
Key Takeaways
- The NPF rule is a formula that helps astrophotographers capture sharp stars without trails.
- It considers aperture, pixel pitch, and focal length to calculate the ideal shutter speed for clear night sky images.
- Choosing the right equipment and location can significantly impact the quality of astrophotography.
- Understanding and applying the NPF rule can lead to better astrophotography results compared to the simpler 500 rule.
- While the NPF rule is more complex, it provides a tailored approach that accounts for the specific characteristics of your camera and lens.
Unlocking the Secrets of the NPF Rule
Have you ever gazed up at the night sky, marveling at the twinkling stars, and wished you could capture their beauty just as you see them? If you’re nodding your head, then you’re ready to dive into the world of astrophotography. And for that, you’ll need to know about the NPF rule—a game-changer for taking crisp, clear photos of the heavens above.
Why the NPF Rule Matters in Night Sky Photography
When it comes to photographing stars, the challenge is to avoid capturing them as blurry streaks across the sky. This is where the NPF rule comes into play. Unlike the simpler 500 rule, which often leaves you with star trails, the NPF rule helps you get pinpoint stars by accounting for the specifics of your camera sensor and lens.
Breaking Down the NPF Formula
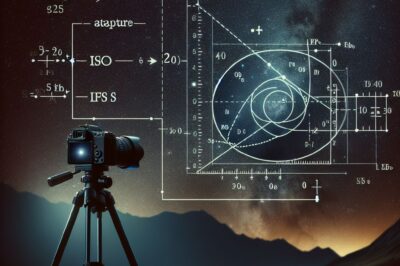
The NPF rule stands for Nosepiece (aperture), Pixel pitch, and Focal length. It’s a formula that calculates the maximum shutter speed you can use before stars start to trail. Why does this matter? Because the Earth is rotating, and long exposures will show that movement as streaks rather than the sharp stars you’re aiming for.
Here’s a quick breakdown of the formula:
NPF rule: (35 x Aperture) + (30 x Pixel pitch) / Focal length = Shutter speed in seconds
Let’s simplify that, shall we? The aperture is the ‘N’ and it’s about how wide your lens can open—think of it like your eye’s pupil. The pixel pitch is the size of the individual pixels on your camera’s sensor. And the focal length is how zoomed in your lens is. Put those numbers into the formula, and you’ll get the shutter speed that’ll give you those crisp stars.
Capturing the Cosmos: A Step-by-Step Guide
Choosing Your Equipment
First things first, you’ll need a camera that allows manual control over exposure settings and a sturdy tripod to keep everything still. A wide-angle lens with a wide aperture, like f/2.8 or wider, is ideal for capturing more light and more of the sky. But remember, the NPF rule works with any lens, so don’t worry if you don’t have a wide-angle just yet.
Setting the Scene: Location and Timing
Next up, location. You want a dark spot away from city lights to see the stars in all their glory. Think about heading out on a night with a new moon and clear skies for the best conditions. Timing is crucial too; you’ll want to shoot when the Milky Way is visible if that’s what you’re after.
Now, let’s get into the nitty-gritty of how to apply the NPF rule to your astrophotography.
Imagine you’re out in the field, under a blanket of stars. You’ve got your camera on a tripod, pointed at the sky. You know the specs of your camera and lens, and you’ve got the NPF formula in mind. You plug in your numbers, and out comes your ideal shutter speed. Set your camera to that speed, dial in a high ISO to capture as much light as possible, and you’re ready to go.
Precise Calculations for Pinpoint Stars
Most importantly, remember that the NPF rule is more accurate than the 500 rule because it’s tailored to your gear. A full-frame camera with a 24mm lens at f/2.8 will have a different setting than a crop sensor camera with a 50mm lens at f/4. It’s all about getting the right balance for your specific situation.
And don’t worry if math isn’t your strong suit. There are apps like PhotoPills that can do the heavy lifting for you. Just input your camera’s specs, and it’ll calculate the perfect shutter speed. This way, you can focus more on enjoying the experience of capturing the night sky.
Optimal Camera Settings for Clarity
Once you’ve got your shutter speed dialed in using the NPF rule, there are a few more settings to tweak for the ultimate clarity. ISO is one of them. A higher ISO lets your camera’s sensor capture more light, which is great for dark skies, but too high and you’ll introduce noise. The sweet spot often lies between ISO 1600 and 3200 for many cameras, but this can vary. Test your camera beforehand to see how high you can push your ISO before noise becomes an issue.
Aperture is another critical setting. A wider aperture, represented by a lower f-number, lets in more light and captures a brighter image. However, be aware that extremely wide apertures can sometimes make the stars at the edge of your photos appear less sharp. It’s a balancing act between letting in enough light and maintaining sharpness across the frame.
Lastly, let’s talk about white balance. Auto white balance can be unpredictable at night. Instead, set your white balance to ‘Daylight’ to maintain the natural colors of the night sky, or manually adjust it to your liking in post-processing.
Remember, these settings aren’t set in stone. Experimentation is key. Take multiple shots at different settings to see what works best for your particular situation.
- ISO: Aim for 1600-3200, but test your camera’s noise threshold.
- Aperture: Use the widest aperture your lens allows without compromising edge sharpness.
- White Balance: Set to ‘Daylight’ or adjust manually in post-processing.
Focusing Techniques for Crisp Constellations
With your camera set up and the NPF rule applied, the next hurdle is getting the stars in sharp focus. Since autofocus struggles in low light, switch to manual focus. If your lens has an infinity mark (∞), don’t rely on it blindly. Lenses can focus past infinity, and at wide apertures, even a slight miss can make stars blurry.
Instead, use your camera’s live view mode to zoom in on a bright star and manually adjust the focus until it’s as small and sharp as possible. If your camera has a focus peaking feature, that can be a great aid too. Once you’ve nailed the focus, be careful not to bump the focus ring—it’s all too easy to do in the dark!
Advanced Techniques for Stellar Results
Beyond the basics, there are advanced techniques that can elevate your astrophotography. Long exposure noise reduction is one such feature found in many cameras. When enabled, it takes a second ‘dark frame’ immediately after your photo, using it to identify and reduce noise. Just remember that it doubles the time for each shot, so be patient.
Overcoming Common Challenges
Even with the NPF rule, challenges like light pollution and atmospheric conditions can affect your results. To combat light pollution, filters that block out specific wavelengths of artificial light can be a godsend. As for atmospheric conditions, shooting during colder nights can reduce air turbulence, which sometimes blurs stars due to heat waves.
Enhancing Your Images with Post-Processing
Post-processing is where good astrophotography becomes great. Software like Adobe Lightroom and Photoshop allows you to adjust exposure, contrast, and color balance to bring out the best in your night sky shots. Don’t forget to reduce noise and sharpen the image, but be careful not to overdo it—too much sharpening can introduce artifacts, and too much noise reduction can smudge fine details.
Nailing Night Photography: Expert Tips for Beginners
Starting with astrophotography can be daunting, but keep these tips in mind and you’ll be capturing the cosmos like a pro in no time. Patience and practice are your best friends here. And remember, every failed shot is a step closer to a breathtaking one. Keep experimenting with different settings and compositions, and most importantly, enjoy the process.
NPF Versus the 500 Rule: What to Use When
So, when should you use the NPF rule over the 500 rule? The 500 rule is simpler but less accurate, leading to potential star trails in your images. If you’re after quick shots without much fuss, the 500 rule might suffice. However, if you’re serious about astrophotography and want the sharpest stars possible, the NPF rule is the way to go. It takes into account the specific traits of your camera and lens, providing a custom shutter speed that’s just right for your setup.
Because the NPF rule can be complex, it’s a good idea to familiarize yourself with it during the day. Run some calculations, try out settings, and get comfortable with the process. That way, when you’re out under the stars, you’ll be ready to capture them in all their glory.
Therefore, while the 500 rule is a decent starting point, the NPF rule is your ticket to truly stellar astrophotography.
Low-Light Photography Hacks
Besides that, there are a few hacks to help you in low-light conditions. Use a headlamp with a red light to preserve your night vision while setting up your gear. And if you’re struggling to find focus, aim at a distant light on the horizon or a bright planet like Venus. Lastly, keep your batteries warm—cold can drain them faster, so tuck them in a pocket close to your body when not in use.
FAQ
Here are some common questions answered to help you on your astrophotography journey.
What is the NPF Rule in Astrophotography?
The NPF rule is a formula that helps you determine the longest shutter speed you can use before stars appear as trails in your photo. It’s tailored to your camera’s sensor and lens characteristics.
How Do You Calculate the Perfect Exposure Using the NPF Rule?
To calculate the perfect exposure, you’ll need to know your aperture, the pixel pitch of your camera’s sensor, and your lens’s focal length. Plug these into the NPF formula to get your ideal shutter speed.
Can I Use the NPF Rule with a Smartphone Camera?
Smartphone cameras have fixed apertures and pixel pitches, so while you can use the NPF rule, the results may not be as precise as with a DSLR or mirrorless camera. Some newer smartphones have manual controls and apps that can assist with this.
What are the Limitations of the NPF Rule?
The NPF rule assumes a static Earth, but in reality, the Earth’s rotation speed varies slightly depending on your latitude. Additionally, it doesn’t account for atmospheric distortion, which can also affect star sharpness.
How Do I Overcome Noise in High ISO Settings?
To overcome noise at high ISO settings, use noise reduction techniques in your camera or post-processing software. Shooting in RAW format also gives you more flexibility to reduce noise without losing detail in post-processing.
Key Takeaways
- The NPF rule is a formula that helps astrophotographers capture sharp stars without trails.
- It considers aperture, pixel pitch, and focal length to calculate the ideal shutter speed for clear night sky images.
- Choosing the right equipment and location can significantly impact the quality of astrophotography.
- Understanding and applying the NPF rule can lead to better astrophotography results compared to the simpler 500 rule.
- While the NPF rule is more complex, it provides a tailored approach that accounts for the specific characteristics of your camera and lens.
Unlocking the Secrets of the NPF Rule
Have you ever gazed up at the night sky, marveling at the twinkling stars, and wished you could capture their beauty just as you see them? If you’re nodding your head, then you’re ready to dive into the world of astrophotography. And for that, you’ll need to know about the NPF rule—a game-changer for taking crisp, clear photos of the heavens above.
Why the NPF Rule Matters in Night Sky Photography
When it comes to photographing stars, the challenge is to avoid capturing them as blurry streaks across the sky. This is where the NPF rule comes into play. Unlike the simpler 500 rule, which often leaves you with star trails, the NPF rule helps you get pinpoint stars by accounting for the specifics of your camera sensor and lens.
Breaking Down the NPF Formula
The NPF rule stands for Nosepiece (aperture), Pixel pitch, and Focal length. It’s a formula that calculates the maximum shutter speed you can use before stars start to trail. Why does this matter? Because the Earth is rotating, and long exposures will show that movement as streaks rather than the sharp stars you’re aiming for.
Here’s a quick breakdown of the formula:
NPF rule: (35 x Aperture) + (30 x Pixel pitch) / Focal length = Shutter speed in seconds
Let’s simplify that, shall we? The aperture is the ‘N’ and it’s about how wide your lens can open—think of it like your eye’s pupil. The pixel pitch is the size of the individual pixels on your camera’s sensor. And the focal length is how zoomed in your lens is. Put those numbers into the formula, and you’ll get the shutter speed that’ll give you those crisp stars.
Capturing the Cosmos: A Step-by-Step Guide
Choosing Your Equipment
First things first, you’ll need a camera that allows manual control over exposure settings and a sturdy tripod to keep everything still. A wide-angle lens with a wide aperture, like f/2.8 or wider, is ideal for capturing more light and more of the sky. But remember, the NPF rule works with any lens, so don’t worry if you don’t have a wide-angle just yet.
Setting the Scene: Location and Timing
Next up, location. You want a dark spot away from city lights to see the stars in all their glory. Think about heading out on a night with a new moon and clear skies for the best conditions. Timing is crucial too; you’ll want to shoot when the Milky Way is visible if that’s what you’re after.
Now, let’s get into the nitty-gritty of how to apply the NPF rule to your astrophotography.
Imagine you’re out in the field, under a blanket of stars. You’ve got your camera on a tripod, pointed at the sky. You know the specs of your camera and lens, and you’ve got the NPF formula in mind. You plug in your numbers, and out comes your ideal shutter speed. Set your camera to that speed, dial in a high ISO to capture as much light as possible, and you’re ready to go.
Precise Calculations for Pinpoint Stars
Most importantly, remember that the NPF rule is more accurate than the 500 rule because it’s tailored to your gear. A full-frame camera with a 24mm lens at f/2.8 will have a different setting than a crop sensor camera with a 50mm lens at f/4. It’s all about getting the right balance for your specific situation.
And don’t worry if math isn’t your strong suit. There are apps like PhotoPills that can do the heavy lifting for you. Just input your camera’s specs, and it’ll calculate the perfect shutter speed. This way, you can focus more on enjoying the experience of capturing the night sky.
Optimal Camera Settings for Clarity
Once you’ve got your shutter speed dialed in using the NPF rule, there are a few more settings to tweak for the ultimate clarity. ISO is one of them. A higher ISO lets your camera’s sensor capture more light, which is great for dark skies, but too high and you’ll introduce noise. The sweet spot often lies between ISO 1600 and 3200 for many cameras, but this can vary. Test your camera beforehand to see how high you can push your ISO before noise becomes an issue.
Aperture is another critical setting. A wider aperture, represented by a lower f-number, lets in more light and captures a brighter image. However, be aware that extremely wide apertures can sometimes make the stars at the edge of your photos appear less sharp. It’s a balancing act between letting in enough light and maintaining sharpness across the frame.
Lastly, let’s talk about white balance. Auto white balance can be unpredictable at night. Instead, set your white balance to ‘Daylight’ to maintain the natural colors of the night sky, or manually adjust it to your liking in post-processing.
Remember, these settings aren’t set in stone. Experimentation is key. Take multiple shots at different settings to see what works best for your particular situation.
- ISO: Aim for 1600-3200, but test your camera’s noise threshold.
- Aperture: Use the widest aperture your lens allows without compromising edge sharpness.
- White Balance: Set to ‘Daylight’ or adjust manually in post-processing.
Focusing Techniques for Crisp Constellations
With your camera set up and the NPF rule applied, the next hurdle is getting the stars in sharp focus. Since autofocus struggles in low light, switch to manual focus. If your lens has an infinity mark (∞), don’t rely on it blindly. Lenses can focus past infinity, and at wide apertures, even a slight miss can make stars blurry.
Instead, use your camera’s live view mode to zoom in on a bright star and manually adjust the focus until it’s as small and sharp as possible. If your camera has a focus peaking feature, that can be a great aid too. Once you’ve nailed the focus, be careful not to bump the focus ring—it’s all too easy to do in the dark!
Advanced Techniques for Stellar Results
Beyond the basics, there are advanced techniques that can elevate your astrophotography. Long exposure noise reduction is one such feature found in many cameras. When enabled, it takes a second ‘dark frame’ immediately after your photo, using it to identify and reduce noise. Just remember that it doubles the time for each shot, so be patient.
Overcoming Common Challenges
Even with the NPF rule, challenges like light pollution and atmospheric conditions can affect your results. To combat light pollution, filters that block out specific wavelengths of artificial light can be a godsend. As for atmospheric conditions, shooting during colder nights can reduce air turbulence, which sometimes blurs stars due to heat waves.
Enhancing Your Images with Post-Processing
Post-processing is where good astrophotography becomes great. Software like Adobe Lightroom and Photoshop allows you to adjust exposure, contrast, and color balance to bring out the best in your night sky shots. Don’t forget to reduce noise and sharpen the image, but be careful not to overdo it—too much sharpening can introduce artifacts, and too much noise reduction can smudge fine details.
Nailing Night Photography: Expert Tips for Beginners
Starting with astrophotography can be daunting, but keep these tips in mind and you’ll be capturing the cosmos like a pro in no time. Patience and practice are your best friends here. And remember, every failed shot is a step closer to a breathtaking one. Keep experimenting with different settings and compositions, and most importantly, enjoy the process.
NPF Versus the 500 Rule: What to Use When
So, when should you use the NPF rule over the 500 rule? The 500 rule is simpler but less accurate, leading to potential star trails in your images. If you’re after quick shots without much fuss, the 500 rule might suffice. However, if you’re serious about astrophotography and want the sharpest stars possible, the NPF rule is the way to go. It takes into account the specific traits of your camera and lens, providing a custom shutter speed that’s just right for your setup.
Because the NPF rule can be complex, it’s a good idea to familiarize yourself with it during the day. Run some calculations, try out settings, and get comfortable with the process. That way, when you’re out under the stars, you’ll be ready to capture them in all their glory.
Therefore, while the 500 rule is a decent starting point, the NPF rule is your ticket to truly stellar astrophotography.
Low-Light Photography Hacks
Besides that, there are a few hacks to help you in low-light conditions. Use a headlamp with a red light to preserve your night vision while setting up your gear. And if you’re struggling to find focus, aim at a distant light on the horizon or a bright planet like Venus. Lastly, keep your batteries warm—cold can drain them faster, so tuck them in a pocket close to your body when not in use.
FAQ
Here are some common questions answered to help you on your astrophotography journey.
What is the NPF Rule in Astrophotography?
The NPF rule is a formula that helps you determine the longest shutter speed you can use before stars appear as trails in your photo. It’s tailored to your camera’s sensor and lens characteristics.
How Do You Calculate the Perfect Exposure Using the NPF Rule?
To calculate the perfect exposure, you’ll need to know your aperture, the pixel pitch of your camera’s sensor, and your lens’s focal length. Plug these into the NPF formula to get your ideal shutter speed.
Can I Use the NPF Rule with a Smartphone Camera?
Smartphone cameras have fixed apertures and pixel pitches, so while you can use the NPF rule, the results may not be as precise as with a DSLR or mirrorless camera. Some newer smartphones have manual controls and apps that can assist with this.
What are the Limitations of the NPF Rule?
The NPF rule assumes a static Earth, but in reality, the Earth’s rotation speed varies slightly depending on your latitude. Additionally, it doesn’t account for atmospheric distortion, which can also affect star sharpness.
How Do I Overcome Noise in High ISO Settings?
To overcome noise at high ISO settings, use noise reduction features in your camera or post-processing software. Shooting in RAW format also gives you more flexibility to reduce noise without losing detail in post-processing.


