When you gaze up at the night sky, do you feel a sense of wonder at the celestial tapestry above? The stars, planets, and galaxies hold stories spanning billions of years, and capturing even a fraction of that splendor can be both thrilling and rewarding. If you’re ready to dive into the world of astrophotography, let’s embark on this journey together.
Key Takeaways
-
Understanding the essential gear for astrophotography is critical; you’ll need a camera, a sturdy tripod, and optionally a telescope or a good lens.
-
Mastering camera settings such as long exposures, ISO, and focus is key to capturing stunning night sky images.
-
Choosing the right location, away from light pollution, will significantly enhance the quality of your astrophotographs.
-
Post-processing techniques like image stacking can transform your photos from good to extraordinary.
-
With practice and patience, you can progress to more advanced projects like time-lapse videos and deep-sky imaging.
Capturing Stardust: Your First Foray into Astrophotography
Why You’ll Love Night Sky Photography
Imagine capturing the swirling colors of the Milky Way or the delicate crescent of a distant nebula. Astrophotography allows you to freeze these cosmic moments in time, creating your own window to the universe. It’s a hobby that not only produces beautiful images but also deepens your connection with the natural world.
What You’ll Need to Begin
Starting in astrophotography is simpler than you might think. With a few essential tools and a sprinkle of enthusiasm, you’ll be on your way to photographing the stars. So, what do you need to get started? Let’s break it down.
Choosing Your Tools of the Trade
Selecting Your First Camera
The heart of your astrophotography setup is the camera. A DSLR or mirrorless camera is most common among beginners due to their versatility and quality. When selecting a camera, consider these key features:
-
Manual Mode: This allows you to control the exposure settings crucial for night photography.
-
High ISO Performance: Night sky shots require higher ISO settings, so a camera that handles noise well at high ISOs is beneficial.
-
Long Exposure Capability: You’ll be taking pictures over several seconds or even minutes, so ensure your camera can handle long exposure times.
Most importantly, you don’t need the latest and most expensive model to start. Even an entry-level camera can yield breathtaking results.
Understanding Telescope and Lens Options
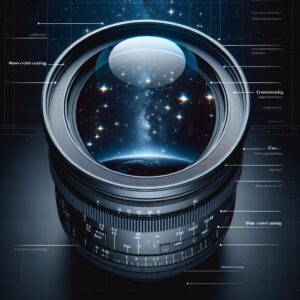
While a telescope can provide spectacular views of deep-sky objects, a good lens is often more than enough for beginners. If you’re using a DSLR or mirrorless camera, a wide-angle lens with a large aperture, such as f/2.8 or wider, is ideal for capturing expansive night skies and the Milky Way.
Must-Have Accessories for the Novice Astrophotographer
Besides that, a few accessories will make your astrophotography adventure smoother:
-
A Sturdy Tripod: Long exposures mean any camera shake can blur your images. A solid tripod is non-negotiable.
-
Remote Shutter Release: This helps prevent camera shake when pressing the shutter button.
-
Extra Batteries: Long exposures and cold nights drain batteries quickly, so always have spares on hand.
With your gear ready, you’re all set to capture the cosmos. But remember, the best equipment is the one you have with you. So don’t be discouraged if you’re starting with just the basics; every astrophotographer started there once.
Mastering the Basics of Night Sky Photography
Before you can capture the grandeur of the cosmos, you need to master a few basic techniques. These foundations will ensure that your foray into the universe’s portrait is as clear and vibrant as the night sky itself.
Setting Up Your Equipment
Once you’re out in the field, it’s time to set up your gear. Mount your camera securely on the tripod and attach the remote shutter release to minimize vibrations. If you’re using a telescope, make sure it’s properly aligned and that the camera is attached securely. Take a moment to familiarize yourself with your surroundings and plan your composition. Remember, preparation is key, and a well-set-up station is the launchpad for spectacular astrophotography.
Perfecting Focus and Exposure
One of the most challenging aspects of astrophotography is achieving sharp focus. Since auto-focus often fails in low-light conditions, you’ll need to focus manually. Aim your camera at a bright star or a distant light and adjust the focus until the point of light is as small and defined as possible. As for exposure, start with a 20-second exposure time, a wide aperture (like f/2.8), and an ISO around 1600. Review your shot and adjust accordingly. Remember, each night sky is unique, so what works one evening might need tweaking the next.
Camera Settings Decoded
Camera settings can be mystifying, but they’re your paintbrush for night sky artistry. Here’s a breakdown:
-
Exposure Time: Determines how long your camera’s sensor is exposed to light. Longer exposures capture more starlight but can also result in star trails if too long.
-
Aperture: Controls how much light enters through the lens. A wider aperture (lower f-number) allows more light and is ideal for astrophotography.
-
ISO: Adjusts the camera’s sensitivity to light. Higher ISOs are more sensitive but can introduce noise, so balance is key.
Experiment with these settings to find the sweet spot for your specific conditions. The magic is in the tweaking!
Overcoming the Dark: Practical Field Tips
Now that you’re familiar with your equipment and settings, it’s time to address the environment you’ll be shooting in. The dark sky is both your canvas and your challenge. Here’s how to navigate it.
Finding the Ideal Photography Spot
Location is everything in astrophotography. You want to find a spot that’s as dark as possible, away from the glow of city lights. Use a dark sky map or app to locate areas with minimal light pollution. National parks or remote countryside are often great choices. Once there, give your eyes at least 20 minutes to adjust to the darkness, and you’ll be amazed at how much more you can see.
Accessibility is also important. You’ll be carrying gear, so ensure you can safely reach your spot. And always check the weather – clear, moonless nights are best for capturing the stars.
Scout your location during the day so you can plan your shots and ensure it’s safe. Look for interesting landscapes to include in your compositions; a silhouette of trees or a mountain can add depth and interest to your celestial images.
Battling Light Pollution Creatively
Even if you can’t escape the city, don’t lose hope. You can still enjoy astrophotography by focusing on brighter objects like the Moon or planets. Or, use light pollution to your advantage by incorporating it into urban nightscapes. A long exposure can turn a busy highway into a river of light leading to the stars.
Post-Processing: Turning Good Shots into Great Ones
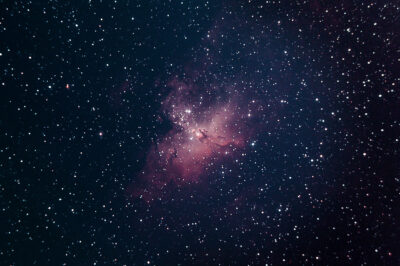
Example: One of my first astrophotographs was of the Orion Nebula. Initially, it looked dull and uninspiring straight out of the camera. But after some post-processing magic, the colors popped, and the details sharpened, transforming my photo into one that I’m proud to display.
Post-processing is where good astrophotographs become great. Software like Adobe Photoshop or Lightroom allows you to adjust exposure, contrast, and color balance to bring out the best in your images.
Begin by adjusting the white balance to correct any color casts. Next, enhance the contrast to make the stars stand out against the night sky. Finally, tweak the clarity and sharpness to bring out details.
Remember, less is often more with post-processing. Aim for a natural look that reflects the true beauty of the night sky.
Introduction to Image Stacking
Example: By stacking 20 individual shots of the Milky Way, each exposed for 15 seconds, I was able to reduce noise and reveal subtle details that were not visible in the single shots.
Image stacking is a technique where you combine multiple exposures of the same scene to improve image quality. This is particularly useful in astrophotography to reduce noise and increase detail.
To stack images, you’ll need software like DeepSkyStacker or Sequator. Here’s a simple guide:
-
Take multiple shots of your target with the same exposure settings.
-
Load these images into your stacking software.
-
Let the software align and combine them to produce a single, high-quality image.
Image stacking can be a game-changer, especially for those with entry-level equipment. It’s a powerful way to achieve professional-looking results.
Adjusting for Color, Contrast, and Clarity
Color correction is crucial in astrophotography. Space objects have distinct colors that can be enhanced through careful editing. Adjust the saturation and vibrance sliders to make the colors of stars and nebulae more pronounced.
Increasing contrast can help differentiate the light of the stars from the dark of space. But be cautious not to overdo it, as this can lead to a loss of detail in the shadows and highlights. For more guidance, check out this astrophotography guide for beginners.
Finally, clarity and sharpness adjustments can help define the edges of stars and celestial objects. Apply these sparingly to avoid creating an artificial look.
Post-processing is an art form in itself. It’s where you can truly put your personal stamp on your astrophotography work. So take your time, experiment, and watch as your images transform before your eyes.
Remember, every astrophotographer’s journey starts with a single shot of the night sky. With practice, patience, and a bit of guidance, you’ll soon be capturing the universe in all its glory. So go ahead, set up your gear, and let the stars be your guide.
Expanding Your Skills: Tackling More Complex Astrophotography Projects
Once you’ve got the hang of capturing the stars, you might want to push your boundaries. There’s a whole universe out there waiting to be explored through your lens. So why not try something a bit more ambitious, like time-lapse astrophotography or delving into deep-sky objects?
Time-Lapse Astrophotography Simplified
Time-lapse astrophotography is a stunning way to show the motion of the stars across the sky. To create a time-lapse, take a series of photos at regular intervals and then combine them into a video. You’ll need an intervalometer (many cameras have one built-in) to automate the shooting process. Set it to take a photo every 30 seconds or so throughout the night, and you’ll be rewarded with a breathtaking view of the heavens in motion.
Delving into Deep Sky Imaging
Deep-sky astrophotography focuses on objects beyond our solar system, such as galaxies, nebulae, and star clusters. This type of photography typically requires a telescope with a tracking mount to follow the stars as they move across the sky. While it can be more complex and equipment-intensive, the results are truly out of this world. Start with bright and relatively easy-to-capture objects like the Orion Nebula or Andromeda Galaxy.
Frequently Asked Questions
As you embark on your astrophotography journey, questions are bound to arise. Here are answers to some of the most common queries beginners have.
What is the Best Camera for Beginner Astrophotographers?
The best camera is one that you’re comfortable using and fits your budget. An entry-level DSLR or mirrorless camera with manual mode and good high ISO performance is a great place to start. Brands like Canon, Nikon, and Sony offer models that are perfect for beginners. The key is to start with what you have and learn the basics before investing in more advanced equipment.
-
Canon EOS Rebel series
-
Nikon D3500
-
Sony Alpha a6000
Each of these cameras has features suitable for night sky photography, so choose one that aligns with your goals and budget.
How Do You Avoid Star Trails in Long Exposures?
To avoid star trails, you need to follow the ‘500 Rule’, which helps you calculate the maximum exposure time before stars begin to streak. Simply divide 500 by the focal length of your lens. For example, if you’re using a 20mm lens, you can expose up to 25 seconds (500/20 = 25) without noticeable star movement. Also, using a tracking mount can allow for longer exposures without trails.
Is a Telescope Necessary to Start Astrophotography?
No, a telescope is not necessary for beginner astrophotographers. Many stunning astrophotos can be taken with just a camera and lens. A good tripod and a wide-angle lens are enough to capture the Milky Way and starry landscapes. A telescope can be a valuable addition later on, especially for deep-sky photography.
Can Smartphone Cameras be Used for Astrophotography?
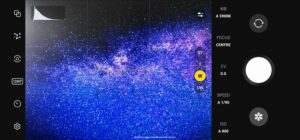
Yes, smartphone cameras have come a long way and can be used for basic astrophotography. Many modern smartphones have manual settings or apps that allow for long exposures. While they may not compete with the capabilities of DSLRs or mirrorless cameras, they’re a great way to get started and practice composition and exposure.
What Software is Recommended for Astrophotography Image Editing?
For post-processing astrophotography images, software like Adobe Photoshop, Lightroom, and dedicated stacking programs like DeepSkyStacker are highly recommended. These tools offer advanced features to enhance your images, such as noise reduction, color correction, and stacking capabilities. Start with free trials to find the software that works best for you.
In conclusion, astrophotography is a hobby that opens up a universe of possibilities. With the right equipment, a bit of knowledge, and a lot of passion, you can capture the night sky in all its glory. Remember, the journey of a thousand stars begins with a single shutter click. So go ahead, set up your camera, and start shooting for the stars!


