
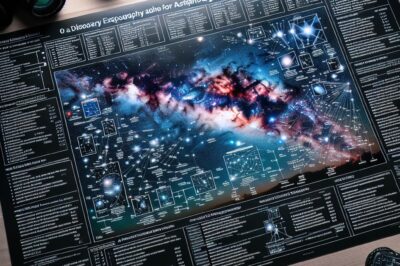
Article-at-a-Glance
- Understanding the basics of astrophotography exposure settings is essential for capturing the night sky.
- Minimum exposure time varies but typically starts at 10 seconds to capture stars without noticeable trails.
- ISO settings should be between 1000-4000, balancing light sensitivity and noise.
- The aperture setting (f-stop) should be as wide as possible, commonly f/2.8, to allow more light to hit the sensor.
- Using the 500 Rule helps determine the maximum shutter speed to avoid star trails on a standard wide-angle lens.
Choosing the Right Gear
Before diving into the cosmos with your camera, it’s crucial to gear up appropriately. You’ll want a sturdy tripod to eliminate camera shake, a camera capable of manual mode to control exposure settings, and a lens with a wide aperture to gather as much light as possible. These are your pillars for night sky photography.
Understanding Exposure in Night Sky Photography
Exposure in astrophotography is a balancing act. Too short, and the stars are dim; too long, and they’ll streak across the sky. It’s about finding that sweet spot where the stars are bright, but still pinpoint sharp. To start, aim for an exposure time of at least 10 seconds, adjusting as necessary based on your specific conditions and equipment.
Setting Up for Success
When you’re ready to shoot, set your camera to manual mode. This gives you complete control over the exposure settings, which is vital for night photography. Begin with a wide aperture, the lowest f-number your lens allows, to let in as much light as possible. This is usually f/2.8 or lower.
Next, adjust your ISO. Start at around 1000 and go up from there, watching for unwanted noise. A good rule of thumb is to not exceed ISO 4000 to keep the noise at manageable levels. Remember, the higher the ISO, the more digital noise, or grain, will appear in your photos.
Finally, consider the shutter speed. This is where the ‘500 Rule‘ comes into play. Divide 500 by the focal length of your lens to find the maximum exposure time before stars start to trail. For example, if you’re using a 20mm lens, 500 divided by 20 gives you 25 seconds.
Maximizing Your Shooting Session
To make the most of your time under the stars, plan your shoot during a new moon when the sky is darkest. Find a location far from city lights to avoid light pollution. And always allow your eyes to adjust to the darkness for at least 20 minutes before you start shooting. This will help you see the stars more clearly and compose better shots.
Camera and Lens Essentials for Night Sky Images
For astrophotography, the camera and lens you choose can make a significant difference. A camera with a full-frame sensor is ideal because it has better low-light capabilities and can capture more of the night sky due to its larger sensor size. However, crop sensors can also work well, especially when paired with the right lens.
Selecting a Camera for Astrophotography
Look for a camera that has manual mode, allowing you to adjust ISO, aperture, and shutter speed independently. It should also have a ‘Bulb’ mode for exposures longer than 30 seconds, which is great for capturing deep-sky objects like nebulae and galaxies.
The Best Lenses for Capturing Stars
A wide-angle lens with a wide aperture, such as f/2.8 or wider, is best for astrophotography. This type of lens lets in a lot of light and captures a broad swath of the sky. A lens with a focal length of 14mm to 24mm is typically ideal for expansive shots of the Milky Way.
Must-Have Accessories
Aside from the camera and lens, a few accessories can significantly enhance your astrophotography experience:
- A sturdy tripod is essential to keep your camera stable during long exposures.
- A remote shutter release or a camera’s built-in timer to prevent shaking the camera when pressing the shutter button.
- Extra batteries, because long exposures and cold nights can drain battery life quickly.
- A red flashlight to help you see in the dark without ruining your night vision.
Exposure Settings 101: The Basics You Need to Know
Exposure settings in astrophotography are the triumvirate of ISO, aperture, and shutter speed. Mastering these will give you the foundation to start capturing the night sky effectively.
ISO: Balancing Light Sensitivity and Noise
ISO measures your camera’s sensitivity to light. Higher ISO values mean your camera can capture more light, which is essential in low-light conditions such as astrophotography. However, increasing ISO also increases the noise in your images. It’s a trade-off. Start at a lower ISO and increase it until you get a bright enough image without too much noise.
Aperture: Fine-Tuning for Sharp Starlight
The aperture, or f-stop, controls how wide your lens opens to let in light. A wider aperture (a lower f-stop number) lets in more light, which is ideal for astrophotography. Most astrophotographers use an aperture of f/2.8 or wider to capture as much starlight as possible.
Shutter Speed and the 500 Rule
Shutter speed is how long your camera’s sensor is exposed to light. In astrophotography, if the shutter is open too long, the earth’s rotation will cause the stars to blur into trails. The 500 Rule is a good starting point to prevent this, ensuring sharp stars in your final image.
For a 20mm lens on a full-frame camera, divide 500 by 20 to get a 25-second exposure. This will keep the stars as sharp points of light in your night sky photos.
With these settings as your starting point, you’re ready to begin your journey into astrophotography. Remember, practice makes perfect. So, go out there, look up, and start capturing the wonders of the universe!
Now that we’ve got the basics down, let’s refine our approach to capture even more stunning celestial scenes. Astrophotography is not just about snapping pictures; it’s about painting with light in the grand canvas of the night sky.
Dialing in the Details: Advanced Exposure Techniques
- Experiment with different exposure times to capture varying levels of detail.
- Try light painting to illuminate foreground objects for a unique composition.
- Adjust white balance to add a creative touch to the color of the night sky.
Long exposure is a technique that, when used effectively, can unveil the faintest stars and the subtle colors of the Milky Way. It’s all about letting your camera soak in the light over an extended period, which can mean exposures of several minutes.
To do this, you’ll need to switch your camera to ‘Bulb’ mode. This setting allows you to keep the shutter open for as long as you hold down the shutter button, or until you decide to close it. It’s essential to use a remote shutter release to avoid any camera shake.
Be mindful that long exposures can introduce noise, just like high ISO settings. To counteract this, many cameras offer a noise reduction feature that takes a second ‘dark frame’ to identify and remove noise. It’s a handy tool to keep your long exposures crisp.
Long Exposure for Deep Sky Wonders
When you’re aiming to capture deep sky objects, like galaxies or nebulae, long exposures become even more critical. These objects are incredibly distant and faint, so you’ll need exposures that can last several minutes—or even hours—to collect enough light.
Stacking Images for Clarity and Detail
Image stacking is another technique that can significantly improve the quality of your astrophotos. It involves taking multiple exposures of the same scene and then combining them in post-processing to reduce noise and enhance details.
This process not only improves the signal-to-noise ratio but also brings out details that might not be visible in a single exposure. Software like DeepSkyStacker or Sequator can help automate this process for you.
For example, taking 10 exposures of 30 seconds each and stacking them can produce an image that’s much cleaner and more detailed than a single 5-minute exposure.
Tracking the Night Sky: When to Use a Star Tracker
Star trackers are devices that move your camera at the same speed as the stars, allowing you to take long exposures without star trails. They are especially useful for deep-sky astrophotography, where long exposure times are necessary to capture faint objects.
While a star tracker is not essential for capturing the night sky, it’s an invaluable tool for serious astrophotographers. By compensating for the Earth’s rotation, a tracker allows for much longer exposures, which means more light and more detail in your images.
Keep in mind that using a star tracker requires some setup and calibration, but the results can be truly out of this world. You’ll be able to capture crisp images of deep-sky objects that would otherwise be impossible to photograph without this specialized equipment.
Practical Tips to Enhance Your Astrophotography
Aside from mastering your camera settings, there are several other factors to consider that can elevate your astrophotography from good to great.
Scouting the perfect location is one. You’ll want to find a spot with minimal light pollution and a clear view of the sky. Apps like Dark Sky Finder can help you locate the darkest skies near you. Also, consider the composition of your photos. Look for interesting landscapes or foreground elements that can add depth and context to your night sky images.
- Use apps to plan your shoot around the lunar cycle and Milky Way’s position.
- Arrive early to set up your gear and let your eyes adjust to the dark.
- Bring warm clothes and snacks—it can get cold and you might be out for a while!
Scouting Locations: Dark Skies and Interesting Horizons
Finding the perfect location is about more than just escaping city lights. It’s about framing the cosmos in a context that speaks to the viewer, adding a terrestrial touch to the celestial wonders above.
- Seek out locations with interesting silhouettes, like trees or mountains, to add depth to your composition.
- Water bodies can provide stunning reflections of the night sky.
- Historical or iconic landmarks can create a sense of scale and wonder.
Focusing your camera in the dark can be challenging, but it’s essential for sharp stars. Start by setting your lens to manual focus. Then, use live view mode to zoom in on a bright star and adjust the focus until the star is a small, sharp point of light.
If your camera has a focus peaking feature, use it to highlight the edges of the stars when they are in focus. Another trick is to focus during the day on a distant object and mark the spot on your lens where it’s in focus. Then, return to that mark when you’re ready to shoot at night.
Focusing in the Dark: Achieving Pin-Sharp Stars
For tack-sharp stars, live view is your best friend. Zoom in on a bright star and manually adjust the focus until it’s as small and sharp as possible. If your camera has it, use the focus magnifier to really dial it in.
- Use a bright planet or the moon to set your focus before they set.
- Tape your focus ring once you’ve achieved sharp focus to prevent accidental changes.
- Take test shots and review them on your camera’s screen to check for sharpness.
Light pollution and atmospheric conditions can be the bane of astrophotographers, but there are ways to mitigate their effects. Shoot during a new moon, use a light pollution filter, and shoot in RAW format to give you more flexibility in post-processing to correct for any color imbalances or light pollution.
Dealing with Light Pollution and Atmospheric Conditions
Even if you can’t escape to the darkest skies, don’t be discouraged. You can still capture the stars from your backyard. Use a light pollution filter to help cut through the glow and capture clearer night skies.
Atmospheric conditions like humidity and dust can also affect your images. Try to shoot on nights with low humidity and after rains when the air is cleaner. Always keep an eye on the weather and be ready to adapt your plans. Sometimes, the most unpredictable conditions can lead to the most breathtaking photos.
Sharing the Beauty: Post-Processing and Presentation
After a successful night capturing the stars, post-processing is where your images truly come to life. This stage is where you can adjust contrast, bring out details, and reduce noise to make your photos pop.
Most importantly, shooting in RAW is crucial for astrophotography. This format records all data from the sensor, giving you a wealth of information to work with during editing.
Essential Editing Steps for Impactful Images
Begin by adjusting the exposure and contrast to bring out the details in the Milky Way or other celestial objects. Play with the highlights and shadows sliders to find the right balance without losing details. For more guidance on capturing the night sky, check out this comprehensive astrophotography guide for beginners.
Then, tweak the white balance to correct any color casts. The night sky can sometimes appear too warm or too cool, and this step helps to restore the natural colors of the stars and the sky.
Noise Reduction Techniques for Cleaner Photos
Noise reduction is a delicate process. You want to remove as much noise as possible without smearing out the fine details of the stars. Most photo editing software has built-in noise reduction tools that you can use.
When using noise reduction, zoom in on your image to ensure that you’re not losing the sharpness of the stars. Adjust the noise reduction settings carefully, looking at both the sky and the edges of the silhouettes in your image.
Another effective method is to use noise reduction software specifically designed for astrophotography, which can sometimes yield better results than general photo editing software.
From RAW to Remarkable: Bringing Your Photos to Life
Processing RAW images allows you to adjust many aspects of your photo with more flexibility than if you shot in JPEG. This is because JPEG images are already processed and compressed by your camera, limiting how much you can change them.
- Adjust the clarity and vibrance to make the stars stand out against the night sky.
- Use curves to fine-tune the luminosity and contrast of your image for a more dramatic effect.
- Sharpen the image to enhance the details of the stars, but be careful not to overdo it and introduce artifacts.
Remember, the goal is to enhance the natural beauty of the night sky, not to create an artificial-looking image. Less is often more when it comes to post-processing.
Once you’re happy with your edits, it’s time to share your work. Consider the format and platform that will best showcase your images, whether it’s a print, an online gallery, or social media. The joy of astrophotography comes not only from the process of capturing the stars but also from sharing the beauty of the universe with others.
Frequently Asked Questions
Now, let’s address some common questions that might pop up as you embark on your astrophotography journey.
What is the best ISO setting for astrophotography?
The best ISO setting for astrophotography is one that allows you to capture the faintest stars without introducing too much noise. This usually falls between ISO 1000 and 4000. The exact setting will depend on your camera’s capabilities and the level of ambient light in your shooting location.
Experiment with different ISO levels to see what works best for your specific situation. Take test shots at various ISO settings and examine them closely to determine the highest ISO you can use before noise becomes detrimental to your image quality.
How do I avoid star trails in my images?
To avoid star trails, you need to use a shutter speed that’s fast enough to freeze the stars’ apparent motion as the Earth rotates. The 500 Rule is a helpful guideline: divide 500 by your lens’s focal length to find the maximum shutter speed in seconds.
Can I practice astrophotography in a city?
Yes, you can practice astrophotography in a city, but you’ll need to contend with light pollution. Look for the darkest spots available, use a light pollution filter, and shoot during a new moon to maximize your chances of capturing the stars.
Another tip is to focus on capturing brighter objects like the moon or planets, which are visible even from urban areas.
Do I need a tracking mount for astrophotography?
A tracking mount is not necessary for all types of astrophotography, but it can be a game-changer for long-exposure images and deep-sky photography. It compensates for the Earth’s rotation, allowing you to take longer exposures without star trails.
How many images should I stack to get a clear photo?
The number of images you should stack depends on the quality of your individual exposures and the level of detail you want to achieve. Generally, stacking 10 to 20 images can significantly improve the signal-to-noise ratio and bring out more detail in your photos.
Stacking is particularly useful for images of the Milky Way or other dim celestial objects, as it allows you to create a clearer, more detailed final image without increasing the noise.
With patience and practice, your skills in astrophotography will grow, and you’ll find your own techniques and preferences. Remember, the sky is not the limit; it’s your canvas. So go out there, explore the night, and capture the wonders of our universe.


