
Key Takeaways
-
Chromatic aberration appears as color fringes around stars in astrophotos, reducing image clarity.
-
It’s commonly caused by lens quality, dispersion of light, and atmospheric conditions.
-
Using apochromatic lenses or chromatic aberration filters can help prevent this issue.
-
Post-processing software is essential for removing chromatic aberration from existing images.
-
Advanced techniques like image stacking and manual adjustments further enhance photo quality.
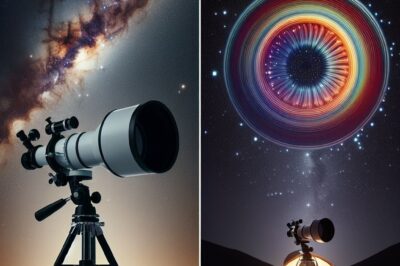
Astrophotography is like a dance with light and shadows. As astrophotographers, we strive to capture the cosmos in all its splendor. But sometimes, our celestial snapshots can be marred by an unwelcome guest: chromatic aberration. Don’t worry, though; with the right knowledge and tools, you can banish this intruder from your astrophotos, ensuring that the stars shine true to their colors.
Defining Chromatic Aberration
Let’s start by understanding our foe. Chromatic aberration, also known as color fringing, occurs when a lens fails to focus all colors to the same convergence point. It manifests as a series of colorful halos around the edges of objects, particularly noticeable in high-contrast areas. In astrophotography, this means stars can be surrounded by unsightly color rings instead of being crisp points of light.
Recognize the Signs in Your Astrophotos
How do you know if chromatic aberration has crept into your astrophotos? Look for the tell-tale signs: red, green, or blue fringes around the stars. These fringes can turn an otherwise sharp image into a blurry disappointment. But don’t fret; recognizing the problem is the first step to fixing it.
Stars and Stripes: Identifying Chromatic Aberration in Your Night-Sky Images
Spotting the aberration can be tricky, but once you know what to look for, it becomes second nature. Check your photos for any signs of color that seem out of place. This is most apparent in areas where bright stars contrast against the dark backdrop of space.
Spotting Color Fringes Around Stars
Zoom in on your image and scrutinize the edges of stars. If you see halos of color that don’t belong, that’s chromatic aberration. It can make stars look fuzzy and out of focus, robbing your image of its potential sharpness.
Understanding the Impact on Image Quality
Even a small amount of chromatic aberration can significantly affect the quality of your astrophotos. It can make the difference between an image that’s suitable for framing and one that’s just not quite right. This is why addressing it is so crucial for anyone serious about astrophotography.
The Culprits: What Causes Chromatic Aberration in the Night Sky?
Several factors contribute to chromatic aberration. Let’s delve into the main culprits, so we can understand how to combat them effectively.
Lens Quality and Different Wavelengths
The quality of your telescope’s lens plays a significant role. Cheaper lenses often struggle to bring all wavelengths of light to the same focal point, resulting in color fringing. It’s a common issue with refractor telescopes, especially those that are not specifically designed to minimize chromatic aberration.
Atmospheric Conditions and Light Pollution
Besides the equipment, atmospheric conditions can exacerbate chromatic aberration. Light pollution, air turbulence, and even the angle at which light enters the lens can affect how colors are focused. These factors are often out of our control, but understanding them helps us plan our astrophotography sessions better.
Now, let’s roll up our sleeves and tackle the problem head-on. In the next sections, we’ll explore how to fix chromatic aberration in astrophotography with practical tips and step-by-step guidance. Stay tuned, because your journey to clearer, more vibrant astrophotos is just beginning.
Sharpening the Heavens: Steps to Fix Chromatic Aberration
Chromatic aberration can be a thorn in the side of any astrophotographer, but with the right approach, it’s a problem that can be solved. The journey to clear, vibrant astrophotos begins with understanding how to correct this pesky issue. Let’s walk through the steps together.
Remember, the goal is not just to fix a single photo, but to refine your entire approach to astrophotography. By doing so, you’ll ensure that every star in your future images twinkles with crystal clarity, free from the distortions of chromatic aberration.
Choosing the Right Equipment
Before you even press the shutter button, your choice of equipment can determine how much chromatic aberration you’ll have to deal with later. High-quality lenses and telescopes are designed to minimize this effect, so investing in the right gear from the start can save you hours of post-processing time.
Achromatic vs Apochromatic Lenses
When it comes to telescopes, you’ll encounter two main types: achromatic and apochromatic. Achromatic lenses are more common and affordable, but they often fall short in correcting chromatic aberration. On the other hand, apochromatic lenses are specifically engineered to bring all wavelengths of light into sharp focus, practically eliminating the issue. They might be pricier, but the difference in image quality can be worth every penny.
Filtering Light: Chromatic Aberration Filters
If you’re not ready to upgrade your lens or telescope, consider using a chromatic aberration filter. These filters can be attached to your existing equipment and work by selectively blocking certain wavelengths of light, reducing the color fringing effect.
However, it’s essential to choose the right filter for your needs. Some filters are designed to enhance specific colors, which might not be suitable if you’re aiming for true-to-life color representation in your astrophotos.
Filters can also vary in quality, so do your research and read reviews before making a purchase. A good filter can make a noticeable difference, helping to produce sharper images without breaking the bank.
Post-Processing Magic: Software Solutions
Even with the best equipment, some degree of chromatic aberration can still occur. That’s where post-processing software comes in. With the right tools, you can remove any remaining color fringing and perfect your astrophotos after the fact.
Most photo editing software comes with built-in tools specifically for chromatic aberration correction. These tools allow you to target and eliminate the fringes manually or automatically, depending on the software’s capabilities.
While it might take some time to learn the ropes, mastering these tools will give you the power to bring out the true beauty in your night sky images.
-
Identify the areas of your image affected by chromatic aberration.
-
Select the chromatic aberration correction tool in your software.
-
Adjust the settings to target the specific colors of the fringes.
-
Preview the changes to ensure that the stars appear natural and sharp.
-
Apply the corrections and marvel at your aberration-free photo!
Selecting the Best Astrophotography Software
When it comes to choosing software for fixing chromatic aberration, you’ll want something that’s both powerful and user-friendly. Programs like Adobe Photoshop, Lightroom, and Affinity Photo are popular choices among astrophotographers for their robust toolsets and intuitive interfaces.
Free alternatives like GIMP also offer chromatic aberration correction tools, though they might require a bit more manual effort to achieve the same results. Ultimately, the best software for you is the one that fits your workflow and budget while delivering the results you need.
Detailed Guide to Using Removal Tools
Let’s dive into a step-by-step guide to using these tools. For this example, we’ll use a common software choice among astrophotographers: Adobe Photoshop.
First, open your image in Photoshop. Look for the ‘Lens Correction’ filter under the ‘Filter’ menu. Within this tool, you’ll find a ‘Custom’ tab that allows you to adjust the amount of chromatic aberration correction. Use the sliders to remove the fringes, and keep an eye on the preview to ensure you’re not overcorrecting, which could lead to unnatural-looking stars.
Beyond Basics: Advanced Techniques for Pristine Night Skies
Once you’ve mastered the basics of chromatic aberration correction, you can explore more advanced techniques to further enhance your astrophotos. These methods require a bit more effort and understanding, but the results can be spectacular.
Stacking Images for Maximum Clarity
Image stacking is a powerful technique where you combine multiple exposures of the same scene to improve clarity and reduce noise, including chromatic aberration. By aligning and averaging out the images, you can significantly enhance the final photo’s quality.
To stack images effectively, you’ll need dedicated software like DeepSkyStacker or Sequator. These programs are designed to handle the complexities of stacking astrophotos, making it easier to achieve that pristine night sky you’re aiming for.
Stacking not only improves clarity but also allows for better chromatic aberration correction, as the software can more accurately distinguish between true starlight and aberrant colors.
Fine-Tuning with Manual Adjustments
Sometimes, automated tools can’t catch every instance of chromatic aberration, especially in complex or particularly affected images. In these cases, manual adjustments can be your best friend. Zoom in close, and use small, precise edits to remove the fringes around each star. This level of control ensures that your final image is as close to perfection as possible.
Armed with these tips and techniques, you’re well on your way to capturing the cosmos without the distraction of chromatic aberration. With practice and patience, your astrophotography will not only inspire others but also bring you immense personal satisfaction as you preserve the beauty of the night sky for all to see.
F
For those tricky cases where software can’t quite catch every instance of chromatic aberration, manual adjustments are the way to go. This involves a more hands-on approach, where you’ll need to zoom in and carefully inspect each star. Using tools like the clone stamp or healing brush in your editing software, you can manually blend the fringes into the background sky, pixel by pixel. It’s a meticulous process, but the payoff is a pristine image that truly showcases the wonders of the universe.
Expert Tips for Consistently Clear Shots
Consistency is key in astrophotography. To maintain a high standard across all your shots, it’s essential to have a routine that you stick to. Always check your equipment before a shoot, making sure that lenses are clean and filters are properly attached. Plan your sessions around optimal weather conditions to minimize atmospheric interference. And most importantly, practice your post-processing skills regularly. The more familiar you are with your software’s tools, the faster and more effectively you can correct chromatic aberration.
Another expert tip is to keep a log of your astrophotography sessions. Note down the equipment used, the settings, the atmospheric conditions, and any issues you encountered. This log will be invaluable in helping you understand which conditions and setups yield the best results, and which ones tend to introduce chromatic aberration into your images.
FAQ
As you venture deeper into the realm of astrophotography, questions are bound to arise. Here are answers to some frequently asked questions about fixing chromatic aberration in astrophotography.
What is the Best Way to Prevent Chromatic Aberration?
The best way to prevent chromatic aberration is to invest in high-quality apochromatic lenses that are designed to minimize this effect. Additionally, using chromatic aberration filters can help reduce the amount of color fringing in your images. When it comes to post-processing, familiarize yourself with the chromatic aberration removal tools in your software and apply them as needed.
Can Chromatic Aberration be Corrected on All Astrophotos?
While most instances of chromatic aberration can be corrected using post-processing software, the success of the correction depends on the severity and type of aberration. Some complex aberrations might require advanced manual adjustments. Images with extreme aberration might not be fully correctable, highlighting the importance of using the right equipment and techniques during capture.
That said, don’t be discouraged if you can’t completely remove chromatic aberration from a particular photo. Each image is a learning opportunity, and every session brings you one step closer to mastering the art of astrophotography.
Remember, perfection in astrophotography is a journey, not a destination. Every photo you take is a chance to improve and refine your skills. So keep shooting, keep learning, and most of all, keep looking up!
Is Chromatic Aberration More Common with Specific Types of Telescopes?
Yes, chromatic aberration is more commonly associated with refractor telescopes, especially achromatic refractors. These telescopes use lenses to focus light, and the different wavelengths can lead to color fringing. Reflectors and catadioptric telescopes, which use mirrors, typically don’t suffer from chromatic aberration.
However, even within refractors, there are differences. Apochromatic refractors are designed to greatly reduce chromatic aberration and generally produce clearer images. So, the type of telescope you use can indeed influence the amount of chromatic aberration in your photos.
Are There Specific Software Features to Look Out for When Correcting Chromatic Aberration?
When selecting software for chromatic aberration correction, look for features like automatic aberration detection and correction, manual sliders for precise adjustments, and the ability to target specific colors or areas of the image. Some software also offers lens profiles that can automatically compensate for known issues with certain lenses or telescopes.
Additionally, software that supports RAW file processing will give you more control over the correction process, as RAW files contain more data than compressed formats like JPEG.
Can Hardware Accessories Reduce the Need for Post-Processing?
Yes, certain hardware accessories can help reduce the need for extensive post-processing. Chromatic aberration filters, as mentioned earlier, can be attached to your telescope to minimize color fringing at the time of capture. High-quality eyepieces and field flatteners can also contribute to a reduction in aberration.
Ultimately, the best approach is a combination of quality hardware and proficient post-processing. By addressing chromatic aberration on both fronts, you can achieve the clearest and most vibrant astrophotos possible.


