When you look up at the night sky, you’re not just seeing stars; you’re peering into an ancient and endless universe. Astrophotography is the art of capturing that timeless beauty, and if you’re aiming to excel in this field, you’ll need to understand the importance of flat field panels. They’re the unsung heroes that can make or break your cosmic captures.
Key Takeaways
- Flat field panels are essential for reducing vignetting and sensor dust in astrophotography images.
- They provide even illumination across the image sensor, leading to more accurate and consistent results.
- Selecting the right flat field panel involves considering size, brightness adjustability, and compatibility with your setup.
- Proper installation and calibration of a flat field panel are crucial for achieving the best possible flat frames.
- Regular maintenance and careful storage of your flat field panel ensure long-term performance and reliability.
Capturing the Cosmos: A Flat Field Panel Guide
Imagine trying to draw a perfect circle, but your paper has wrinkles and smudges. No matter how steady your hand, the final drawing will have imperfections. That’s similar to what happens when you take photos of the cosmos without a flat field panel. This tool is like a cosmic iron, smoothing out the wrinkles to ensure your images are as crisp and clear as the night sky.
The Role of Flat Field Panels
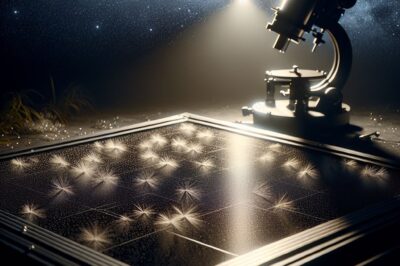
Flat field panels are critical for producing high-quality astrophotography images. They work by providing a uniform source of light to illuminate the imaging sensor of your camera or telescope. This uniform light is crucial for capturing what we call ‘flat frames’ – a type of calibration image that helps correct for any uneven lighting (vignetting) and sensor dust that might be present in your final images.
Think of flat frames as the foundation of a house. Just as a strong foundation ensures a sturdy home, well-captured flat frames provide the basis for stunning astrophotography. They’re the starting point for post-processing, where the true magic of the cosmos comes to life in your images.
- Flat frames reduce vignetting, which is the darkening of image corners caused by light fall-off.
- They help eliminate the appearance of sensor dust, which shows up as dark spots in your photos.
- Flat frames ensure the uniformity of the background, making the stars and galaxies stand out more.
Now, you might be wondering, “How do I use these flat field panels?” It’s quite simple. You place the panel in front of your telescope or camera lens, ensuring it’s evenly lit, and then take a series of images with the same settings you’d use for capturing the night sky. These images are your flat frames, and you’ll use them later during image processing to perfect your celestial shots.
Why Flat Field Panels Matter
Without flat field panels, your astrophotography images can end up looking less than stellar. Vignetting and sensor dust are common issues that can distract from the beauty of the night sky. By using a flat field panel, you can address these problems head-on, ensuring that your images truly represent the wonders of the universe.
Most importantly, using a flat field panel shows a commitment to quality and a deep respect for the craft of astrophotography. Whether you’re a seasoned astronomer or just starting out, taking the time to capture flat frames speaks volumes about your dedication to capturing the cosmos in all its glory.
Therefore, let’s delve into selecting the right flat field panel for your setup, so you can start capturing the universe with the clarity and precision it deserves.
Setting Up Your Flat Field Panel
Setting up your flat field panel is like preparing your canvas before painting; it’s a step that cannot be overlooked. The goal is to ensure that the panel evenly illuminates your camera’s sensor, eliminating any shadows or bright spots that could affect your flat frames. The first step is to securely attach the panel to the front of your telescope or lens. If you’re using a telescope, make sure the panel covers the entire aperture without any gaps. For a more detailed guide on taking flat frames, consider reading how to master flat frames in astrophotography.
Installation Best Practices
To get started, you’ll want to install your flat field panel in a way that guarantees even light distribution across your camera’s sensor. Here are a few tips to ensure you’re on the right track: For more in-depth information, consider reading our guide on astrophotography exposure tips.
- Align the panel so that it sits perfectly parallel to the telescope’s aperture or camera lens.
- Check that the panel’s surface is clean and free of any dust or smudges that could create uneven lighting.
- If your panel is dimmable, start with a lower brightness setting and gradually increase it until you find the right illumination level.
Remember, the goal is to simulate a clear, bright sky. You’re not just setting up equipment; you’re creating the ideal conditions for flawless astrophotography.
Calibration for Perfect Illumination
Calibration is key. Begin by taking a test shot with the flat field panel on and examine the image for any uneven lighting. Adjust the brightness and position of the panel as needed until you achieve a uniform illumination. It’s a bit like tuning an instrument – you’re looking for that perfect pitch, or in this case, the perfect glow that will make your images sing.
Once you’ve found the sweet spot, note down the settings. Consistency is crucial, so you’ll want to use these same settings every time you take flat frames. This will save you time and ensure that your calibration is always spot on.
Working with Flat Field Panels
With your flat field panel set up and calibrated, it’s time to start working with it. The objective is to capture flat frames that will serve as the foundation for your image processing. A good flat frame will help you correct for any optical imperfections and sensor anomalies, giving you a clean slate to bring out the beauty of the night sky in your final images. For a detailed guide on capturing the perfect flat frames, refer to mastering flat frames in astrophotography.
Achieving Even Light Distribution
The essence of a good flat frame lies in the even distribution of light. You want to avoid any hotspots or gradients that could affect the quality of your calibration. Take multiple flat frames to ensure you have a good sample. I like to take at least 15-20 flat frames to average out any minor fluctuations in the panel’s brightness.
Optimizing Exposure Times
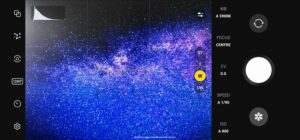
Exposure times for flat frames are a balancing act. You want your camera’s histogram to peak around the middle, indicating that you have an evenly lit image without over or underexposure. A good rule of thumb is to aim for an exposure that’s around one-third to one-half of your camera’s maximum dynamic range.
It’s a little like baking – too short and your cake is undercooked, too long and it’s burnt. With practice, you’ll find the perfect ‘recipe’ for your setup.
And don’t forget, your flat frames should be taken with the same ISO and aperture settings as your light frames (the actual images of the night sky). This ensures that the flat frames accurately represent the light conditions your camera will experience during the shoot.
Advanced Tips and Tricks
Once you’re comfortable with the basics, it’s time to level up your skills. There are always ways to refine your process and push the boundaries of what you can capture. Let’s explore some advanced techniques to enhance your astrophotography even further.
Dealing with Weather Challenges
Weather can be unpredictable, and sometimes you’re faced with less-than-ideal conditions for astrophotography. If you’re contending with high humidity, for example, you might find condensation forming on your flat field panel. To combat this, use a dew heater strap or keep a hairdryer handy to gently warm the panel and keep it clear.
And if the wind is causing your panel to flap or vibrate, secure it with additional weights or clamps. Remember, stability is key for capturing consistent flat frames.
Maintaining your equipment is just as important as using it correctly. Your flat field panel, like any tool, will perform its best when it’s well-cared for. Store it in a dry, dust-free environment, and handle it with care to avoid scratches or damage. Regularly check the panel’s surface for dirt or debris, and clean it gently with a microfiber cloth.
Maintaining Your Flat Field Panel
Finally, keep an eye on the panel’s LED performance over time. Like all light sources, LEDs can change in brightness and color temperature as they age. If you notice significant changes, it might be time to replace the panel to ensure you’re still getting accurate flat frames.
By following these tips and maintaining a curious and meticulous approach to your astrophotography, you’ll not only capture stunning images of the cosmos but also deepen your connection with the night sky. So go ahead, set up that flat field panel, and let the universe reveal its secrets to you, one pixel at a time.
Frequently Asked Questions
Can Flat Field Panels Be Used with Any Telescope?
Yes, flat field panels can be used with any telescope, but it’s essential to choose the correct size and model for your specific setup. Compatibility is key for achieving optimal results.
Flat field panels are versatile tools and can be adapted to fit a wide range of telescopes. Whether you have a refractor, a reflector, or a compound telescope, there’s a flat field panel out there for you. The important thing is to ensure that the panel fully covers the aperture of your telescope and that it sits securely to provide even illumination across the entire field of view.
When in doubt, reach out to the manufacturer or consult with fellow astrophotographers to find the best fit for your telescope model. With the right panel in place, you’re well on your way to capturing the stars in all their glory.
How Often Should I Calibrate My Flat Field Panel?
Calibrating your flat field panel is not a one-time event; it should be done regularly to ensure accurate results. I recommend calibrating your panel each time you set up for a night of shooting, especially if your setup has been moved or adjusted since the last session.
Consistency is crucial in astrophotography, and recalibrating your flat field panel is part of that. Even small changes in your setup or the environment can affect the quality of your flat frames, so it’s best to err on the side of caution and calibrate often.
What’s the Difference Between a Flat Field Panel and a Light Box?
A flat field panel and a light box both serve the same purpose – to provide even illumination for capturing flat frames. However, a flat field panel is typically a slim, LED-based device that attaches directly to the telescope’s aperture, while a light box is a larger, box-shaped contraption that you place in front of the telescope.
Flat field panels are generally more portable and convenient, making them a popular choice among astrophotographers who value ease of use and simplicity. Light boxes, on the other hand, can be more cumbersome but may offer a broader and more diffuse light source, which can be beneficial for larger telescope setups.
Are Flat Field Panels important for All Types of Astrophotography?
Flat field panels are crucial for deep-sky astrophotography, where precision and detail are paramount. For wide-field astrophotography or nightscape shots, they may not be as critical, but they can still improve the overall quality of your images.
Regardless of the type of astrophotography you’re into, using a flat field panel can only benefit your workflow. It’s all about giving yourself the best possible starting point for post-processing, which in turn leads to more striking and detailed images of the cosmos.
How Do I Know If My Flat Frames Are Properly Exposed?
Properly exposed flat frames are crucial for successful image calibration. You’ll know your flat frames are well-exposed when the histogram of the image is centered, without clipping on the shadows or highlights. This means that the panel’s illumination is neither too dim nor too bright, but just right for your sensor.
To check your flat frame exposure, look at the histogram on your camera or software. Aim for a peak that’s around the middle of the graph, ensuring you’re capturing all the necessary data without overexposing or underexposing the frame.
If you find that your flat frames are not properly exposed, adjust the brightness of your flat field panel or the exposure settings on your camera. It might take a bit of trial and error, but once you’ve dialed in the correct settings, you’ll be rewarded with consistent and reliable calibration frames every time.


