Key Takeaways
- Gradients can mar the beauty of astrophotographs, but with the right techniques, they can be removed or reduced significantly.
- Using flat frames is a critical step in minimizing gradients caused by lens vignetting and uneven field illumination.
- Photoshop and PixInsight are powerful tools for gradient removal, each with unique methods to tackle this issue.
- Light pollution filters can help reduce gradients at the capture stage, especially in urban environments.
- Understanding the sources of gradients and how to address them can greatly enhance the quality of your night sky images.
Mastering Gradient Removal for Stellar Astrophotography
Understanding Gradients in Night Sky Photography
When you look up at the night sky, it’s a canvas of darkness sprinkled with twinkling stars. But when you capture this scene with your camera, you might notice that the background isn’t uniformly black. Instead, there’s a subtle transition of light, often unwanted, known as a gradient. This can be a nuisance, but don’t worry, it’s a puzzle we can solve together.
Gradients in astrophotography are like uninvited guests at a stargazing party. They show up as uneven patches of brightness or color across the image. These can be caused by natural factors like the moonlight or artificial ones such as streetlights. The key is to recognize them and understand that they can be tamed with patience and the right techniques.
Common Sources of Gradients
Most of the time, gradients are not caused by celestial objects themselves but by conditions here on Earth. Let’s take a look at some of the usual suspects:
- Light Pollution: The glow from nearby cities can cast a gradient across your image, often resulting in a wash of color that doesn’t belong in the night sky.
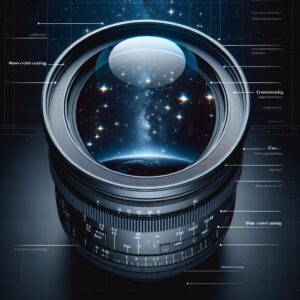
- Vignetting: This is when the corners of your image are darker than the center, caused by the optical design of your lens.
- Atmospheric Conditions: Humidity, dust, and other particles can scatter light and create gradients.
By identifying these sources, you’re already on the path to cleaner, more striking astrophotos.
Step-by-Step Techniques to Banish Gradients
Utilizing Flat Frames
Think of flat frames as your secret weapon against gradients. They’re images you take of an evenly illuminated surface, like a white t-shirt or the twilight sky. Flat frames help to correct imperfections in your photos caused by your camera and lens. It’s like giving your images a custom-made filter that only corrects the flaws without altering the good parts.
To create flat frames:
- Point your telescope or lens at an evenly lit surface.
- Set your camera to the same focus and aperture used for your night sky shots.
- Take multiple exposures to later average them out, reducing noise.
Using these flat frames in post-processing can significantly reduce the vignetting and even out the field illumination, leaving you with a more uniform background to showcase the stars.
Manual Gradient Removal in Photoshop
Photoshop is like the Swiss Army knife for astrophotographers. It’s packed with features that, when used correctly, can remove even the most stubborn gradients. Here’s a simple way to start: learn more about removing gradients in Photoshop for clearer astrophotography images.
- Open your image and duplicate the layer to protect the original.
- Use the ‘Dust & Scratches’ filter to create a blurred version of your image, which highlights the gradient.
- Subtract this blurred layer from your original to neutralize the gradient.
This method might take a few tries to perfect, but once you get the hang of it, you’ll see a dramatic improvement in your images.
“Remember, the goal is not just to remove gradients, but to enhance the true beauty of the night sky in your photographs.”
Now, let’s take a break here and digest these first steps. Stay tuned, because in the next part, we’ll dive into more advanced techniques and troubleshooting tips that will help you capture the night sky in all its glory.
Choosing the Right Light Pollution Filters
Light pollution is a common headache for astrophotographers, especially those in urban areas. It can cause gradients that are tough to remove in post-processing. But there’s a way to fight back – light pollution filters. These filters block specific wavelengths of light, usually those common in streetlights, allowing the true colors of the stars to shine through.
When shopping for a light pollution filter, consider the following:
- The type of light pollution in your area (LED, sodium vapor, etc.)
- The wavelengths the filter blocks or allows through
- Compatibility with your camera and telescope setup
By selecting the right filter, you can greatly reduce gradients right from the start, making your post-processing work much easier.
Most importantly, don’t forget to test your filter under the night sky. What works in one location might not be as effective in another because of the different types of artificial lights. Adapt and experiment until you find the perfect match for your astrophotography needs.
Software Solutions for Gradient Issues
If you’re facing the challenge of gradients in your astrophotographs, software can be your best ally. We’ve already touched on Photoshop, but there’s another heavyweight in the ring – PixInsight. This software is designed with astrophotography in mind and comes with powerful tools specifically for gradient removal.
In PixInsight, you can use processes like ‘DynamicBackgroundExtraction’ (DBE) and ‘AutomaticBackgroundExtractor’ (ABE) to tackle gradients. These tools allow you to sample the background sky in various places and calculate a correction that can be applied to the entire image.
Here’s a simplified approach to using PixInsight for gradient removal:
- Load your image and select the DBE or ABE process.
- Place sample points on the background sky, avoiding stars and nebulas.
- Let the software calculate the correction and apply it to your image.
While the learning curve for PixInsight can be steep, the results are often well worth the effort. It’s a tool that can take your astrophotography to the next level.
Advanced Tips for Perfect Night Sky Images
Harnessing Dynamic Range
Dynamic range is the span from the darkest to the brightest elements in your photo. Capturing the vast dynamic range of the night sky is essential for a great astrophotograph. To do this, you’ll need to manage your camera settings carefully. A lower ISO can help capture more detail without the noise, and shooting in RAW format gives you more flexibility during editing.
Consider taking multiple exposures with different settings and combining them in post-processing. This technique, known as High Dynamic Range (HDR) imaging, can bring out details in both the shadows and highlights that a single exposure might miss.
Fine-Tuning with Curves and Levels
Curves and levels are the bread and butter of photo editing. They allow you to adjust the brightness and contrast of your image with precision. With curves, you can pinpoint specific tones to lighten or darken, while levels let you set the white point, black point, and midtones.
When you’re fine-tuning your astrophotos:
- Start with levels to set the overall tone and contrast.
- Use curves to bring out details in the Milky Way or nebulas.
- Always keep an eye on the histogram to avoid clipping the shadows or highlights.
These tools are incredibly powerful when used correctly, so take the time to learn them and apply them to your images.
Troubleshooting Common Gradient Challenges
Dealing with Severe Light Pollution
Severe light pollution can be the bane of an astrophotographer’s existence, causing gradients that seem impossible to remove. If you’re stuck in a light-polluted area, here are a few strategies to consider:
- Shoot during new moon phases when the sky is darkest.
- Plan a trip to a darker location, even if it’s just a few miles out of town.
- Combine light pollution filters with post-processing techniques to mitigate the effects.
It’s a challenge, but not insurmountable. With persistence and the right approach, you can capture breathtaking night skies even from less-than-ideal locations.
Remember, astrophotography is as much about the journey as it is about the destination. Every challenge you overcome adds to your skill set and brings you one step closer to capturing the night sky in all its splendor.
Correcting Vignetting and Other Lens Issues
Vignetting is a common lens issue that can create gradients in your astrophotography images. It usually manifests as darkening at the corners of the frame. To correct this, you can use flat frames that we discussed earlier. Additionally, you can also adjust your shooting technique:
- Stop down your lens to reduce vignetting, although this may increase exposure time.
- Choose lenses known for having less vignetting, or use lens correction profiles in post-processing software.
- Be mindful of the sky conditions and your camera’s position relative to artificial light sources.
With these tips and the use of flat frames, vignetting can often be corrected, resulting in a cleaner, more uniform night sky in your images.
Frequently Asked Questions
Can Gradients Be Fully Removed or Just Reduced?
Gradients can often be fully removed with the right techniques, especially if they are not too severe. However, in some cases with extreme light pollution or lens issues, they may only be reduced. The key is to combine capture techniques, such as using light pollution filters and flat frames, with post-processing methods in software like Photoshop or PixInsight.
What Are Flat Frames, and How Do They Help?
Flat frames are images that capture the optical imperfections of your camera and lens setup, like dust on the sensor or vignetting. They’re taken by photographing an evenly illuminated surface, and when applied during post-processing, they help correct uneven lighting and gradients in your astrophotographs. Essentially, they act as a map to tell your editing software where and how to even out the light in your images.
Is Gradient Removal Possible Without Post-Processing Software?
While post-processing software is the most effective way to remove gradients, there are steps you can take during the capture process to minimize them. Using light pollution filters, shooting during the darkest phase of the night, and carefully framing your shot to avoid bright sources of light can all help reduce gradients. However, some level of post-processing will usually be necessary to completely remove them.
How Can I Minimize Gradients During the Capture Process?
To minimize gradients during the capture process:
- Use light pollution filters to cut down on unwanted wavelengths of light.
- Shoot during the new moon phase or from darker locations to avoid sky brightness.
- Take flat frames to correct for lens and camera imperfections.
By taking these steps, you can significantly reduce the amount of gradient in your images, making post-processing easier.


