
Stargazing and capturing the night sky can be one of the most exhilarating experiences. Whether you’re a seasoned astrophotographer or just starting out, the drizzle technique in astrophotography is a game-changer that can take your images from good to great. This method, which originated with the Hubble Space Telescope, is now accessible to amateur astronomers and can significantly enhance the resolution and quality of your celestial captures. Let’s dive into the essentials of this technique and how you can apply it to your own stargazing adventures.
Key Takeaways
- The drizzle technique is a powerful method for improving the resolution and detail in astrophotography.
- It involves capturing multiple images and combining them to ‘supersample’ the final photograph.
- Drizzle is particularly useful for deep-sky astrophotography, allowing for greater magnification of distant objects.
- Proper equipment, such as a suitable telescope and camera, along with dithering techniques, are crucial for successful drizzle astrophotography.
- Software like DeepSkyStacker can be used to stack and process images using the drizzle technique.
Capturing the Cosmos: A Journey into Drizzle Astrophotography
Essence of Drizzle Technique
At its core, the drizzle technique is all about precision and detail. When we take pictures of the night sky, we’re limited by the resolution of our cameras and telescopes. Drizzle comes to the rescue by mathematically reconstructing images to a higher resolution. It’s like having a magnifying glass that not only zooms in but also clears up the fuzziness, revealing the intricate beauty of stars, galaxies, and nebulae.
Impact on Image Resolution
Imagine trying to capture the delicate swirls of a distant galaxy with a standard camera setup. Without drizzle, you might end up with a beautiful yet somewhat blurry image. Now, with drizzle, you can combine several slightly offset images to create one that’s sharper and more detailed. It’s as if you’ve stepped closer to the cosmos, bringing its wonders into sharper focus.
The Stellar Secret of Drizzle
What Is Drizzle Technique?
The drizzle technique is a method of image processing that combines multiple, slightly offset images to create a final photograph with higher resolution and less distortion. It’s particularly effective in astrophotography because it can reveal details that single exposures might miss. Drizzle works best when capturing a series of images with small shifts or ‘dithers’ between them, which are then algorithmically combined to enhance the final picture.
The Science Behind Improved Details
When we drizzle, we’re essentially oversampling our images. By capturing and combining multiple frames with slight shifts, we fill in the gaps between pixels, increasing the image resolution. This process reduces the noise and artifacts that can often plague astrophotographs, resulting in crisper, clearer images that showcase the true splendor of the night sky.
Next, we’ll explore the equipment you’ll need to harness the power of drizzle in your astrophotography.
Setting the Stage: Preparation and Camera Settings
Before you even think about hitting the shutter button, there’s a bit of prep work to do. The right preparation can mean the difference between a so-so snapshot and a stellar masterpiece. You’ll want to ensure you have all the necessary gear, understand the settings you’ll need, and choose the best location for your night sky photography.
It’s not just about the camera and telescope; it’s also about the little things that can make a big difference. Batteries, memory cards, and even a comfortable chair can affect your stargazing experience. Make sure everything is charged, empty, and ready for a night under the stars.
And remember, patience is key. Astrophotography is not a rush job; it’s a careful, deliberate process that rewards those who take their time. So take a deep breath, look up at the sky, and let’s get started.
Finding the Perfect Night Sky
Location, location, location! It’s not just a mantra for real estate; it’s vital for astrophotography too. Light pollution is the arch-nemesis of stargazers. To find the perfect night sky, you’ll need to escape the bright lights of the city. Use a light pollution map to find a dark spot where the stars shine brightest.
Once you’ve found your spot, give your eyes time to adjust to the darkness. This can take about 20-30 minutes. Only then will you truly appreciate the canvas you’re about to capture. And don’t forget to check the weather! Clear, moonless nights are best for stargazing and astrophotography.
Optimal Camera Settings for Starry Shots
Now let’s talk camera settings. To start, you’ll want to set your camera to manual mode. This gives you complete control over the exposure settings. For astrophotography, a wide aperture is usually best — think f/2.8 or wider. This allows more light to hit the sensor, which is crucial in low-light conditions.
Next, consider your ISO. A higher ISO can make your camera more sensitive to light, but it also increases the noise. Start around 800 to 1600 ISO and adjust as needed. For more detailed guidance, see the best ISO settings for astrophotography. Lastly, shutter speed. For stars, you’ll want a long exposure, but not so long that the stars begin to trail due to the Earth’s rotation. A good rule of thumb is to use the ‘500 rule’ — divide 500 by your lens’s focal length to find the longest exposure before star trails appear.
And one more thing: shoot in RAW. This gives you the highest quality image with the most data to work with in post-processing. Trust me, when it comes to drizzle astrophotography, you’ll want all the data you can get.
Frame by Frame: Capturing Your Images
With the stage set and your camera dialed in, it’s time to start capturing the heavens. Aim your lens skyward and begin taking a series of long-exposure images. Remember, consistency is key here. You’ll want each frame to be exposed similarly to make the stacking process smoother later on.
The Art of Long Exposure
Long exposure is an art form. It’s about letting your camera soak in the light of distant stars and galaxies for just the right amount of time. Use a sturdy tripod to keep your camera still and a remote shutter release or your camera’s timer to avoid shaking the camera during exposure.
As you take each shot, remember to breathe. The universe isn’t going anywhere, and each image you capture is a moment in cosmic history. Take your time, and enjoy the process.
To Dither or Not to Dither with Drizzle
When it comes to the drizzle technique, dithering is your best friend. Dithering means slightly shifting your camera between shots. This helps to reduce noise and fill in the gaps between pixels during the stacking process. So, should you dither? Absolutely. The small movements may seem insignificant, but they play a huge role in the clarity and quality of your final image.
Piecing the Puzzle: Stacking Images with Drizzle
Once you’ve captured a series of images, it’s time to stack them. This is where the magic of the drizzle technique really happens. Stacking combines your images, aligning and layering them to increase detail and reduce noise.
How to Combine Your Captured Frames
To combine your frames, you’ll need stacking software like DeepSkyStacker. This software aligns your images based on the stars and then stacks them using the drizzle algorithm. It’s a bit like putting together a jigsaw puzzle; each piece needs to fit perfectly to reveal the big picture.
Selecting the Right Software for Stacking
Choosing the right software for stacking is crucial. DeepSkyStacker is a popular choice because it’s user-friendly and specifically designed for astrophotography. But there are others, like Sequator or even Photoshop, that can achieve similar results. Experiment with different software to find the one that suits your workflow best.
Refining the Universe: Post-Processing Tips
After stacking, it’s time to refine your images. This is where you can adjust contrast, sharpness, and color to bring out the best in your cosmic captures.
Enhancing Image Sharpness and Detail
Sharpening is delicate work. You want to enhance the details without introducing artifacts. Use the unsharp mask or high-pass filter in your editing software to gently sharpen the image. Keep an eye on the stars; they should look like crisp points of light, not fuzzy blobs.
Detail is everything in astrophotography. Play with the curves and levels to bring out the faint nebulosity and the subtle glow of distant galaxies. It’s a dance between the light and the dark, and you’re the choreographer.
Final Touches: Color Correction and Noise Reduction
Remember, space isn’t just black and white; it’s a canvas of colors. Use color balance adjustments to accurately represent the colors of the night sky. And don’t forget about noise reduction. Be gentle, though; too much noise reduction can smudge out the fine details you worked so hard to capture.
Color correction is both science and art. Adjust the hues to reflect the true colors of the celestial bodies, keeping in mind that different stars emit different colors based on their temperatures. And as for noise, a little can add character, but too much can distract from the beauty of the cosmos. For more in-depth techniques, consider exploring different types of images in astrophotography, which can also influence your approach to color correction and noise reduction.
In the next section, we’ll look at how the drizzle technique can transform your astrophotography and when it’s best to employ this powerful tool.
Magnified Majesty: Evaluating the Benefits of Drizzle
Comparing Before and After Drizzle
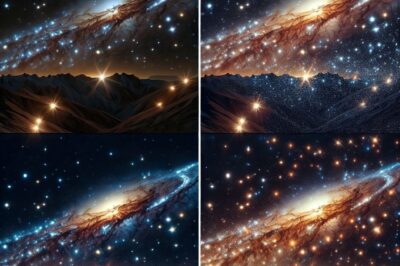
Seeing is believing, and in astrophotography, the proof is in the picture. Before and after comparisons of drizzled images are nothing short of astonishing. Without drizzle, images may appear softer, with less definition. After applying the drizzle technique, those same images are transformed, revealing finer details and textures in celestial objects that were previously hidden to the eye. It’s like the difference between a standard-definition TV and the latest 4K ultra-high-definition screen.
When to Use Drizzle Technique for Maximum Impact
So when should you pull out the drizzle technique? Most importantly, it shines in deep-sky astrophotography where capturing details of distant galaxies and nebulae is the goal. It’s also particularly useful when dealing with undersampled images—those where the camera’s resolution is a limiting factor. However, it’s not always necessary for wide-field astrophotography where the focus is on capturing larger areas of the sky rather than zooming in on minute details.
Besides that, drizzle is best used when you have a series of well-dithered images and a clear night sky. Remember, the more data you can provide through your captures, the better the drizzle algorithm can work its magic.
FAQ
What exactly does drizzle technique do to my astrophotos?
The drizzle technique takes your series of slightly offset astrophotos and combines them to create a single, higher-resolution image. It fills in the gaps between pixels, enhancing details and reducing noise. This means that stars look sharper, galaxies are more defined, and the overall image appears cleaner and more vibrant.
Can I apply the drizzle technique to any type of astrophotography?
While drizzle can be applied to many types of astrophotography, it is most effective for deep-sky imaging. This is because deep-sky objects, like galaxies and nebulae, benefit greatly from the increased resolution and detail that drizzle provides. For wide-field and planetary photography, the technique may not always be necessary or appropriate.
Do I need specialized software for drizzle astrophotography?
Yes, to use the drizzle technique, you will need software capable of processing your images with this method. DeepSkyStacker is a popular free option that many astrophotographers use. There are also other software packages, like PixInsight and StarTools, that offer drizzle capabilities, but these may come with a cost.
How does the drizzle technique improve image resolution?
Drizzle improves image resolution by reconstructing the captured frames to a higher pixel density. It takes advantage of the slight movements between frames (dithering) to increase the amount of detail that can be resolved. This process reduces the effects of undersampling and can make your images appear as if they were taken with a higher-resolution sensor.
Is it difficult to learn the drizzle technique?
Like any new technique, there is a learning curve to mastering drizzle astrophotography. However, with patience and practice, it can become a valuable part of your astrophotography toolkit. Start with simple projects, use online tutorials, and connect with the astrophotography community to learn best practices and tips.


