Key Takeaways: Mastering Intervalometer Settings for Stunning Astrophotography
- An intervalometer is a device that automates the shutter release on your camera, allowing for precise control over exposure times and intervals between shots.
- To capture the night sky effectively, you’ll need to understand and adjust key camera settings like aperture, ISO, shutter speed, and focus.
- For star trails and noise reduction through image stacking, intervalometers are essential tools that enable a series of timed exposures.
- Finding the right intervalometer for your camera involves checking compatibility and deciding between wired and wireless options.
- Composition and location are critical in astrophotography; a captivating foreground and dark skies free of light pollution will enhance your images.
Capturing the Cosmos: A Beginner’s Guide to Intervalometers
When you gaze up at the night sky, you’re looking at a canvas that begs to be captured. But the stars don’t stand still, and neither does our planet. That’s where an intervalometer comes into play. This little gadget might just be your ticket to unlocking the full potential of the cosmos through your lens.
The Role of Intervalometers in Night Sky Photography
Think of an intervalometer as your personal photography assistant. It’s a device that tells your camera exactly when to snap a photo, how long to keep the shutter open, and how long to wait before taking the next shot. This is crucial for astrophotography, where we deal with long exposures to collect enough light from distant stars and galaxies.
With an intervalometer, you can:
- Create breathtaking time-lapses that show the movement of the heavens.
- Capture sequences of images for star trails, showing the earth’s rotation.
- Stack multiple exposures to reduce noise and bring out the clarity of the night sky.
And the best part? You can do all this without ever having to touch your camera, avoiding any potential shake or blur in your shots.
Choosing the Right Intervalometer for Your Camera
Finding the right intervalometer is like choosing the right wand in the world of wizardry – it has to be a perfect match for your camera. Most importantly, it needs to be compatible with your camera’s make and model. Once that’s sorted, you can decide between a wired or wireless intervalometer. Wired ones are reliable and straightforward, while wireless options offer the convenience of controlling your camera from a distance.
Here’s what you should consider: for those just starting out in astrophotography, understanding the basics is essential for capturing stunning night sky images.
- Camera compatibility: Check if the intervalometer is designed for your camera brand and model.
- Connection type: Decide between wired or wireless based on your shooting preferences and environment.
- Features: Look for intervalometers with features like long exposure settings, a backlit display for night use, and the ability to program complex shooting sequences.
Once you’ve got your hands on the right intervalometer, it’s time to dive into the settings that will turn those twinkling little stars into works of art.
Setting the Stage: Preparing Your Camera for the Stars
Before we jump into the intricacies of intervalometers, let’s set up your camera for success. Astrophotography is all about capturing light that’s traveled across the universe to reach us, so every setting counts. You’ll want to switch your camera to manual mode. This gives you full control over the exposure, ensuring that the camera doesn’t make any automatic adjustments that could ruin your shot.
Understanding Exposure: Aperture, ISO, and Shutter Speed
Exposure is the cornerstone of photography, and in astrophotography, it’s about balancing three key elements: aperture, ISO, and shutter speed. Your aperture should be as wide as possible (which means a low f-number) to let in as much light as you can. An ISO setting that’s too high might introduce noise, so start with something like ISO 1600 and adjust as needed. As for shutter speed, long exposures are necessary to capture the faint light of the stars, but the exact time will depend on your specific scene and desired effect.
The Importance of Manual Mode in Astrophotography
Why manual mode? Because the automatic settings on your camera aren’t designed for the darkness of the night sky. They might try to compensate by overexposing your shot, which will wash out the stars. Manual mode puts you in the driver’s seat, letting you make the fine adjustments needed to capture the night sky in all its glory. For more details on setting up your camera, check out our astrophotography exposure guide.
The Intervalometer Setup: Timed Precision for Perfect Star Shots
Programming Your Intervalometer: A Step-by-Step Approach
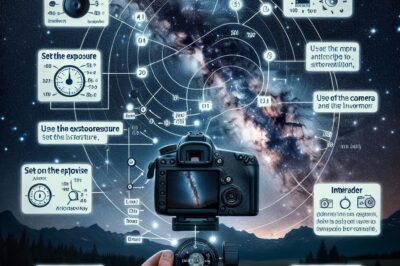
Now, let’s talk about programming your intervalometer. Start by connecting it to your camera and turning both on. Set the delay (the time before the first photo is taken) to give yourself a moment to step away from the camera. Then, set the long exposure time (how long the shutter stays open) based on your earlier manual settings. Finally, set the interval time (the gap between shots) and the number of exposures you want to take. If you’re going for a time-lapse or star trails, you’ll want a sequence of shots over a period of time.
Interval Timing: How to Calculate the Perfect Gaps
Calculating the interval timing can be a bit of a puzzle. You want enough time for your camera to process each image, but not so much that the stars move significantly between shots. A good rule of thumb is to give your camera an extra 5-10 seconds on top of your exposure time. So, if your exposure is 30 seconds, set your interval to at least 35-40 seconds.
Remember, the interval time is the time from the start of one exposure to the start of the next, not the time between exposures ending and starting. This is a common mistake, so keep a sharp eye on it.
Going Beyond the Basics: Advanced Intervalometer Techniques
Creating Star Trails: Using Intervals for Stunning Effects
For star trails, you’re capturing the apparent movement of stars across the sky as the Earth rotates. Set your camera to take continuous 30-second exposures with a 1-second interval. Over several hours, this will create a series of images that, when combined, form a trail of light in the sky. It’s a mesmerizing effect that truly showcases the dynamics of our universe.
Multiple Exposures for Noise Reduction: A How-To
Noise is the bane of any low-light photographer’s existence. But with an intervalometer, you can take multiple short exposures and stack them in post-processing to reduce noise. This technique allows you to use a higher ISO setting without the usual penalty of increased noise. Set your intervalometer to take exposures in rapid succession, and later you can use software to align and combine them into a single, cleaner image.
The Art of Nightscapes: Composition and Creative Tips
Foreground Interest: Composing Images with Depth
While the stars might be the main attraction, a well-composed foreground can add depth and context to your nightscape. Look for interesting shapes or silhouettes that will stand out against the night sky. A lone tree, a rocky outcrop, or an abandoned building can serve as a focal point and add a story to your celestial scene. For more guidance on capturing the beauty of the night sky, check out our astrophotography guide for beginners.
Navigating Light Pollution: Finding the Ideal Location
Light pollution is the nemesis of astrophotography. To capture the best images of the night sky, you’ll need to find a location far from the glow of city lights. Use a dark sky map to locate areas near you that offer the clearest view of the heavens. Once there, give your eyes time to adjust to the darkness, and you’ll be amazed at what you can capture.
Frequently Asked Questions (FAQ)
Can I Use an Intervalometer with Any Camera?
Most modern cameras, especially DSLRs and mirrorless models, support an intervalometer, either built-in or as an external device. To ensure compatibility, check your camera’s manual or manufacturer’s website. The intervalometer must match your camera’s specific remote input, whether that’s a 2.5mm jack, USB port, or wireless connection.
It’s worth noting that some cameras come with an intervalometer function built into their firmware. If that’s the case with your camera, you can access this feature through your camera’s menu system, bypassing the need for an external device.
How Long Should My Exposure Be for Milky Way Photography?
Exposure times for capturing the Milky Way can vary, but a good starting point is 20 to 30 seconds. This will allow you to capture enough light without the stars beginning to trail due to the Earth’s rotation. The exact exposure time also depends on your lens’ focal length; the wider the lens, the longer you can expose without star trailing.
To determine the optimal exposure time, you can use the ‘500 Rule’. Divide 500 by your lens’ focal length to get the maximum number of seconds for your exposure. For example, with a 24mm lens, you would calculate 500/24, which gives you a little over 20 seconds.
- Wide lens (24mm or wider): Start with a 20-30 second exposure.
- Using the 500 Rule: 500 divided by your lens’ focal length equals maximum exposure time.
- Adjust ISO: Begin with ISO 1600 and adjust for brightness and noise levels.
What is the Best Interval Between Shots for Star Trails?
When creating star trails, you want the interval between shots to be as short as possible to avoid gaps in the trails. Typically, a 1-5 second interval is sufficient. This allows your camera just enough time to write the image to the memory card before starting the next exposure.
If you’re using a digital camera with a fast memory card, you can often set the interval to just one second. This will give you a smooth, continuous star trail, as each shot will begin almost immediately after the previous one ends.
How Do I Minimize Noise in Long Exposure Astrophotography?
Noise in long exposure photos, particularly in astrophotography, can be reduced through several techniques:
- Shoot multiple short exposures and stack them in post-processing.
- Use in-camera long exposure noise reduction, if available.
- Keep your camera’s sensor cool, as heat increases noise.
- Calibrate your camera with dark frames to subtract noise from your images.
For example, if you’re shooting the Milky Way, take a series of 25-second exposures with a 5-second interval, then use software to align and stack these images. This approach can significantly reduce the noise that typically comes with high ISO settings.
Are There Alternatives to Buying an Intervalometer?
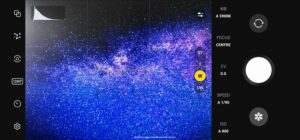
Yes, there are alternatives to purchasing a dedicated intervalometer. Many modern cameras have built-in interval shooting functions that can be programmed directly from the camera’s menu. Additionally, there are smartphone apps available that can control your camera’s shutter in a similar way to an intervalometer when connected via Wi-Fi or a cable.
For those who enjoy DIY projects, it’s also possible to build your own intervalometer with a microcontroller like an Arduino, combined with a few electronic components. This can be a fun and educational project that also saves you money.


