Key Takeaways: Capturing the Night Sky
- The Rule of 300 is a simple guideline to help astrophotographers capture sharp stars without trails caused by the Earth’s rotation.
- Understanding the relationship between shutter speed, aperture, and ISO is crucial for taking clear night sky images.
- Selecting the appropriate camera and lens, along with essential accessories like a sturdy tripod, can significantly improve astrophotography results.
- Adjusting camera settings according to the Rule of 300 will differ based on sensor size and focal length of the lens used.
- Practicing good composition and employing advanced techniques such as stacking and tracking can enhance the quality of astrophotography.
Capturing Stars Without the Streaks
When you gaze up at the night sky, it’s hard not to be mesmerized by the twinkling stars. But have you ever tried to capture their beauty in a photograph, only to end up with streaks instead of sharp points? That’s where the Rule of 300 comes into play. It’s a tried-and-true method to keep those stars as crisp in your photos as they are in your memories.
What is the Rule of 300?
Imagine you’re out in the wilderness, under a blanket of stars, and you’ve got your camera set up. You want to take a picture that looks exactly like what you’re seeing. The Rule of 300 is a simple calculation that helps you do just that. It tells you the longest shutter speed you can use before the stars start to blur. To get this number, just divide 300 by the focal length of your lens. So, if you’re using a 50mm lens, your max shutter speed would be 6 seconds (300/50=6). It’s that easy!
Why Sharpness Matters in Night Sky Images
Sharpness in your night sky images isn’t just about aesthetics; it’s about capturing the wonder of the cosmos. A sharp image can reveal the delicate hues of a nebula, the fine points of a distant galaxy, or the intricate patterns of star clusters. When your stars are sharp, your photos don’t just show the night sky; they transport the viewer right into it.
Equipment Essentials for Sharp Stars
Before you can even think about shutter speeds, you need the right gear. Astrophotography is a bit of a gear-heavy hobby, but don’t worry, you don’t need the most expensive camera to get started. What’s important is knowing how to use what you have.
Choosing the Right Camera and Lens
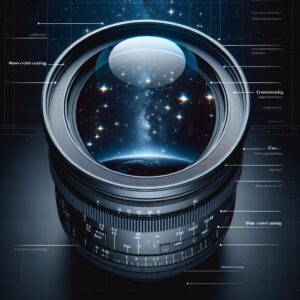
The best camera for astrophotography is the one that allows you to control the settings manually. DSLRs and mirrorless cameras are great for this. As for lenses, wide-angle ones are typically the go-to for capturing the vast night sky, but a good prime lens can also work wonders. The key is to use a lens with a wide maximum aperture, something like f/2.8 or wider, to let in plenty of starlight.
Must-Have Accessories for Night Shots
Now, let’s talk accessories. A sturdy tripod is non-negotiable—it keeps your camera still during those long exposures. A remote shutter release is also a good idea to avoid camera shake when you press the button. And don’t forget a headlamp with a red light setting; it’ll help you see what you’re doing without ruining your night vision.
Alright, let’s pause here. In the next section, we’ll dive into how to set up your camera to get those sharp stars using the Rule of 300. Stay tuned, and get ready to capture the wonders of the night sky like never before.
Finding the Ideal Shutter Speed
Once you’ve got your gear all set up, the next step is to dial in your shutter speed. Remember the Rule of 300 we talked about? It’s time to put it into action. If you’re using a 24mm lens on a full-frame camera, divide 300 by 24 to get a shutter speed of about 12.5 seconds. But keep in mind, this is just a starting point. Depending on how dark your sky is and what you’re aiming to capture, you might need to adjust from there. Always check your shots and tweak as necessary.
Aperture and ISO: Balancing Light and Quality
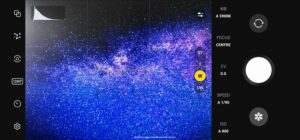
Aperture and ISO settings are also crucial for night photography. A wide aperture, like f/2.8, lets in more light, which is exactly what you need when shooting stars. But what about ISO? It’s tempting to crank it up to capture more light, but higher ISO also means more noise in your images. Start with an ISO around 1600 and only increase it if you need to. The goal is to find the sweet spot where you get enough light for a good exposure without compromising image quality.
And here’s a pro tip: use manual focus. Auto-focus won’t do you any favors in the dark. Set your lens to infinity, but double-check by zooming in on a bright star and adjusting until it’s a sharp point. This little extra effort goes a long way in getting those crisp star shots.
Techniques to Sharpen Your Skills
Now that you’ve got the basics down, let’s talk about some techniques to really make your night sky photos pop. Composition and advanced strategies like stacking and tracking can turn a good photo into a great one.
Aligning with the Night Sky: Composition Tips
When it comes to composition, the night sky is your canvas, and the stars are your paint. Look for interesting foreground elements to add depth to your images. Trees, mountains, or even old buildings can frame your shot and add a sense of scale. And don’t forget the rule of thirds; placing your horizon on the lower third line can give your stars the spotlight they deserve.
Also, think about what’s happening in the sky. Is there a meteor shower tonight? Maybe you want to capture the Milky Way’s core. Position your camera to include these celestial events, and you’ll add a whole new level of interest to your shots.
Advanced Strategies: Stacking and Tracking
If you’re ready to take your astrophotography to the next level, consider stacking and tracking. Stacking involves taking multiple shots of the same scene and combining them in post-processing to reduce noise and bring out more detail. Tracking, on the other hand, requires a motorized mount that moves your camera in sync with the stars, allowing for longer exposures without star trails. Both techniques require some extra gear and patience, but the results can be out of this world.
Making the Most of the Rule of 300
The Rule of 300 is a powerful tool, but it’s not one-size-fits-all. You’ll need to adjust it based on your camera’s sensor size and the focal length of your lens. Let’s break it down.
Adjusting the Rule for Sensor Size and Focal Length
If you’re shooting with a crop sensor camera, you might want to use the Rule of 300 with a twist. Since crop sensors have a multiplication factor (usually around 1.5x to 1.6x for APS-C cameras), you should adjust the rule accordingly. Multiply your lens’s focal length by your camera’s crop factor, then divide 300 by that number to find your new shutter speed. So, if you’re using a 24mm lens on a crop sensor with a 1.5x factor, you’ll calculate it like this: 300 / (24 * 1.5) = 8.3 seconds.
This adjustment ensures that your stars stay sharp, even with the different field of view that crop sensors provide. It’s a simple change that can make a big difference in your astrophotography.
Common Pitfalls and How to Avoid Them
Even with the Rule of 300, there are a few common pitfalls you’ll want to avoid. One is not accounting for the direction you’re shooting. Stars move at different speeds across the sky, with stars near the celestial equator moving faster from our perspective. If you’re pointing your camera in that direction, you might need to use a shorter shutter speed than the rule suggests.
Another pitfall is ignoring the conditions. If it’s particularly cold out, your battery will drain faster. If there’s even a slight breeze, it can shake your camera and blur your stars. Always be prepared for the environment you’re shooting in, and your photos will thank you for it.
Now, get ready to field some questions! In the next section, we’ll tackle the FAQs that every astrophotographer should know the answers to.
FAQs: Getting It Right with Night Photography
As you embark on your astrophotography journey, you’re bound to have questions. Whether you’re curious about gear, techniques, or just want to understand how to get the best results, I’ve got you covered. Let’s dive into some of the most frequently asked questions and clear up any uncertainties you might have about capturing the night sky.
How does sensor size affect the Rule of 300?
Sensor size plays a significant role in astrophotography and directly influences the Rule of 300. If you’re using a camera with a full-frame sensor, you’ll follow the rule as is. However, if your camera has a crop sensor, you need to adjust the rule to account for the crop factor. This factor, which is typically around 1.5x to 1.6x for APS-C cameras, effectively increases the focal length of your lens. Therefore, you multiply the focal length by the crop factor before dividing into 300. This adjustment is crucial for maintaining sharp stars in your images.
Can I use the Rule of 300 with a smartphone camera?
While smartphone cameras have come a long way, they often lack the manual controls necessary to apply the Rule of 300 effectively. However, some newer models do offer manual settings and long exposure capabilities. If your smartphone allows you to manually set the exposure time, you can attempt to use the rule, keeping in mind that the small sensor size and fixed aperture may limit your results. For the best experience in astrophotography, a dedicated camera with manual controls is recommended.
That said, there are apps available that can help you simulate long exposure effects on your smartphone. While not as precise as using a camera with manual settings, these apps can be a fun way to experiment with capturing the night sky.
Is a tripod necessary for following the Rule of 300?
Absolutely, a tripod is essential for astrophotography and using the Rule of 300. The rule helps you determine the longest shutter speed possible to avoid star trails, which often means using exposure times of several seconds. Handholding your camera for such long exposures is nearly impossible without introducing motion blur. A sturdy tripod ensures your camera remains perfectly still, giving you sharp, clear images of the stars.
- It stabilizes your camera for long exposure shots.
- It allows for precise framing and composition.
- It helps avoid camera shake, ensuring sharp images.
Remember, not just any tripod will do. Look for one that’s robust and can withstand wind or uneven terrain, especially if you’re shooting in the great outdoors.
Additionally, using a remote shutter release or your camera’s timer function can help avoid any movement when pressing the shutter button. This small step can make a big difference in the sharpness of your astrophotography images.
How does light pollution impact astrophotography settings?
Light pollution is the bane of astrophotography. It’s the reason why city skies often look empty compared to the vibrant starscape visible from a dark country field. Light pollution washes out the faint stars and can even change the color balance of your night sky photos. To combat this:
- Seek out darker locations away from city lights.
- Use a longer exposure to capture more stars, but be mindful of the Rule of 300 to avoid trails.
- Consider using a light pollution filter to help reduce the effects of artificial lighting.
Adjusting your camera settings can help to some extent, but there’s no substitute for a dark sky when it comes to astrophotography.
Can I apply the Rule of 300 for shooting star trails?
The Rule of 300 is specifically designed to prevent star trails by limiting the exposure time. If you want to capture star trails intentionally, you’ll be doing the opposite—extending the exposure time well beyond what the rule recommends. For star trails, you’ll need exposures that can last several minutes to several hours. This is a different kind of astrophotography that requires a different approach.
When shooting star trails, it’s important to:
- Use a lower ISO to reduce noise over the long exposure.
- Stop down the aperture a bit to ensure all the stars are in focus.
- Use a locking cable release or intervalometer to keep the shutter open without having to hold it down manually.
Remember, the goal with star trails is to show the movement of the stars across the sky, creating beautiful circular patterns around the North or South Pole. So, embrace the movement and let the Earth’s rotation paint the picture for you.


