
Key Takeaways
-
The optimal ISO setting for astrophotography often begins at ISO 1600 for modern digital cameras.
-
Understanding ISO and its impact on image noise and detail is crucial for capturing clear night sky images.
-
Adjusting ISO settings according to the ambient light and your camera’s capabilities is key to successful astrophotography.
-
For the best results, balance ISO with the right exposure time and aperture settings.
-
Using test shots and reading histograms can help you quickly find the best ISO setting for any given night sky scene.
Unlocking the Night Sky: Mastering ISO for Stellar Images
When you gaze up at the night sky, you’re not just looking at stars; you’re peering back through time. Capturing that majesty with your camera can feel like bottling the universe itself. But to do that, you need to understand one of the most pivotal settings on your camera: ISO.
ISO can be thought of as the sensitivity setting of your camera’s sensor. It’s a critical component of the exposure triangle, which also includes shutter speed and aperture. In the realm of astrophotography, finding the right ISO is essential because it affects both the brightness of your stars and the overall quality of your image.
Why ISO Matters in Capturing the Cosmos
ISO settings are like the magic dials of your camera. Turn them one way, and you can capture faint starlight. Turn them too far, and your photo may be overwhelmed by digital noise, like static on a TV screen. It’s all about finding that sweet spot where the stars shine bright without the noise drowning them out.
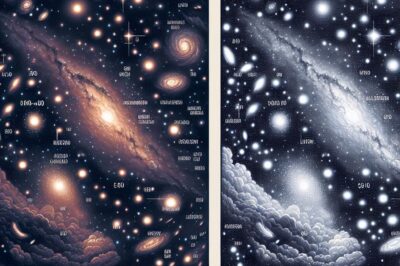
Imagine a night sky with the Milky Way arcing across it. An ISO too low, and the galaxy’s delicate details fade into darkness. Too high, and the sky looks grainy. Just right, and every star pops against the black canvas.
Most importantly, the ISO setting you choose will depend on your camera’s capabilities and the specific conditions under which you’re shooting. That’s why understanding your gear and the environment is as important as the ISO number itself.
The Connection Between ISO and Image Quality
Higher ISO settings can make your camera sensor more sensitive to light, which seems perfect for the dim reaches of space. However, this increased sensitivity comes with a trade-off – increased noise, which can obscure the crispness of the stars and the details of celestial bodies.
Therefore, the goal is to use the lowest ISO that allows you to capture the desired detail without excessive noise. This is why knowing your camera’s noise performance at various ISO levels is so important. It’s like knowing how much weight a bridge can hold before it starts to strain.
The ISO Sweet Spot: Starting Points for Sharp Stars
Let’s start with a general rule of thumb: for many modern cameras, ISO 1600 is a good starting point. But remember, this is just the beginning of the journey. Your camera’s sensor size, the presence of light pollution, and even the atmospheric conditions can influence the ideal setting.
For example, if you’re using a full-frame camera under dark skies, ISO 1600 might be perfect. But if you’re in a suburban backyard with streetlights nearby, you might need to push to ISO 3200 or higher to capture the same level of detail in the stars.
Common ISO Baselines for Different Cameras
Different cameras handle ISO in their own unique ways. It’s like how different cars perform under various driving conditions. For a more in-depth understanding, you might want to read our guide on astrophotography exposure and camera settings.
-
Full-frame cameras: Start at ISO 1600 and adjust as needed.
-
Crop-sensor cameras: Begin at ISO 800 to 1600, depending on the model’s noise performance.
-
Micro Four Thirds cameras: ISO 400 to 800 can be a good starting point due to the smaller sensor size.
But remember, these are just starting points. The true test comes when you’re out under the stars, dialing in your settings to match the scene before you.
Adjusting ISO Based on Ambient Light Levels
The level of ambient light around you will greatly affect your ISO choice. In a city with lots of light pollution, you’ll need a higher ISO to see the stars. But if you’re far from city lights, you might be able to dial it back and still get stunning results.
Here’s what to do:
-
If you’re in a dark area, start with a lower ISO to see how much of the sky you can capture without noise.
-
In a moderately light-polluted area, bump up the ISO until the stars start to stand out against the glow.
-
Under heavy light pollution, go higher with ISO, but watch out for noise that can ruin the clarity of your image.
Keep in mind, adjusting ISO isn’t just about battling light pollution. It’s also about capturing the faintest stars and the subtle textures of the Milky Way. And that’s a challenge worth embracing.
Using Lower ISO to Preserve Detail in Brighter Objects
When photographing brighter objects in the night sky, like the moon or planets, a lower ISO can preserve the details and prevent overexposure. It’s a delicate balance; use an ISO that’s too high, and you’ll lose the craters on the moon to a glaring white blob. A lower ISO maintains the nuances of light and shadow that give these celestial bodies their character. For more in-depth information, consider reading our guide on optimal camera settings for astrophotography.
For the moon, start at ISO 100 or 200. For planets, which are not as bright, you might need to bump it up to ISO 400 or 800. Take a test shot and examine the details. If the highlights are too bright, lower the ISO; if the image is too dark, increase it slightly.
Balancing Act: ISO, Exposure, and Aperture in Harmony
Finding the perfect ISO setting is just one part of the equation. To capture the night sky in all its glory, you must also consider the exposure time and aperture. These three elements work together like musicians in a symphony, each contributing to the final composition.
Calculating the Best Exposure Time With Your ISO Setting
|
ISO Setting |
Suggested Exposure Time (Dark Skies) |
Suggested Exposure Time (Light Pollution) |
|---|---|---|
|
800 |
15 seconds |
10 seconds |
|
1600 |
30 seconds |
20 seconds |
|
3200 |
20 seconds |
15 seconds |
Use this table as a starting point. Remember, the longer the exposure, the more likely you are to capture star trails due to the Earth’s rotation. If you want pinpoint stars, keep the exposure time shorter or use a tracking mount.
Selecting Aperture to Complement ISO for Optimal Sharpness
The aperture, or the size of the opening in your lens, controls how much light reaches the sensor. In astrophotography, a wider aperture (a lower f-number) lets in more light, which is great for dark skies. But it can also make focusing more challenging and reduce sharpness at the edges of your image. To understand this balance better, consider reading about focal length vs aperture in astrophotography.
Most lenses perform best one or two stops down from their widest aperture. So, if your lens opens up to f/2.8, try shooting at f/4 or f/5.6. This will give you a good balance of light-gathering ability and image sharpness.
Now, with your ISO dialed in and your exposure and aperture set, you’re ready to capture the night sky with clarity and detail.
Tips and Tricks for Fine-Tuning ISO in the Field
Even with a good starting point, you’ll need to fine-tune your settings in the field. Conditions change, and what worked last night might not work tonight. Here’s how to adjust on the fly.
Reading Histograms: A Tool for Perfect ISO Adjustments
Your camera’s histogram is an invaluable tool for judging exposure. After taking a test shot, check the histogram to ensure the peak is towards the center. If it’s too far to the left, your image is underexposed; too far to the right, and it’s overexposed.
Adjust your ISO, exposure time, or aperture accordingly. The goal is to have a histogram that shows detail in the shadows without clipping the highlights. It’s like tuning an instrument – you’re looking for that perfect pitch.
Test Shots: The Key to Nailing Your Settings Quickly
Test shots are your best friend in astrophotography. They’re like sketches before a masterpiece. Take a shot, review it, adjust your settings, and repeat. This iterative process will quickly lead you to the best combination of ISO, exposure, and aperture for the scene.
And don’t forget to zoom in on your test shots to check focus and noise. The stars should be sharp points of light, and the image should be free of excessive graininess.
Debunking ISO Myths: What You Really Need to Know
There are plenty of myths out there about ISO and astrophotography. Let’s set the record straight so you can shoot with confidence.
Exploring ISO Invariance: Myth or Fact?
ISO invariance is the idea that a camera can produce the same image quality at high ISOs as at low ISOs, just by brightening the image in post-processing. While this is true for some cameras, it’s not a universal rule.
Test your camera to see if it’s ISO invariant. Take a series of shots of the night sky at different ISOs without changing the aperture or exposure time. Then, compare the images after brightening the lower ISO images to match the higher ISO ones. If they look the same, your camera is ISO invariant.
High ISO Noise: Is It Always the Enemy?
Many people think high ISO automatically means bad noise, but that’s not always the case. Noise can be managed, especially with modern cameras and post-processing software.
Don’t be afraid to push your ISO higher if the situation calls for it. Sometimes, getting the shot with a bit of noise is better than not getting the shot at all. Besides that, stacking multiple images can reduce noise significantly, turning a grainy mess into a clean, detailed photograph.
Remember, the best ISO setting for astrophotography is the one that gives you the image you want. It’s about understanding your camera, the conditions, and how to balance all the elements at play. With practice, you’ll find your own sweet spot and capture the cosmos like never before.
-
ISO invariance may not apply to all cameras; test your camera to see how it performs.
-
High ISO noise isn’t always detrimental and can be reduced through image stacking and post-processing.
-
Understanding your camera and how to balance ISO with other settings is crucial for astrophotography success.
-
Test shots are essential for finding the right ISO setting in varying conditions.
-
Use histograms to ensure your ISO adjustments lead to well-exposed images.
High ISO noise is often seen as the enemy of astrophotography, but this isn’t necessarily the case. While it’s true that higher ISOs can introduce more noise into your images, this doesn’t mean they’re ruined. In fact, with today’s advanced cameras and noise reduction techniques in post-processing software, a little noise isn’t the end of the world.
Think of noise like the static on a radio. With the right tools and techniques, you can tune your images to minimize the interference and bring the music of the stars into clear focus. So, don’t be afraid to push your ISO higher if it means capturing the shot. After all, a slightly noisy image of a beautiful nebula is better than no image at all.
There’s a persistent belief that high ISO means noisy, unusable photos. But let’s dispel that myth. High ISO noise can indeed be a challenge, but it’s not always the villain it’s made out to be. Sometimes, it’s a necessary compromise to capture the faintest celestial lights.
And here’s the good news: noise can be managed. Modern cameras are getting better at handling high ISOs, and post-processing software has become incredibly adept at reducing noise. So, don’t shy away from cranking up that ISO when the situation demands it. The key is to understand your camera and how to work with the noise, not against it.
Debunking ISO Myths: What You Really Need to Know
Myths are as vast in the world of astrophotography as the stars in the night sky. It’s time to bring some of these myths back down to Earth and reveal the truth behind them. By understanding the facts, you’ll be empowered to capture the cosmos with confidence and clarity.
Exploring ISO Invariance: Myth or Fact?
ISO invariance is a term that gets thrown around a lot in photography circles. It suggests that a camera can produce an image at high ISOs that’s just as good as one taken at a lower ISO, simply by increasing the exposure in post-processing. This concept is a bit like saying you can turn up the volume on a quiet recording and hear the sound just as clearly as if it had been recorded louder in the first place.
While some cameras are ISO invariant, not all are created equal. It’s essential to test your camera to see if it holds up to this idea. Take a series of images at different ISO settings without changing other exposure settings, then brighten the lower ISO images in post-processing to match the high ISO ones. If there’s no significant difference in noise or detail, congratulations, your camera is ISO invariant!
ISO Mastery: From Settings to Spectacular Astrophotography
Mastery of ISO in astrophotography isn’t just about memorizing numbers; it’s about understanding how this setting interacts with the light and darkness of the cosmos. It’s about knowing your camera, experimenting with settings, and finding the sweet spot that brings the night sky to life. With patience and practice, you’ll be able to translate the wonder of the universe into photographs that inspire awe and curiosity.
FAQ
Got questions? Here are some answers to the most common queries about ISO settings in astrophotography. For those just starting out, check out our comprehensive astrophotography guide for beginners.
What is the ideal ISO setting for photographing the Milky Way?
The ideal ISO for capturing the Milky Way typically starts at 1600 for modern digital cameras. However, this can vary based on your camera’s sensor and the level of ambient light. Start there and adjust as needed, taking test shots and checking your histogram to ensure you’re capturing the galaxy’s grandeur without excessive noise.
How does ISO affect the noise levels in astrophotography?
ISO affects noise levels by determining how sensitive your camera’s sensor is to light. A higher ISO increases sensitivity, which can help capture faint stars but also brings more noise into the image. Finding the right balance is key to minimizing noise while still revealing the beauty of the night sky.
Can I use the same ISO setting for different types of cameras?
Not all cameras are created equal when it comes to ISO performance. Full-frame cameras typically handle higher ISOs better than crop-sensor or micro four-thirds cameras. Start with recommended baselines for your camera type and adjust from there based on the results you see.
What adjustments should I make to ISO when in a light-polluted area?
In areas with light pollution, you may need to increase your ISO setting to capture the stars. However, be cautious of the increased noise. Take test shots at various ISO levels to find the best balance between star visibility and image quality.
Is a higher ISO always better for capturing stars?
A higher ISO can help capture faint stars, but it’s not always better. It can introduce more noise, which can detract from the image quality. The best approach is to use the lowest ISO that allows you to capture the desired detail and adjust based on the conditions of your shooting environment. For more on this topic, check out our guide on astrophotography exposure and camera settings.
Remember, the universe is waiting for you to capture its beauty. With these tips and a bit of practice, you’ll be well on your way to taking breathtaking astrophotographs that reflect the wonder of the night sky. Clear skies and happy shooting!


