
Key Takeaways
- Discover the ideal shutter speed to capture sharp stars and avoid trails.
- Learn how to adjust aperture and ISO for optimal exposure in astrophotography.
- Understand the importance of manual focus and how to achieve it for clear night skies.
- Find out why light pollution filters and a sturdy tripod are crucial for night photography.
- Get tips on reducing noise and enhancing your images with post-processing techniques.
When you look up at the night sky, you’re not just seeing stars—you’re witnessing a cosmic dance that’s been going on for billions of years. Capturing this spectacle through astrophotography isn’t just about pointing a camera upwards and clicking the shutter; it’s an art form that combines patience, precision, and a touch of creativity. Let’s dive into the universe of astrophotography and unlock the secrets to capturing stunning images of the night sky.
Why Exposure Makes or Breaks Your Night Sky Shots
Exposure is the cornerstone of astrophotography. It’s the delicate balance of light that enters your camera’s sensor, which in the case of astrophotography, is often scarce. The right exposure will reveal the beauty of the Milky Way, the twinkle of distant stars, and the delicate hues of nebulae. Get it wrong, and you’ll be left with a dark, featureless frame. Most importantly, mastering exposure allows you to tell a story with the stars, whether it’s a tale of a serene, starry night or the dramatic swirl of a galaxy.
Equipment Essentials for Next-Level Astrophotos
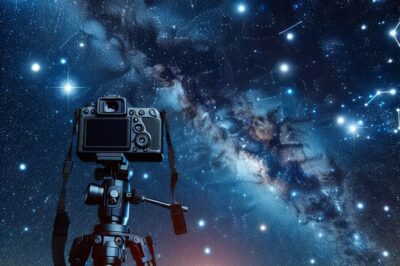
Before we jump into settings, let’s talk gear. A sturdy tripod is non-negotiable; it’s the foundation that keeps your camera steady during long exposures. A mirrorless or DSLR camera with manual mode capabilities is your canvas, while a fast wide-angle lens is your brush, capturing a broad swath of the sky with every shot. And don’t forget a remote shutter release or your camera’s self-timer to avoid any camera shake when you take the shot.
Additionally, consider investing in a light pollution filter, especially if you’re shooting near cities. This nifty piece of equipment helps block out unwanted artificial light and brings out the true colors and contrast of the night sky.
- Sturdy tripod: Ensures stability for sharp images during long exposures.
- Mirrorless or DSLR camera: Allows manual control over settings for precise exposure.
- Fast wide-angle lens: Captures more of the sky and lets in more light.
- Remote shutter release: Avoids camera shake when pressing the shutter button.
- Light pollution filter: Reduces the effect of artificial light for clearer night skies.
Basic Exposure Adjustments for the Stars
Now, let’s set the stage for a perfect shot. You’ll want to shoot in manual mode to have complete control over your exposure triangle: shutter speed, aperture, and ISO. This trio works in harmony to create the ideal exposure for your night sky images. And remember, practice makes perfect. Don’t be afraid to experiment and see what works best for your specific conditions.
The Shutter Speed Sweet Spot for Sharp Stars
Shutter speed determines how long your camera’s sensor is exposed to light. For astrophotography, you want a long enough exposure to capture the stars’ light, but not so long that they start to trail due to the Earth’s rotation. A rule of thumb is the “500 Rule,” which suggests setting your shutter speed to 500 divided by the focal length of your lens. For example, if you’re using a 20mm lens, you’d set your shutter speed to 25 seconds (500/20 = 25). But keep in mind, this is just a starting point.
Aperture Settings: Balancing Light and Sharpness
Aperture, measured in f-stops, controls the amount of light that passes through your lens. A lower f-stop means a wider aperture and more light, which is ideal for astrophotography. Aim for an aperture of f/2.8 to f/4 to let in enough light without compromising sharpness. If your lens doesn’t open that wide, don’t worry—just use the lowest f-stop number available and adjust your other settings accordingly. For more detailed information, consider reading our guide on astrophotography camera settings.
ISO: The Highs and Lows for Night Sky Clarity
ISO measures your camera sensor’s sensitivity to light. A higher ISO lets you capture more light, which is tempting in low-light conditions like astrophotography. However, a high ISO can also introduce noise, which looks like grainy specks in your image. Start with an ISO around 1600 to 3200 and adjust as needed based on the brightness of the stars and your other settings.
Advancing your skills in astrophotography involves delving into more sophisticated camera settings. These adjustments can be the difference between a good shot and a breathtaking one. It’s all about understanding the interplay between your camera and the cosmos.
Advanced Camera Settings Unraveled
Tracking the Stars: Using Long Exposures Without Trails
While the 500 Rule is a great starting point, serious astrophotographers often use a star tracker. This device moves your camera in sync with the Earth’s rotation, allowing for much longer exposures without star trails. With a tracker, exposures can extend to several minutes, revealing much fainter stars and deep sky objects. But remember, setting up a star tracker requires patience and precision to align it accurately with the celestial pole.
Fine-Tuning Focus for Pinpoint Stars
Autofocus is a no-go when it comes to the stars. Instead, switch to manual focus and use your camera’s live view mode to zoom in on a bright star. Adjust the focus until the star is a sharp point of light. If your camera has a focus peaking feature, use it to highlight the edges of the stars when they’re in focus. This can be a game-changer for achieving that crystal-clear shot.
Balancing White Balance for True Night Sky Colors
White balance affects the color temperature of your image. While ‘auto’ can work, it often misinterprets the night sky. Instead, manually set your white balance to a Kelvin temperature between 3400K and 4800K to enhance the natural blues and purples of the night sky. This setting helps to keep the stars true to their natural colors and avoid an unnatural yellow or orange tint.
Photographic Phenomena: Special Techniques in Astro Art
Painting with Light in the Vast Night Sky
Light painting is a creative technique where you use a light source, like a flashlight or LED, to illuminate foreground objects in your astrophotography scenes. It adds depth and interest to your composition. The key is subtlety; you don’t want to overpower the stars. Use a warm light sparingly to gently enhance the scene, not dominate it.
Multiple Exposures: A Symphony of Light
Combining multiple exposures can create a more dynamic image. Take several shots with the same composition but vary the exposure settings. Later, blend these in post-processing to balance the bright and dark areas, bringing out details that might otherwise be lost. It’s like conducting an orchestra of light, each exposure contributing to the harmony of the final image.
Time-Lapse Tips: Compressing Hours into Seconds
A time-lapse is a sequence of photos taken over a period, showing the movement of stars across the sky. To create one, take consistent shots at set intervals—anywhere from 15 seconds to several minutes apart—and compile them into a video. The result is a fast-motion sequence that speeds up the slow dance of the heavens into a few mesmerizing seconds.
The Dark Frames Debate: To Dither or Not to Dither?
Understanding Noise Reduction in Post-Processing
Noise is the bane of any low-light photographer’s existence, and astrophotography is no exception. To combat this, you can take dark frames—photos with the same exposure settings and duration as your main images, but with the lens cap on. These frames capture just the sensor noise, which can be subtracted from your images during post-processing to clean up the noise without sacrificing detail.
Dithering Techniques for Cleaner Astrophotography
Dithering is a process where you slightly shift the position of your camera between exposures. When the images are stacked in post-processing, the noise patterns don’t line up, effectively canceling each other out. This technique can significantly improve the quality of your final image, giving you cleaner, more detailed photos of the night sky.
FAQs
Even with the best techniques and equipment, questions always pop up in the field of astrophotography. It’s a complex hobby that combines art, science, and a little bit of magic. Here are some of the most common questions I hear from fellow night sky enthusiasts, along with answers that will keep you shooting stars like a pro. For more in-depth guidance, check out these astrophotography tips and camera settings.
How Do I Reduce Noise in Long Exposure Shots?
To reduce noise in long exposure astrophotography, start by setting your camera to a moderate ISO; too high will introduce unwanted grain. Use long exposures at the lowest ISO that still allows you to capture enough light. Employing in-camera noise reduction features can help, but be aware they might increase processing time. Furthermore, shooting in RAW format gives you greater flexibility to reduce noise in post-processing software. The use of dark frames, as mentioned earlier, can also significantly reduce noise when used correctly in image stacking.
Which Lenses Are Best for Milky Way Photography?
For Milky Way photography, the lens you choose can make all the difference. You want a lens that can capture as much light as possible in a single frame. Here’s what to look for:
Wide-angle lenses with a large maximum aperture, ideally f/2.8 or wider, are perfect for Milky Way photography. These lenses allow more light to reach the sensor, which is crucial for capturing the faint details of our galaxy. Lenses like a 14mm f/2.8 or a 24mm f/1.4 are popular choices among astrophotographers. Zoom lenses can be versatile but often have smaller maximum apertures, which might not be as effective in low light conditions.
For those looking to get started, here are a couple of lenses that have proven to be excellent for Milky Way photography:
- Samyang 14mm f/2.8 – A budget-friendly option with a wide field of view.
- Sigma 24mm f/1.4 Art – A bit pricier, but the wide aperture captures stunning details.
Can I Shoot Astro on a Full Moon Night?
Shooting astrophotography on a full moon night is challenging due to the bright light the moon casts, which can wash out the fainter stars and details of the Milky Way. However, it’s not impossible. You can use the moonlight to your advantage to illuminate landscapes and create dramatic nightscapes. If you’re aiming to capture stars, focus on areas of the sky farthest from the moon, and consider using a narrower aperture and shorter exposure to reduce the moon’s brightness.
Here are a few tips for shooting on a full moon night:
- Plan your composition to include the moon as a feature in your image.
- Adjust your exposure settings to compensate for the additional light.
- Use the moonlight to highlight foreground elements and add depth to your photos.
Remember, the full moon can also be a spectacular subject in itself, especially when captured with a long lens that can reveal its cratered surface.
Why Are My Star Photos Blurry?
Blurry star photos can result from several factors: camera shake, incorrect focus, or movement of the stars due to long exposures. To avoid camera shake, use a sturdy tripod and a remote shutter release. For focus, manually adjust using a bright star or planet and magnify your live view to ensure sharpness. If the stars are trailing, your exposure might be too long; refer back to the 500 Rule to find the sweet spot for your lens’s focal length.
It’s also essential to ensure that your tripod is on solid ground and not subject to vibrations from the wind or passing foot traffic. And always double-check your focus throughout the night, as temperature changes can cause your lens to drift out of focus.
Should I Use a Telescope or a Camera Lens for Deep Sky Objects?
Choosing between a telescope and a camera lens for deep sky objects depends on your goals and budget. A telescope can magnify distant objects like galaxies and nebulae, making them more prominent in your images. However, telescopes are often more expensive and require additional equipment like a mount and may have a steeper learning curve.
Camera lenses are more versatile and user-friendly, suitable for wide-field astrophotography and capturing the Milky Way. They’re also generally more portable and easier to set up. For deep sky objects, a telephoto lens can still capture impressive shots, especially when paired with a tracking mount.
In conclusion, start with a camera lens to learn the ropes of astrophotography. If you find yourself drawn to the deep sky and crave more detail, then consider investing in a telescope setup.
Astrophotography is a journey, not a destination. Each night under the stars is an opportunity to refine your skills, experiment with new techniques, and capture the universe in all its glory. With the right knowledge, patience, and practice, the sky is not the limit—it’s your canvas. So go out there, and let the cosmos inspire your next masterpiece.
For those interested in capturing the night sky, understanding the best camera settings for astrophotography is crucial. Whether you’re a beginner or an experienced photographer, getting to grips with exposure times, ISO settings, and aperture can make a significant difference in the quality of your celestial images.


