
Article-at-a-Glance
- Open your lens to the widest aperture to let in as much light as possible.
- Use a sturdy tripod and a remote shutter release to prevent camera shake.
- Start with a high ISO and adjust to find the balance between brightness and noise.
- Manual focus is your friend in the dark; use live view and zoom in to focus on a bright star.
- Experiment with different settings and take notes on what works best for your setup.
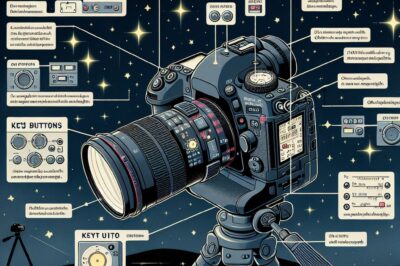
Essential Gear for Astrophotography
Before we dive into the nitty-gritty of camera settings, let’s make sure you’ve got the essential gear. You’ll need a camera capable of manual mode, a wide-angle lens with a large maximum aperture, and a sturdy tripod. Oh, and let’s not forget the most underrated piece of equipment—a remote shutter release to keep your shots sharp and free from the dreaded camera shake.
Understanding Exposure: ISO, Aperture, and Shutter Speed
Exposure is the cornerstone of all photography, and in astrophotography, it’s all about balancing the ISO, aperture, and shutter speed to capture the faint light of the stars. These three pillars of exposure work together to create a well-lit, sharp image of the night sky.
Aperture Settings: Your Gateway to the Stars
Choosing the Right Aperture
The aperture is like the pupil of your camera’s eye—the wider it is, the more light it lets in. In astrophotography, we want to capture as much light as we can, so we set our aperture to its widest setting. This is typically denoted by the smallest f-number on your lens, like f/2.8 or f/4.
The Impact of Aperture on Star Brightness
Opening up the aperture not only allows more light to hit the sensor but also makes the stars appear brighter. This is essential when photographing celestial objects that are light-years away. Just remember, a wide aperture can also mean a shallower depth of field, so keep your focus precise.
Mastering Shutter Speed for Sharp Starry Scenes
Conquering Camera Shake: Remote Shutter Release
Even the slightest movement can turn your stars into streaks. A remote shutter release lets you trigger the shutter without touching the camera, preserving the crispness of your cosmic captures.
Using the 500 Rule for Perfect Exposure
The ‘500 Rule’ helps you calculate the longest shutter speed you can use before stars start to trail. Simply divide 500 by the focal length of your lens. For a 20mm lens, you can go up to 25 seconds. This keeps your stars as sharp as pinpoints in the vast night sky.
ISO and Noise: Balancing Sensitivity and Clarity
Finding Your Camera’s Sweet Spot for ISO
ISO controls your camera’s sensitivity to light. A higher ISO lets you capture more light, which is great for dark skies, but it also increases noise. Start at ISO 1600 and adjust up or down. Your goal is to find the sweet spot where the stars are bright, but the noise isn’t overwhelming.
Reducing Noise in Post-Processing
Noise is the bane of astrophotography, but fear not—software like Adobe Lightroom and dedicated astrophotography programs can help you reduce it in post-processing. Take multiple shots at the same settings and stack them to average out the noise, leaving you with a cleaner image.
Example: I once photographed the Orion Nebula using a 50mm lens at f/2.8, 20-second exposure, and ISO 3200. The results were impressive, but it took a bit of noise reduction in post to get that crisp, celestial look.
Focusing in the dark is tricky, but modern cameras have a secret weapon: live view. By using the live view mode, you can magnify a star on your camera’s LCD screen and manually adjust the focus until it’s as small and sharp as possible. This method beats squinting through the viewfinder any night!
Once you’ve locked the focus, switch your lens to manual to prevent it from changing. Some photographers even use a piece of tape to hold the focus ring in place. It’s a small step that can save you from a blurry disappointment.
And remember, focus once and check often. As the temperature drops, the focus can shift slightly, so it’s a good idea to recheck your focus periodically throughout the night. This ensures that you keep capturing the stars in all their glory.
Live View Focusing: A Modern Aid
Most importantly, don’t rely on autofocus. It’s nearly impossible for cameras to autofocus in the dark, and you’ll end up with blurry stars. Instead, use live view focusing as a modern aid to get pinpoint stars. It’s a game-changer, trust me.
Taking Control: Manual Mode and Bulb Mode Explained
When it comes to astrophotography, automatic modes just won’t cut it. You need the control and flexibility that manual mode offers. In manual mode, you’re the boss. You set the ISO, aperture, and shutter speed to exactly what they need to be for the perfect shot.
When to Use Manual Mode
Manual mode is essential for astrophotography because it gives you the ability to tweak settings in real-time based on the conditions. If the stars aren’t bright enough, you can adjust the exposure without the camera second-guessing your intentions. It’s all about control.
Besides that, there’s a sense of satisfaction in capturing a stunning night sky image knowing you dialed in every setting yourself. It’s not just a photo; it’s a skill you’ve honed and perfected.
The Benefits of Bulb Mode for Long Exposures
For those extra-long exposures, bulb mode is your friend. It allows you to keep the shutter open for as long as you hold down the shutter button (or remote release). This is perfect for capturing those elusive deep-sky objects or creating star trails that stretch across the sky.
Just be aware that long exposures can lead to more noise, so balancing your ISO and using noise reduction techniques is key. But the results can be otherworldly, making bulb mode a powerful tool in your astrophotography arsenal.
Advanced Strategies for the Avid Astro-Photographer
Once you’ve got the basics down, it’s time to level up your astrophotography game. Advanced strategies like stacking images and long exposure deep-sky imaging can take your photos from good to galactic.
Stacking Images for Enhanced Detail
Stacking is a technique where you take multiple exposures of the same scene and combine them to increase detail and reduce noise. It’s like having a super camera sensor that can capture more light and color than a single shot ever could.
Long Exposure Deep-Sky Imaging: A Step-by-Step Guide
For deep-sky imaging, you’ll need patience and precision. Here’s a step-by-step guide:
- Mount your camera on a tracking mount to follow the stars’ movement.
- Use a long lens or telescope for magnification.
- Start with a 30-second exposure and adjust from there.
- Take multiple shots for stacking.
- Process your images with software designed for astrophotography.
Deep-sky imaging allows you to capture the wonders of galaxies, nebulae, and star clusters. It’s a challenging but rewarding aspect of astrophotography that showcases the beauty of our universe.
And remember, practice makes perfect. Each session under the stars teaches you more about your equipment and the sky, helping you refine your techniques for even better shots next time.
Seeing the Bigger Picture: Composition in Astrophotography
Composition is just as important in astrophotography as it is in daylight photography. The right composition can turn a simple photo of stars into a masterpiece that captures the imagination.
When composing your shots, think about what elements you can include to add interest or tell a story. A lone tree, a silhouette of a mountain range, or even a person can give your image scale and context. For more on this, check out these astrophotography tips.
Also, consider the rule of thirds. Place interesting elements along the lines or at the intersections to create a balanced and engaging composition. The night sky is your canvas—use it wisely.
Incorporating the Landscape
Don’t just point your camera upwards; use the landscape to your advantage. A well-composed foreground can add depth and interest to your night sky photos. It’s the difference between a snapshot of the stars and a stunning landscape under the cosmos.
Experiment with different angles and perspectives. Sometimes, the most dramatic compositions come from looking at the scene in a new way. And always, always look for ways to frame the night sky in a manner that tells a story or evokes emotion.
Framing for Impact: Rule of Thirds in the Night Sky
The rule of thirds isn’t just for daytime shots. By positioning the Milky Way or a constellation along one of the thirds, you create a dynamic and interesting composition that draws the viewer’s eye through the image.
But rules are made to be broken. Feel free to experiment with centering the Milky Way for a symmetrical shot or placing it off to the side for an unexpected twist. The sky’s the limit—literally.
Capturing the Milky Way: Specialized Settings for a Galactic View
The Milky Way is the crown jewel of astrophotography. To capture it, you’ll need to pay special attention to your camera settings and timing.
Best Times and Locations for Milky Way Photography
The best time to photograph the Milky Way is during the new moon when the sky is darkest. As for location, you’ll want to find a spot far from city lights with a clear view of the southern horizon (in the Northern Hemisphere). For more detailed guidance, consider these astrophotography tips.
Plan your shoot using apps that track the Milky Way’s position in the sky. This way, you can be sure you’re set up and ready to go when the galaxy rises.
And finally, use a wide-angle lens with a large aperture, set your ISO high, and experiment with longer shutter speeds to capture the galaxy’s intricate details. With a little practice and patience, you’ll be rewarded with stunning shots of our home galaxy. For more guidance, check out our guide on sharp stars photography tips.
The Milky Way is the crown jewel of astrophotography. To capture it, you’ll need to pay special attention to your camera settings and timing.
The best time to photograph the Milky Way is during the new moon when the sky is darkest. As for location, you’ll want to find a spot far from city lights with a clear view of the southern horizon (in the Northern Hemisphere).
Plan your shoot using apps that track the Milky Way’s position in the sky. This way, you can be sure you’re set up and ready to go when the galaxy rises.
And finally, use a wide-angle lens with a large aperture, set your ISO high, and experiment with longer shutter speeds to capture the galaxy’s intricate details. With a little practice and patience, you’ll be rewarded with stunning shots of our home galaxy.
Camera Setup for a Galactic Masterpiece
To capture the grandeur of the Milky Way, you’ll want to use a wide-angle lens, set your camera to manual mode, and use the widest aperture your lens allows. Position your camera on a tripod, point it toward the southern sky, and set your focus to infinity. Remember, a high ISO can help capture the faint details of the Milky Way, but keep an eye on the noise levels.
Post-Processing: Polishing Your Starry Night Captures
Once you’ve captured the night sky, it’s time to bring those images to life with post-processing. This is where you can adjust the exposure, bring out the details, and reduce the noise to make your stars shine.
Post-processing is an art in itself. Begin by adjusting the exposure and contrast to enhance the Milky Way. Then, fine-tune the white balance to bring out the natural colors of the stars. Noise reduction is also crucial, but be careful not to lose star details in the process.
Essential Software for Astrophotography Image Editing
There are several software options for editing your astrophotography images. Adobe Lightroom and Photoshop are popular choices, but there are also specialized programs like DeepSkyStacker and Sequator that can help with image stacking and noise reduction.
Basic Edits That Make a Big Difference
Even simple edits can transform your astrophotography images. Adjusting the highlights and shadows can bring out the Milky Way’s structure, while increasing clarity can make the stars pop. Don’t forget to correct any lens distortion to ensure the stars look sharp across the entire image.
Remember, less is often more with astrophotography edits. Subtlety is key to maintaining the natural beauty of the night sky.
- Use a noise reduction tool to clean up the image without smudging the stars.
- Adjust the curves to enhance the contrast between the stars and the night sky.
- Sharpen the image to make the stars more distinct.
- Apply color correction to bring out the true colors of the Milky Way.
- Consider using gradient filters to balance the sky’s exposure with the foreground.
Frequently Asked Questions
As an astrophotography enthusiast, you might have some questions. Let’s tackle a few common ones to help you on your journey to capturing the cosmos.
What is the best aperture setting for astrophotography?
The best aperture for astrophotography is the widest your lens offers, usually between f/2.8 and f/4. This allows the maximum amount of light to reach the sensor, which is essential for capturing the faint details of the night sky.
- f/2.8 – Ideal for fast lenses and dark skies.
- f/4 – A good balance for light gathering and depth of field.
- f/5.6 – If you’re using a lens with a smaller maximum aperture, this can still work, just increase the exposure time accordingly.
How long should my exposure be when shooting stars?
Your exposure time will depend on your focal length and desired outcome. Use the 500 Rule as a starting point to avoid star trails. For example, with a 20mm lens, start with a 25-second exposure. If you’re after star trails, exposures can last several minutes.
Why is manual focus important in astrophotography?
Manual focus is crucial because autofocus systems struggle in low-light conditions and might not lock onto the stars. By using manual focus, you ensure that the stars remain sharp and clear in your final image.
What is image stacking and how can it improve my photos?
Image stacking is the process of combining multiple exposures of the same scene to reduce noise and increase detail. This technique is particularly useful in astrophotography, where light is limited, and noise can be problematic.
When is the best time of year to photograph the Milky Way?
The best time to photograph the Milky Way in the Northern Hemisphere is during the summer months, from May to August, when the galactic center is visible. However, the Milky Way can be photographed at different times throughout the year; it just won’t be as bright or detailed.
With these tips and a bit of practice, you’ll be well on your way to capturing breathtaking images of the night sky. Remember, astrophotography is as much about the experience as it is about the final image. So get out there, look up, and start shooting the stars!
Here’s a real-life example: During a new moon, I set up my camera in a dark, rural area with a clear view of the sky. With my 24mm lens set to f/2.8, ISO 3200, and a 20-second exposure, I captured the Milky Way in all its glory. After some light editing to reduce noise and enhance contrast, the image came alive, showcasing the magnificent detail of our galaxy. For more insight on optimal shutter speeds for astrophotography, check out our detailed guide.


