Ever looked up at the night sky and felt a sense of wonder? Those twinkling stars, distant planets, and the creamy streak of the Milky Way are not just a feast for the eyes but a playground for photographers. Astrophotography is a unique blend of art and science, allowing us to capture the beauty of the cosmos. Whether you’re a seasoned stargazer or a budding space enthusiast, understanding the dance between focal length and aperture is your ticket to stellar images.
Key Takeaways
- Focal length affects the field of view and magnification of celestial objects in your photos.
- Aperture determines how much light your camera lens can gather, crucial for low-light conditions in astrophotography.
- A wider aperture (represented by a smaller f-number) allows more light, enhancing the ability to photograph dim stars and nebulae.
- The combination of focal length and aperture, known as the f-ratio, influences the exposure and sharpness of your astro images.
- Choosing the right equipment involves balancing focal length and aperture to match your astrophotography goals.
Capturing the Cosmos: A Simple Guide to Focal Length and Aperture in Astrophotography
Let’s embark on a journey through the night sky. As we navigate, I’ll share insights on how to harness the power of your camera to freeze those fleeting moments of cosmic beauty. And it all starts with two fundamental concepts: focal length and aperture.
Why Focal Length Matters to Stars and Galaxies
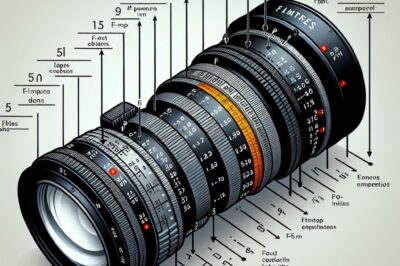
Think of focal length as your telescope to the stars. It’s the distance from the lens to the sensor when focused on a subject. In practical terms, focal length changes the size of the stars and galaxies in your viewfinder. A shorter focal length gives you a wide-angle view, perfect for capturing expansive nightscapes. Longer focal lengths bring distant celestial bodies up close and personal, but they require a steady hand or a mount to keep the stars from streaking across your image due to the Earth’s rotation.
Most importantly, the choice of focal length influences the composition and the story you want to tell with your photograph. Whether you’re framing the constellation Orion or zooming in on the craters of the moon, the right focal length can make all the difference.
The Magic of Aperture in Night Sky Photography
Aperture is your camera’s eye, and its size determines how much light reaches the sensor. In the darkness of space, every photon counts, and a larger aperture (indicated by a lower f-number) can gather more of that precious starlight. This is especially true in astrophotography, where we often find ourselves pushing the limits of our gear to capture the faintest of objects.
Because we’re working with such little light, a wide aperture is often your best friend. It allows you to use faster shutter speeds to freeze the stars in place or to keep your ISO low to minimize noise. However, a wider aperture can also mean a shallower depth of field, so focusing must be precise to keep the stars sharp.
Choosing the Right Equipment for Stellar Shots
When you’re stargazing through a lens, the right equipment is not just about having the best gear; it’s about having the right gear for the job. For wide-field astrophotography, a camera with a full-frame sensor and a wide-angle lens with a large aperture, like f/2.8 or wider, will allow you to capture vast swaths of the sky in a single frame. If you’re more interested in photographing specific celestial objects, like planets or nebulae, you’ll want a longer focal length and a mount that can track the sky’s movement.
Remember, the goal is to match your equipment to your vision. Whether you’re after a wide, star-filled landscape or a detailed shot of the surface of the moon, the right combination of focal length and aperture will get you there.
Shedding Light on Aperture: The Astrophotographer’s Ally
Let’s dive deeper into aperture. It’s a term tossed around a lot in photography, but in the realm of astrophotography, it’s one of your most powerful tools. A larger aperture doesn’t just mean more light; it means more detail, more color, and more of what makes the night sky so mesmerizing.
And here’s a little secret: a wide aperture can transform a dim star into a brilliant point of light in your photos. It’s like opening the curtains on a dark night to let the moonlight pour in. That’s the magic we’re after when we press the shutter button under the stars.
Defining Aperture and Its Role in Starlight Capture
Aperture refers to the opening in your lens through which light travels to the camera sensor. It’s measured in f-stops, and a key thing to remember is that a lower f-stop means a wider aperture. So, when you hear a photographer say they’re shooting at f/2.8, they’re letting in a lot of light. This is crucial for astrophotography, where light is scarce and every bit counts.
- A wide aperture (low f-stop number) gathers more light, making it ideal for photographing the night sky.
- Aperture also affects depth of field, which isn’t as critical in astrophotography since most subjects are at infinity focus.
- However, a very wide aperture can sometimes cause stars to appear less sharp due to optical aberrations like coma or astigmatism.
Understanding this will help you make informed decisions about your camera settings, especially when you’re out in the field and every second of darkness is precious.
Wide vs. Narrow Aperture: Balancing Light and Sharpness
Choosing between a wide and narrow aperture is a balance. A wide aperture is fantastic for letting in light, but go too wide and you might start to see distortions at the edges of your images, where stars can look like little comets. On the other hand, a narrow aperture gives you sharpness across the field, but you’ll need longer exposures to collect enough light, which can lead to star trails if you’re not using a tracking mount.
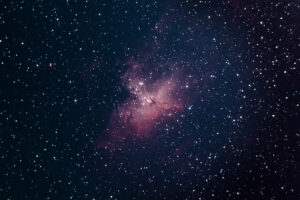
For example, shooting the Orion Nebula with a 50mm f/1.8 lens wide open might give you a bright image, but stopping down to f/2.8 could provide a sharper image with better star shapes.
Therefore, finding your lens’s sweet spot—where it provides both ample light and sharpness—is key. This often lies one or two stops down from the maximum aperture.
Aperture Sweet Spots: Maximizing Image Quality
Every lens has an aperture sweet spot, typically two to three f-stops down from the widest setting. This is where your lens performs best, offering a good balance of light and sharpness. For astrophotography, hitting this sweet spot is like striking gold. You get enough light to capture the faintest stars, and your images stay crisp and clear.
Experiment with your own lenses to find this sweet spot. Start wide open on a clear night and gradually stop down, taking note of how the image quality changes. You’ll soon discover the setting that brings the universe to life in your camera. For more detailed techniques, check out our guide on astrophotography without a tracker.
Focal Length and Aperture: The Dynamic Duo
Focal length and aperture are the Batman and Robin of astrophotography. Together, they can make or break your night sky images. The right combination allows you to capture the night sky in all its glory, whether you’re aiming for a landscape studded with stars or a portrait of a distant galaxy.
Picking the Perfect Pair: Matching Focal Length with Aperture Sizes
Choosing the right pair depends on what you want to shoot. For wide star fields and the Milky Way, a short focal length with a wide aperture, like a 24mm f/1.4 lens, is a dream team. It gives you a vast canvas and collects a lot of light quickly. For zooming in on celestial wonders, a longer focal length with a moderate aperture, such as a 200mm f/2.8 lens, might be the ticket. It provides a narrower field of view but brings distant objects closer.
But it’s not just about picking any two; it’s about understanding how they work together. A fast aperture can compensate for a shorter focal length by gathering more light, allowing you to capture stunning images even with a relatively wide field of view.
Common Pitfalls and How to Avoid Them
It’s easy to fall into traps with focal length and aperture. One common mistake is assuming that a longer focal length always means better astrophotos. But remember, the longer the focal length, the more likely you are to encounter tracking errors and star trails. And with aperture, don’t forget that going too wide can introduce optical distortions.
The best way to avoid these pitfalls is to practice and get to know your equipment. Test different settings, take notes, and learn from each session. Over time, you’ll develop a feel for what works best in various conditions.
Case Studies: Successful Focal Length and Aperture Combos
Let’s look at some real-world examples. A classic combo for wide-field astrophotography is a 14mm lens at f/2.8. It’s wide enough to capture the grandeur of the Milky Way while fast enough to keep exposures short and stars sharp. For those interested in planetary or lunar photography, a 200mm lens at f/4 might be ideal. It offers enough magnification to see details and enough light gathering to keep ISOs down.
Each combo serves a different purpose, but both are proven to produce excellent results in their respective areas of astrophotography. The key is to align your equipment choices with your creative vision.
Tips and Techniques for Exceptional Astrophotography
Now that you have a handle on focal length and aperture, let’s put that knowledge into action. Here are some tips and techniques to elevate your astrophotography to celestial heights.
Firstly, always use a sturdy tripod. The stability it provides is non-negotiable when capturing the night sky. Next, consider using a remote shutter release or your camera’s timer function to minimize vibrations when taking the shot. And don’t forget to focus manually; auto-focus often falls short in the dark.
For exposure settings, a good starting point is the “500 rule.” Divide 500 by your focal length to find the maximum exposure time before stars begin to trail. For example, with a 20mm lens, you can expose for 25 seconds (500/20). Adjust your ISO to balance the exposure, aiming for the lowest possible to reduce noise.
Lastly, embrace post-processing. Tools like stacking and noise reduction can turn a good astrophoto into a great one. They help bring out the details and colors that your camera captured but might not be immediately visible in a single shot.
Guiding Lights: Tracking Movement for Optimum Exposure
As Earth spins, the stars wheel across the sky. For exposures longer than a few seconds, this can cause stars to streak or blur. To capture sharp points of light, you’ll need to track their movement. This is where a tracking mount comes into play. It moves your camera at the same rate as the stars, keeping them in the same position on your camera sensor throughout the exposure.
There are various types of tracking mounts, from simple barn-door trackers to sophisticated equatorial mounts. If you’re just starting out, a motorized equatorial mount is a solid investment. It compensates for Earth’s rotation by turning on just one axis. This is not only convenient but also preserves the quality of your images.
And remember, even with a tracking mount, balance your exposure time with your focal length to avoid star trails. This means you might not always be able to use the longest possible exposure your mount can handle, especially if you’re zooming in on a particular star or galaxy.
- Use a sturdy tripod to prevent camera shake.
- Employ a tracking mount to compensate for the Earth’s rotation.
- Balance exposure time with focal length to maintain sharp star points.
- Test different tracking settings to find the best one for your lens and subject.
With these tools and techniques, you’ll be able to capture the night sky with the clarity and sharpness it deserves.
Post-Processing Tricks for Enhancing Your Star Shots
After a night of shooting, the adventure continues on your computer. Post-processing is where good astrophotos become great. Start with basic adjustments like contrast, brightness, and color balance. Then, move on to more advanced techniques like noise reduction and star tightening. Software like Adobe Lightroom and Photoshop, or specialized programs like DeepSkyStacker, can help you bring out the hidden details in your shots.
One powerful technique is image stacking, where multiple shots of the same scene are combined to reduce noise and enhance detail. This requires precise alignment of the stars in each frame, but the result is a cleaner, more detailed image than any single exposure could provide.
Also, don’t shy away from experimenting with filters and effects to bring out the textures and colors of the cosmos. Just be careful not to overdo it; the natural beauty of the night sky is what we’re aiming to capture.
FAQ
What Is the Best Focal Length for Capturing the Milky Way?
The Milky Way is a grand and expansive subject. To capture its vastness, a wide-angle lens is typically best. Focal lengths between 14mm and 24mm on a full-frame camera are ideal. This allows you to include a significant portion of the sky and the landscape below, creating a compelling composition.
But remember, the best focal length also depends on the effect you’re going for. Sometimes, a slightly longer focal length can help isolate interesting features of the Milky Way, like its core, providing a different perspective.
Experiment with different lenses to see how they change the portrayal of the Milky Way in your images. There’s no one-size-fits-all answer, but starting wide is generally a good rule of thumb.
Can I Take Good Astrophotos with a Kit Lens?
Absolutely! While kit lenses may not have the widest apertures or the sharpest optics, they can still capture the night sky effectively. The key is to use them within their limitations. Shoot wide open, stabilize your camera on a tripod, and use longer exposures (but not so long that stars begin to trail).
Remember to shoot in RAW format to maximize your post-processing flexibility. With a bit of tweaking in post, you can often make up for the shortcomings of a less-than-perfect lens.
How Do Crop Sensors Affect Focal Length in Astrophotography?
Crop sensors have a multiplier effect on your focal length, often referred to as the crop factor. For instance, a 24mm lens on a camera with a 1.5x crop factor has an effective focal length of 36mm. This can be beneficial for zooming in on distant objects but reduces the field of view for wide-angle shots.
To compensate, you may need to use a shorter focal length lens to achieve the same field of view as you would on a full-frame camera. This is particularly important to consider when framing wide star fields or the Milky Way.
Is a Fast Aperture Always Better for Shooting Stars?
A fast aperture is often advantageous in astrophotography because it allows more light to reach the sensor, which is crucial in low-light conditions. However, the fastest aperture is not always the best choice. At very wide apertures, optical aberrations can become more pronounced, and the depth of field can be too shallow for some types of astrophotography.
Therefore, while a fast lens is desirable, you may often get better results by stopping down a stop or two from the maximum aperture to achieve the sharpest stars and best overall image quality.
What Are Some Affordable Telescopes or Lenses for Beginners?
Getting into astrophotography doesn’t have to break the bank. There are several affordable telescopes and lenses that can get you started. For telescopes, look for a small refractor or a Newtonian reflector on an equatorial mount. As for lenses, a 50mm f/1.8 lens is a great and affordable option for beginners. It’s versatile, has a wide aperture, and can produce stunning images of the night sky.


