When the stars beckon and the night whispers secrets of the cosmos, there’s nothing quite like capturing that magic through the lens of a camera. Astrophotography is not just about pointing and shooting; it’s a delicate dance with light and shadow, where even the color temperature of your light source can make or break your image. That’s where Kelvin settings come into play. As we embark on this journey through the night sky, let’s unlock the secrets to perfecting our astrophotography with the optimal Kelvin settings.
Key Takeaways
- The optimal Kelvin setting for astrophotography usually ranges between 3400K and 5000K.
- Kelvin settings affect the color balance of your night sky photos, influencing the mood and clarity.
- Manual white balance adjustment is preferred over auto settings to achieve accurate colors in astrophotography.
- Post-processing can be used to refine Kelvin values and enhance the visual impact of your images.
- Understanding the Kelvin scale and experimenting with settings can lead to more creative and striking astrophotographs.
Capturing the Cosmos: A Guide to Kelvin Settings in Astrophotography
So why do Kelvin settings matter for night sky images? Think of it this way: the night sky is like a grand canvas where light from various sources paints a picture. The Kelvin scale helps us control the color of this light, ensuring that our photos truly reflect the beauty of the universe. It’s not just about the stars and galaxies; it’s about presenting them in their truest form.
Why Kelvin Settings Matter for Night Sky Images
Every light source emits a color temperature measured in Kelvin (K). The night sky is no different, and the Kelvin setting you choose can either enhance the natural colors of the stars or introduce unwanted color casts. This is especially crucial in astrophotography, where precision and accuracy bring the wonders of the night to life.
Essential Tools for the Perfect Astrophoto
Before diving into Kelvin temperatures, let’s gear up. To capture the night sky at its best, you’ll need:
- A sturdy tripod to eliminate camera shake and ensure sharp images.
- A camera capable of manual white balance settings, allowing you to adjust the Kelvin temperature to your liking.
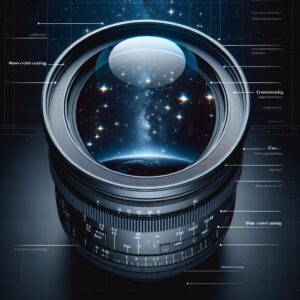
- A wide-angle lens with a large aperture, ideal for capturing expansive star fields and the Milky Way.
- A remote shutter release to prevent vibrations when taking long exposures.
- Post-processing software to fine-tune your images after the shoot.
With these tools in hand, you’re well on your way to creating breathtaking images of the cosmos.
Understanding Kelvin Temperature and Its Role in Astrophotography
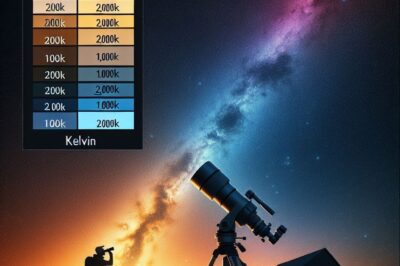
The Kelvin scale is a thermodynamic temperature scale that starts from absolute zero, the point at which all thermal motion ceases. In photography, however, we use it to describe the color temperature of light, ranging from warm orange hues (low Kelvin) to cool blue tones (high Kelvin).
The Kelvin Scale Explained
At the lower end of the scale, around 2000K, we have the warm glow of candlelight. As we move up, household lighting sits at about 3000K, and daylight falls around 5500K. But when we step into the realm of astrophotography, we often look towards the cooler part of the spectrum, which helps us replicate the natural colors of the night sky.
Typically, the Kelvin range for astrophotography falls between 3400K and 5000K. This range helps to balance the natural coolness of the night sky with the warmth of light pollution, which is often a factor when shooting closer to urban areas. By adjusting within this range, you can neutralize unwanted color casts and bring out the true colors of celestial objects.
How Light Temperature Affects Your Astro Images
Light temperature plays a pivotal role in the final appearance of your astrophotography images. A higher Kelvin setting may render the sky in cooler tones, potentially making it appear more natural and helping stars to stand out. Conversely, a lower Kelvin setting can introduce a warmer feel, which might be desirable for certain artistic effects but can also risk drowning out the cooler colors of nebulae and galaxies.
Adjusting for Accuracy: Finding Your Ideal Kelvin Settings
Let’s get practical. When you’re out in the field, under the vast night sky, you’ll want to start with a Kelvin setting that can serve as a reliable baseline. A good starting point is around 3900K. This should give you a relatively neutral starting point from which you can adjust according to the specific conditions of your shoot.
Remember, the ideal setting can vary based on several factors, including atmospheric conditions, light pollution, and the presence of the moon. It’s a game of fine-tuning and patience, but the results are well worth it.
Here’s a quick checklist to guide you through setting the right Kelvin temperature:
- Begin with your camera set to a Kelvin temperature of around 3900K.
- Take a test shot and review the image. Look for natural-looking sky colors and visible details in the stars.
- Adjust the Kelvin setting up or down in small increments to fine-tune the color balance.
- Consider the artistic effect you’re aiming for. Warmer tones might suit a landscape with foreground interest, while cooler tones often complement shots of the galactic core.
- Keep an eye on the histogram to ensure you’re not losing details in the highlights or shadows.
Once you’re back home, you can refine your Kelvin values during post-processing. Tools like Adobe Lightroom or Photoshop offer white balance selectors and sliders that allow you to adjust the color temperature with precision. This is your opportunity to correct any discrepancies and enhance the mood of your image.
It’s important to note that while you can adjust the white balance in post-processing, getting it right in-camera saves you time and gives you the best starting point for editing. This is especially true for astrophotography, where capturing the right colors on-site can make all the difference.
Stay tuned for the next section, where we’ll explore situational settings and advanced techniques to help you dial in those perfect Kelvin adjustments for every celestial scene.
Situational Settings: Ideal Kelvin Ranges for Various Conditions
Each astrophotography session is unique, and the Kelvin setting that worked for one scenario might not be ideal for another. Understanding how to adjust your settings for different celestial events and conditions is key to capturing the night sky in all its glory.
Star Trails and Milky Way Mastery
For star trails and the Milky Way, where you want to capture the cool hues of the night, aim for a Kelvin setting between 4000K and 4500K. This range helps in keeping the sky dark and the stars distinct. If you’re shooting the Milky Way’s galactic core, a slightly cooler temperature may help emphasize the blues and purples of the interstellar dust.
Moonlit Landscapes and Composing with Ambient Light
Moonlight can add a magical touch to your nightscapes, but it can also introduce a cooler tone to your images. To balance the natural coolness, you may want to set your Kelvin closer to 4100K to 4300K. This will warm up the scene slightly, compensating for the moon’s influence and maintaining a natural look.
Planetary Photography and Capturing Fine Details
When photographing planets, you’re often dealing with very specific colors, such as the red of Mars or the bands of Jupiter. Here, a setting around 4500K can provide a good balance between color accuracy and the dark background of space, allowing the planets’ colors to stand out without being overshadowed by a blue cast.
Remember, these are starting points. The joy of astrophotography lies in experimentation and finding the settings that work best for you and your environment.
Advanced Techniques for Precise Kelvin Adjustments
Now that we’ve covered the basics, let’s delve into some advanced techniques that can give you more control over your Kelvin settings in the field.
Custom White Balance: How and When to Use It
Creating a custom white balance based on your specific shooting conditions can give you the most accurate color rendition. To do this, take a photograph of a neutral reference, like a gray card, illuminated by the same light that’s lighting your scene. Then, set this image as the custom white balance reference in your camera’s settings. This tells your camera exactly what neutral looks like under the current lighting, ensuring colors are captured accurately.
Custom white balance is most beneficial when you’re shooting in an environment with mixed lighting or when you want to ensure the utmost color accuracy for your astrophotos.
Utilizing Live View for Real-Time Adjustments
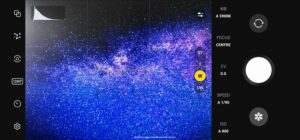
Many modern cameras come equipped with a Live View feature that allows you to see the effects of your Kelvin adjustments in real-time. This is incredibly useful for astrophotography, where subtle changes in color temperature can have a significant impact on your image. Use this to your advantage:
- Turn on Live View and set your camera to manual white balance.
- Adjust the Kelvin setting while observing the changes on the screen.
- Look for a natural balance between the stars and the sky, avoiding overly warm or cool tones.
- Once satisfied, lock in the setting and take your shot.
Live View is a powerful tool that allows for immediate feedback and quick adjustments, ensuring you capture the night sky as you see it.
Bracketing White Balance for Creative Effects
White balance bracketing is another technique where you take multiple shots of the same scene at different Kelvin settings. This gives you a range of images with varying color temperatures to choose from, or to blend together in post-processing for creative effects.
For instance, you might bracket your shots from 3800K to 4200K in 100K increments. Later, you can select the image with the most pleasing colors or combine elements from different shots to create a composite with the perfect balance of warm and cool tones.
Nailing the Shot: Practical Tips for Stellar Astrophotography
“Astrophotography is as much about technique as it is about patience and practice. The more you shoot, the better you become at reading the night sky and adjusting your settings accordingly.” – Renowned Astrophotographer
As you spend more time under the stars, you’ll develop an intuitive sense of how to adjust your Kelvin settings for the best results. But even the most experienced astrophotographers follow a few golden rules:
- Always shoot in RAW format for the greatest flexibility in post-processing.
- Use a lens hood to minimize lens flare from stray light sources.
- Review your images on-site to make adjustments while you still can.
- Take notes of your settings for future reference and learning.
Pairing the right Kelvin settings with solid exposure techniques is crucial. A long exposure will capture more starlight, but go too long and you’ll start to see star trails. Balance your exposure time with your aperture and ISO settings to capture the night sky in all its splendor.
Combining Kelvin Settings with Exposure Techniques
Combining Kelvin settings with the right exposure techniques can elevate your astrophotography from good to great. For example, a lower ISO can reduce noise, while a wide aperture can capture more light. Experiment with these settings in tandem with your Kelvin adjustments to find the perfect combination for your scene.
Mistakes to Avoid with Kelvin and White Balance
One common mistake in astrophotography is neglecting the white balance altogether. Leaving your camera on auto white balance can result in images that are too warm or too cool, and lack consistency. Another mistake is not reviewing your images after adjusting the Kelvin setting. Always check your shots and make incremental changes as needed.
Finally, don’t forget the gear that can make your life easier. A remote shutter release, a star tracker for longer exposures without star trails, and a reliable app to predict astronomical events can all contribute to your success as an astrophotographer.
By now, you should have a solid understanding of how Kelvin settings influence your astrophotography and how to adjust them for various situations. Embrace these techniques, avoid common pitfalls, and with practice, you’ll be capturing the celestial wonders like never before.
Mistakes to Avoid with Kelvin and White Balance
One common mistake in astrophotography is neglecting the white balance altogether. Leaving your camera on auto white balance can result in images that are too warm or too cool, and lack consistency. Another mistake is not reviewing your images after adjusting the Kelvin setting. Always check your shots and make incremental changes as needed.
It’s also easy to fall into the trap of thinking that a higher Kelvin number will automatically yield a better night sky photo. This is not the case; the goal is to find a balance that accurately represents the true colors of the night sky, without letting artificial light pollution dominate the scene.
Must-Have Gear for the Night Sky Enthusiast
To truly excel in astrophotography, there are some essential pieces of equipment that will enhance your ability to capture the night sky. A solid tripod is non-negotiable; it must be sturdy enough to support your camera and lens combo without any wobble, ensuring tack-sharp stars. Additionally, a camera with manual settings will give you the control needed to fine-tune your exposure and Kelvin settings.
A fast wide-angle lens is your best friend when it comes to astrophotography. The wider the lens, the more of the sky you can capture, and a larger aperture lets in more light, which is crucial in low-light conditions. And don’t forget a remote shutter release or intervalometer to avoid camera shake from pressing the shutter button.
Lastly, consider investing in a star tracker or equatorial mount. These devices compensate for the Earth’s rotation, allowing you to take much longer exposures without the stars turning into trails—unless that’s the effect you’re going for, of course.
- Sturdy tripod
- Camera with manual settings
- Fast wide-angle lens
- Remote shutter release or intervalometer
- Star tracker or equatorial mount (optional)
Frequently Asked Questions (FAQ)
As you venture into the realm of astrophotography, questions will inevitably arise. Here are some of the most common inquiries, answered to help you on your journey to capturing the cosmos.
From understanding the best settings for specific scenarios to choosing the right tools, these FAQs cover the essentials that every night sky photographer should know.
What’s the Best Kelvin Setting for Milky Way Photography?
For Milky Way photography, a Kelvin setting that falls between 4000K and 4500K is typically recommended. This cooler temperature range helps to bring out the blues and purples naturally present in the Milky Way, while also contrasting the stars against the darkness of space. For more details, check out our ultimate guide on the best color temperature for astrophotography.
How Does Moonlight Affect My Kelvin Settings?
Moonlight can introduce a cooler tone to your images, which might require you to adjust your Kelvin settings to a slightly warmer range, such as 4100K to 4300K, to maintain a natural look. However, this can vary depending on the phase of the moon and its position in the sky.
- Full moon: Adjust towards the warmer side to counteract the bright, cool light.
- New moon: Opt for cooler settings as you’ll primarily rely on starlight.
Bear in mind that the moon’s brightness and color temperature can also affect the visibility of the Milky Way and other celestial objects, so plan your shoot accordingly.
Can I Use Auto White Balance for Astrophotography?
While it’s possible to use auto white balance (AWB) for astrophotography, it’s not recommended. AWB can lead to inconsistent color temperatures from one image to the next, making it difficult to achieve a cohesive series of shots. Manual Kelvin adjustments offer much more control and predictability.
By setting the white balance manually, you ensure that the camera doesn’t misinterpret the color temperature of the night sky, which can often happen with AWB, especially in low-light conditions where the camera’s sensors are less reliable.
What Tools Can Help Me Set White Balance in the Field?
There are several tools you can use to set white balance accurately while in the field:
A gray card or white balance card can provide a neutral reference point for setting custom white balance. Some cameras also offer built-in white balance tools, like Live View, which allows you to see the impact of Kelvin adjustments in real-time. Additionally, there are mobile apps available that can help you predict the Kelvin values of natural light based on location and time.
How Do I Know if My Kelvin Setting is Correct?
Ultimately, the “correct” Kelvin setting is the one that best represents the scene as you perceive it and meets your artistic vision. To gauge whether your setting is accurate, take test shots and review them on your camera’s display, checking for natural-looking sky colors and visible details in the stars.
Also, don’t forget to use your histogram as a guide; it can help you understand the tonal distribution in your image and whether you’re losing details in the highlights or shadows due to incorrect white balance settings.
Understanding the best camera settings for astrophotography is crucial for capturing the night sky in all its glory. Whether you’re a beginner or an experienced astrophotographer, knowing the right balance of ISO, aperture, and shutter speed can make a significant difference in the quality of your images. Additionally, the Kelvin temperature setting can greatly influence the color balance of your photos, helping to bring out the true colors of the cosmos.


