
Key Takeaways
- The ideal color temperature for astrophotography usually ranges between 3200K and 5500K, depending on your subject and personal preference.
- Shooting in RAW format allows for greater flexibility in adjusting color temperature during post-processing.
- Light pollution can affect the color temperature of your astrophotography, but can be managed with proper settings and filters.
- Understanding the Kelvin scale is crucial for setting the right white balance to capture true-to-life colors of celestial objects.
- Post-processing software can be used to fine-tune the color temperature, enhancing the overall impact of your astrophotography images.
Capturing the Cosmos: Perfect Color for the Perfect Shot
Imagine looking up at a clear night sky, the stars twinkling like diamonds on a cosmic canvas. Now, think about capturing that beauty in a photograph. Astounding, isn’t it? To achieve this, understanding and controlling color temperature is essential. It can be the difference between a good astrophotography image and a great one.
The Kelvin Scale Decoded
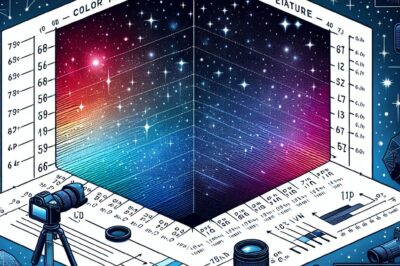
First things first, let’s talk about the Kelvin scale. This scale measures the color temperature of light, which affects the hues in your images. Lower Kelvin values, around 3200K, give a warm, orange glow, while higher values, like 5500K, result in a cooler, blue tone. For astrophotography, you’ll want to lean towards the cooler end of the spectrum to reflect the true colors of the night sky.
Planning Your Shoot Around the Celestial Palette
Before you head out with your camera, consider the celestial targets you aim to capture. Are you shooting the Milky Way, or perhaps the moon? Each requires different color temperature settings to bring out their unique details. For example, the Milky Way often looks best with a setting between 4000K and 4500K, which can accentuate its subtle blues and purples.
Setting the Stage: Optimal Color Temperatures
Now that you’ve got a handle on the Kelvin scale, it’s time to dive into the nitty-gritty. You’ll want to set your camera’s white balance to a specific Kelvin value rather than leaving it on auto. This gives you control over the color narrative of your image, ensuring consistency and accuracy in your shots.
Chasing Starlight: Ideal Settings for Stargazing
When you’re out stargazing, you’re after the natural colors of the stars. Cooler color temperatures around 4800K can help you achieve that. However, don’t be afraid to experiment a bit. Sometimes, the ambient light from your surroundings can influence the shot, and you might need to adjust accordingly.
Galactic Glimpses: Tweaking Temperature for Deep Sky Objects
Deep sky objects like nebulae and galaxies can be a bit trickier. They emit light at different wavelengths, which means your color temperature setting can really make them pop. A setting between 3500K and 4000K often works well, but the best advice is to try different settings and see what brings out the most detail and color in your images.
City Lights and Starry Nights: Balancing Urban Glow
Living in a city doesn’t mean you have to miss out on astrophotography. While city lights can introduce an orange tint to your night sky photos, you can counteract this by setting your camera to a cooler color temperature. Start around 3200K to neutralize the urban glow, and adjust from there based on your results. Besides that, consider using a light pollution filter to help isolate the celestial light.
Remember, the goal is to mimic the natural color of the night sky as closely as possible. In urban settings, this often means compensating for the excess light that can wash out the true colors of the stars and Milky Way. A cooler temperature setting helps to bring back the deep blues and indigos that are masked by the urban light.
Dark Site Dynamics: Adjusting for Pristine Skies
If you’re lucky enough to be shooting from a dark site, free of light pollution, you’ll experience the night sky in its purest form. Here, a color temperature between 4500K and 5500K often works wonders, bringing out the true color of the stars against the blackness of space. It’s a balance that can reveal the stunning hues of distant galaxies and nebulae.
Tech Talk: Camera Settings and Post-Processing
Getting the color temperature right in-camera is just the beginning. Shooting in RAW format is crucial because it captures more data, giving you the freedom to adjust the white balance with precision during post-processing. Whether you’re using Lightroom, Photoshop, or another editing software, the ability to fine-tune the temperature can transform a good shot into a galactic masterpiece.
White Balance Basics: In-Camera vs. Post-Editing
While setting white balance in-camera is important, don’t stress if it’s not perfect on the first try. That’s where post-processing comes in. If you shot in RAW, you can adjust the white balance slider in your editing software to refine the color temperature. This can correct any color casts and enhance the overall mood of your image.
Most importantly, remember that the white balance setting in your camera is just a starting point. It’s in post-processing that you can truly dial in the desired atmosphere of your astrophotography, whether you’re aiming for the cold void of space or the warm embrace of a starlit night.
Software Solutions: Achieving True-to-Life Tones in Editing
Editing software is a powerful ally in achieving true-to-life tones. Here’s where you can employ tools like color calibration and targeted adjustments to specific hues. For instance, if you want to enhance the reds in a nebula or the blues in a star cluster, the HSL (Hue, Saturation, Luminance) sliders are invaluable. This fine-tuning is the secret to photos that truly reflect the splendor of the cosmos.
Navigating the Milky Way of Color
The Milky Way is a treasure trove of color, and capturing it requires a keen eye for temperature settings. As a general rule, lean towards a cooler color temperature to bring out the silvery-blue tones of our galaxy. This can help differentiate the Milky Way from the surrounding stars, providing depth and contrast to your composition.
The Spectrum of Shooting Stars: Understanding Variability
Stars come in a variety of colors, from red giants to blue supergiants. Your color temperature setting can enhance these differences, making your photos more dynamic. Pay attention to the stars’ colors in your frame and adjust your settings to celebrate their diversity. A slight tweak can make a world of difference in highlighting a star’s unique hue.
Moonlit Marvels: Hues for Lunar Landscapes
Photographing the moon is a different game. Here, a color temperature that’s too cool can rob the moon of its natural glow. Instead, aim for a setting around 4100K to 4600K to maintain the moon’s delicate balance of grays and whites while preserving the dark sky’s color.
Whether it’s a crescent or full moon, the correct color temperature can enhance the details and textures of the lunar surface, making your moon shots stand out. Remember, the moon reflects sunlight, so you’re essentially capturing daylight bounced off a distant object.
FAQ: Fine-Tuning Your Astrophotography Experience
Let’s tackle some common questions to help you fine-tune your astrophotography experience even further.
What is the best color temperature for photographing the Milky Way?
The Milky Way often looks its best at cooler color temperatures, typically between 4000K and 4500K. This range helps to bring out the galaxy’s subtle hues and maintain the contrast needed to distinguish it from the background stars.
How do light pollution filters affect color temperature in astrophotography?
Light pollution filters can help reduce the warm color cast caused by artificial lighting, making it easier to achieve a natural-looking night sky in your photos. They work by blocking specific wavelengths of light associated with common sources of light pollution.
Can color temperature be adjusted during post-processing?
Yes, color temperature can be adjusted during post-processing, especially if you shoot in RAW format. This gives you the flexibility to alter the white balance to achieve the desired effect without losing image quality.
Why is RAW format preferred when adjusting color temperature?
RAW format is preferred because it captures all the data from your camera’s sensor, providing the highest level of quality and flexibility in post-processing. This means you can adjust the color temperature without degrading the image, unlike with compressed formats like JPEG.
Does the moon’s phase impact the ideal color temperature for night shots?
The moon’s phase doesn’t directly impact the color temperature, but it does affect the amount of light in your scene. A full moon can act like a giant reflector, filling the sky with light and potentially altering the appearance of stars and the Milky Way. Adjust your color temperature accordingly to compensate for the additional light. For more tips on capturing the night sky, check out our astrophotography exposure guide.
Key Takeaways
- The ideal color temperature for astrophotography usually ranges between 3200K and 5500K, depending on your subject and personal preference.
- Shooting in RAW format allows for greater flexibility in adjusting color temperature during post-processing.
- Light pollution can affect the color temperature of your astrophotography, but can be managed with proper settings and filters.
- Understanding the Kelvin scale is crucial for setting the right white balance to capture true-to-life colors of celestial objects.
- Post-processing software can be used to fine-tune the color temperature, enhancing the overall impact of your astrophotography images.
Capturing the Cosmos: Perfect Color for the Perfect Shot
Imagine looking up at a clear night sky, the stars twinkling like diamonds on a cosmic canvas. Now, think about capturing that beauty in a photograph. Astounding, isn’t it? To achieve this, understanding and controlling color temperature is essential. It can be the difference between a good astrophotography image and a great one.
The Kelvin Scale Decoded
First things first, let’s talk about the Kelvin scale. This scale measures the color temperature of light, which affects the hues in your images. Lower Kelvin values, around 3200K, give a warm, orange glow, while higher values, like 5500K, result in a cooler, blue tone. For astrophotography, you’ll want to lean towards the cooler end of the spectrum to reflect the true colors of the night sky.
Planning Your Shoot Around the Celestial Palette
Before you head out with your camera, consider the celestial targets you aim to capture. Are you shooting the Milky Way, or perhaps the moon? Each requires different color temperature settings to bring out their unique details. For example, the Milky Way often looks best with a setting between 4000K and 4500K, which can accentuate its subtle blues and purples.
Setting the Stage: Optimal Color Temperatures
Now that you’ve got a handle on the Kelvin scale, it’s time to dive into the nitty-gritty. You’ll want to set your camera’s white balance to a specific Kelvin value rather than leaving it on auto. This gives you control over the color narrative of your image, ensuring consistency and accuracy in your shots.
Chasing Starlight: Ideal Settings for Stargazing
When you’re out stargazing, you’re after the natural colors of the stars. Cooler color temperatures around 4800K can help you achieve that. However, don’t be afraid to experiment a bit. Sometimes, the ambient light from your surroundings can influence the shot, and you might need to adjust accordingly.
Galactic Glimpses: Tweaking Temperature for Deep Sky Objects
Deep sky objects like nebulae and galaxies can be a bit trickier. They emit light at different wavelengths, which means your color temperature setting can really make them pop. A setting between 3500K and 4000K often works well, but the best advice is to try different settings and see what brings out the most detail and color in your images.
City Lights and Starry Nights: Balancing Urban Glow
Living in a city doesn’t mean you have to miss out on astrophotography. While city lights can introduce an orange tint to your night sky photos, you can counteract this by setting your camera to a cooler color temperature. Start around 3200K to neutralize the urban glow, and adjust from there based on your results. Besides that, consider using a light pollution filter to help isolate the celestial light.
Remember, the goal is to mimic the natural color of the night sky as closely as possible. In urban settings, this often means compensating for the excess light that can wash out the true colors of the stars and Milky Way. A cooler temperature setting helps to bring back the deep blues and indigos that are masked by the urban light.
Dark Site Dynamics: Adjusting for Pristine Skies
If you’re lucky enough to be shooting from a dark site, free of light pollution, you’ll experience the night sky in its purest form. Here, a color temperature between 4500K and 5500K often works wonders, bringing out the true color of the stars against the blackness of space. It’s a balance that can reveal the stunning hues of distant galaxies and nebulae.
Tech Talk: Camera Settings and Post-Processing
Getting the color temperature right in-camera is just the beginning. Shooting in RAW format is crucial because it captures more data, giving you the freedom to adjust the white balance with precision during post-processing. Whether you’re using Lightroom, Photoshop, or another editing software, the ability to fine-tune the temperature can transform a good shot into a galactic masterpiece.
White Balance Basics: In-Camera vs. Post-Editing
While setting white balance in-camera is important, don’t stress if it’s not perfect on the first try. That’s where post-processing comes in. If you shot in RAW, you can adjust the white balance slider in your editing software to refine the color temperature. This can correct any color casts and enhance the overall mood of your image.
Most importantly, remember that the white balance setting in your camera is just a starting point. It’s in post-processing that you can truly dial in the desired atmosphere of your astrophotography, whether you’re aiming for the cold void of space or the warm embrace of a starlit night.
Software Solutions: Achieving True-to-Life Tones in Editing
Editing software is a powerful ally in achieving true-to-life tones. Here’s where you can employ tools like color calibration and targeted adjustments to specific hues. For instance, if you want to enhance the reds in a nebula or the blues in a star cluster, the HSL (Hue, Saturation, Luminance) sliders are invaluable. This fine-tuning is the secret to photos that truly reflect the splendor of the cosmos.
Navigating the Milky Way of Color
The Milky Way is a treasure trove of color, and capturing it requires a keen eye for temperature settings. As a general rule, lean towards a cooler color temperature to bring out the silvery-blue tones of our galaxy. This can help differentiate the Milky Way from the surrounding stars, providing depth and contrast to your composition.
The Spectrum of Shooting Stars: Understanding Variability
Stars come in a variety of colors, from red giants to blue supergiants. Your color temperature setting can enhance these differences, making your photos more dynamic. Pay attention to the stars’ colors in your frame and adjust your settings to celebrate their diversity. A slight tweak can make a world of difference in highlighting a star’s unique hue.
Moonlit Marvels: Hues for Lunar Landscapes
Photographing the moon is a different game. Here, a color temperature that’s too cool can rob the moon of its natural glow. Instead, aim for a setting around 4100K to 4600K to maintain the moon’s delicate balance of grays and whites while preserving the dark sky’s color.
Whether it’s a crescent or full moon, the correct color temperature can enhance the details and textures of the lunar surface, making your moon shots stand out. Remember, the moon reflects sunlight, so you’re essentially capturing daylight bounced off a distant object.
FAQ: Fine-Tuning Your Astrophotography Experience
Let’s tackle some common questions to help you fine-tune your astrophotography experience even further.
What is the best color temperature for photographing the Milky Way?
The Milky Way often looks its best at cooler color temperatures, typically between 4000K and 4500K. This range helps to bring out the galaxy’s subtle hues and maintain the contrast needed to distinguish it from the background stars. For more details on capturing the night sky, check out our astrophotography exposure guide.
How do light pollution filters affect color temperature in astrophotography?
Light pollution filters can help reduce the warm color cast caused by artificial lighting, making it easier to achieve a natural-looking night sky in your photos. They work by blocking specific wavelengths of light associated with common sources of light pollution.
Can color temperature be adjusted during post-processing?
Yes, color temperature can be adjusted during post-processing, especially if you shoot in RAW format. This gives you the flexibility to alter the white balance to achieve the desired effect without losing image quality.
Why is RAW format preferred when adjusting color temperature?
RAW format is preferred because it captures all the data from your camera’s sensor, providing the highest level of quality and flexibility in post-processing. This means you can adjust the color temperature without degrading the image, unlike with compressed formats like JPEG.
Does the moon’s phase impact the ideal color temperature for night shots?
The moon’s phase doesn’t directly impact the color temperature, but it does affect the amount of light in your scene. A full moon can act like a giant reflector, filling the sky with light and potentially altering the appearance of stars and the Milky Way. Adjust your color temperature accordingly to compensate for the additional light.


