
Staring up at the night sky, you’re captivated by the twinkling stars and the milky ribbon of the galaxy. You’ve got your camera in hand, and you’re ready to capture the celestial dance. But how do you photograph these wonders without turning them into blurry streaks across the sky? That’s where the Rule of 600 comes in—a simple, yet powerful technique that every stargazer should know to take awe-inspiring photos of the night sky.
Key Takeaways
-
The Rule of 600 is a guideline for astrophotographers to avoid star trails by setting the right shutter speed.
-
Shutter speed should be 600 divided by the focal length of your lens to capture sharp stars.
-
Different sensor sizes require adjustments to the Rule of 600 for optimal results.
-
ISO and aperture settings are crucial to balance exposure and minimize noise in your astrophotos.
-
Stacking images and post-processing can further enhance the clarity and detail of your night sky photos.
Capturing the Cosmos: Mastering the Rule of 600 for Stellar Shots
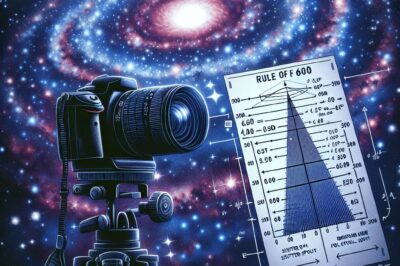
Let’s begin with the basics. When you take a photo of the night sky, the Earth’s rotation can cause stars to appear as streaks rather than points of light. To prevent this, we use the Rule of 600—a quick formula to help you set the right shutter speed. It’s simple: take the number 600 and divide it by the focal length of your lens. The result is the longest exposure time in seconds you can use before stars start trailing.
The Basics of the Rule of 600
For example, if you’re using a 24mm lens on a full-frame camera, you’d calculate 600 / 24 to get 25 seconds. This means you can expose your photo for up to 25 seconds without worrying about star trails. It’s a great starting point, but remember, there’s a bit more to consider for that perfect shot.
Exploiting Camera Settings for Perfect Night Sky Images
While the Rule of 600 gives you a guideline for shutter speed, you also need to balance your ISO and aperture settings. A higher ISO lets you capture more light, but can introduce noise. A wider aperture lets in more light, too, but can affect the sharpness of the stars. You’ll need to experiment to find the sweet spot for your camera and the conditions you’re shooting in.
Unlock the Secrets of the Night Sky
What Is the Rule of 600?
The Rule of 600 is rooted in the desire to capture the night sky as we see it with our own eyes—crisp, clear, and breathtaking. It’s a guideline that helps us freeze the motion of the stars due to Earth’s rotation in our photographs. When we talk about avoiding star trails, we’re really talking about capturing a moment of the infinite, and the Rule of 600 is the key to that time capsule.
But why 600? It’s a number that has been found to work well for many lenses and cameras, providing a balance between exposure time and the apparent motion of stars. It’s not a one-size-fits-all solution, though. Factors like sensor size and the direction you’re pointing your camera in the sky can affect the outcome. That’s why understanding the rule and knowing when to adjust it is crucial.
Most importantly, the Rule of 600 is a starting point. As you grow in your astrophotography journey, you’ll learn to tweak and bend the rule to suit your style and the stories you want to tell with your images.
-
To use the Rule of 600, simply divide 600 by your lens’ focal length.
-
Remember to adjust for your camera’s sensor size, as crop sensors will have a different ‘effective’ focal length.
-
Experiment with your ISO and aperture settings to complement the shutter speed set by the Rule of 600.
Why the Rule of 600 Matters in Astrophotography
The beauty of a night sky photo lies in its ability to transport the viewer to a moment of cosmic wonder. The Rule of 600 is essential because it helps you capture that wonder without the distraction of star trails, which can take away from the impact of a crisp, star-filled sky. By using this rule, you ensure that each star appears as a sharp point of light, just as it does when you gaze upward on a clear night.
Besides that, understanding the Rule of 600 is your first step towards taking control of your astrophotography. It empowers you to make informed decisions about your camera settings, which is the foundation of capturing stunning images of the night sky.
Now, let’s move on to perfecting your technique and exploring how to adjust the Rule of 600 for different scenarios.
Factors That Affect Your Rule of 600 Calculations
Before we dive into camera settings, it’s crucial to understand the factors that can affect your Rule of 600 calculations. First, the type of camera sensor you have matters—a full-frame sensor versus a crop sensor will change the game. Crop sensors have a ‘crop factor’ that effectively increases the focal length, which means you’ll need to adjust the Rule of 600 accordingly. For instance, with a crop factor of 1.5, you’d multiply your lens’ focal length by 1.5 before doing the 600 division.
Secondly, the location of the stars you’re capturing plays a role. Stars near the celestial equator move faster across the sky, so you might need a shorter exposure than the Rule of 600 suggests. On the other hand, stars closer to the celestial poles move slower and can tolerate longer exposures.
Lastly, the resolution of your camera can also impact your calculations. Higher resolution cameras can pick up more detail, which means star trails may become visible with longer exposures that would have been acceptable on lower resolution cameras. Therefore, it might be wise to use a modified rule, like 500 or even 400, to compensate for these factors.
Optimal Camera Settings for the Rule of 600
Now that you’ve got a handle on the Rule of 600, let’s get those camera settings dialed in for the best possible shots of the night sky.
Getting to Know Your Camera’s ISO Limits
ISO controls your camera’s sensitivity to light. A higher ISO means more sensitivity, but it also brings more noise, which looks like grain in your photos. The trick is to find the highest ISO that gives you a well-exposed image without too much noise. This will vary from camera to camera, so take some test shots at different ISO levels to see what your camera can handle. A good starting point might be ISO 1600 or 3200 for many cameras. For more detailed guidance, consider exploring this comprehensive introduction to astrophotography.
-
Start with ISO 1600 and take a test shot.
-
Check the image for noise and adjust the ISO if necessary.
-
Remember, the goal is to find the highest ISO with acceptable noise levels for your camera.
Adjusting your ISO is a balancing act. You want to let enough light in to capture the stars, but not so much that the noise overpowers the details. It’s worth spending some time getting to know your camera’s limits here.
Choosing the Right Aperture for Night Sky Clarity
Aperture is like the pupil of your camera’s eye—it controls how much light enters. In astrophotography, we usually want a wide aperture to let in as much light as possible, often referred to as a ‘fast’ lens. An aperture of f/2.8 or wider is ideal. But be cautious: too wide an aperture can sometimes reduce sharpness at the edges of your image, known as ‘coma.’ Again, test shots are your friend here to find the sweet spot.
Manual Mode: Harnessing Full Control for Night Photography
When shooting the stars, you want full control over your camera’s settings, and that’s what manual mode offers. You can adjust the shutter speed, aperture, and ISO independently to create the perfect exposure for your night sky images. This might seem daunting at first, but with practice, you’ll learn how these settings interact and how to adjust them for the best results.
Advanced Tips for Breathtaking Astrophotography
With the basics out of the way, let’s take your astrophotography to the next level with some advanced tips.
Composing the Milky Way: Tips for Finding Your Stargazing Spot
Finding the perfect spot to shoot the Milky Way is a part of the adventure. Look for locations with dark skies, far from the light pollution of cities. Use apps or websites that show light pollution maps to help you find the darkest skies. Once there, give your eyes at least 20 minutes to adjust to the darkness—you’ll see more stars and be able to compose your shot better.
-
Use a light pollution map to find dark skies.
-
Arrive early to let your eyes adjust to the dark.
-
Look for interesting foreground elements to add depth to your composition.
Remember, the Milky Way is most visible during certain times of the year, so plan accordingly. In the Northern Hemisphere, for example, the core of the Milky Way is best seen during the summer months.
Nailing the Focus in the Dark: Techniques for Sharpness
Focusing at night can be tricky. If you have a lens with an infinity mark, start there, but don’t rely on it blindly—sometimes lenses can focus past infinity. Instead, use your camera’s live view mode to zoom in on a bright star and manually adjust the focus until the star is a sharp point of light. Take a test shot and review the image to ensure all stars are in focus.
For even sharper images, consider using a technique called ‘focus stacking.’ This involves taking several photos with different focus points and combining them in post-processing to create an image with greater depth of field.
Taking Advantage of Moonless Nights
The moon is a beautiful subject, but its brightness can wash out the stars. For the darkest skies and the most stars, plan your shoots during a new moon or when the moon is below the horizon. This will allow you to capture the faintest stars and the most detail in the Milky Way.
Bringing Your Cosmic Imagery to Life
You’ve planned, you’ve shot, and now it’s time to bring those images to life with post-processing. This is where you can really make your photos pop. Use software like Adobe Lightroom or Photoshop to adjust exposure, contrast, and color balance. Don’t be afraid to push the limits a little to bring out the details in the Milky Way or to make those stars twinkle.
But the most powerful tool in your astrophotography arsenal might just be image stacking. By taking multiple exposures of the same scene and combining them, you can reduce noise and increase detail. Software like DeepSkyStacker is designed specifically for this and can make a big difference in your final image.
Remember, astrophotography is as much an art as it is a science. While the Rule of 600 is a great starting point, don’t be afraid to bend the rules to capture the night sky as you see it. With practice, patience, and a little bit of luck, you’ll be taking breathtaking photos that inspire stargazers everywhere.
Taking Advantage of Moonless Nights
When the moon is out of sight, the stars get their chance to shine with full splendor. Moonless nights are a treasure trove for astrophotographers. The absence of moonlight means the sky is at its darkest, allowing the faintest of stars to become visible. Planning your shoot during the new moon phase, or when the moon sets, will give you the darkest backdrop for the celestial objects you’re aiming to capture. This is the time when the Milky Way truly stands out, revealing its intricate details and the full breadth of its majesty.
After a night spent under the stars, you’ll have a collection of raw images waiting to reveal their secrets. This is where the magic of post-processing comes into play. With tools like Adobe Lightroom and Photoshop, you can adjust the exposure, bring out the colors of the Milky Way, and enhance the contrast to make the stars stand out. Your goal in post-processing is to reflect the beauty of the night sky as you experienced it, ensuring the emotions and awe you felt are conveyed in your final image.
Stacking for Noise Reduction and Detail Enhancement
One of the most effective techniques to enhance your astrophotography is image stacking. This process involves taking multiple shots of the same scene and layering them to reduce noise and bring out more details. It’s particularly useful in astrophotography where light is limited and noise can be a significant issue. Software like DeepSkyStacker or Sequator can help you with this process, aligning and combining your images to create a single, noise-reduced composite with stunning clarity.
Post-Processing Tips: From Capture to Creation
Your journey from capture to creation involves several key post-processing steps. Begin by adjusting the white balance to accurately represent the cool hues of the night sky. Next, tweak the highlights and shadows to reveal the structure of the Milky Way. Increase clarity and sharpness to make the stars pop, and don’t shy away from using noise reduction tools to clean up the image. Lastly, consider the overall composition and crop if necessary to create a more impactful frame. With these steps, your astrophotography will come to life, ready to inspire and amaze.
When to Break the Rules: Creative Astrophotography
Rules in photography are meant to guide, not restrict. As you grow more comfortable with the Rule of 600 and other astrophotography techniques, don’t hesitate to experiment. Maybe you want to capture star trails to convey the Earth’s rotation, or perhaps you’re aiming for an artistic blur that adds a sense of motion to your images. Creative astrophotography is about expressing your vision and storytelling through the lens, so embrace your creativity and let the stars be your canvas.
FAQ
How Do I Adjust the Rule of 600 for a Crop Sensor Camera?
With a crop sensor camera, you’ll need to account for the crop factor, which typically ranges from 1.5 to 1.6 for most models. To adjust the Rule of 600, first multiply your lens’s focal length by the crop factor to get the effective focal length. Then divide 600 by this number. For example, if you’re using a 24mm lens with a crop factor of 1.5, you’ll calculate 600 / (24 * 1.5) to get an exposure time of around 16 seconds.
Can I Use the Rule of 600 for Deep Sky Objects?
The Rule of 600 is primarily designed for wide-field astrophotography where you’re capturing stars as points of light across the sky. When it comes to deep sky objects like nebulae or galaxies, you may require longer exposures and potentially a tracking mount to follow the object’s movement across the sky. While the Rule of 600 can give you a starting point, deep sky astrophotography often involves more complex techniques and equipment.
What If My Photos Still Show Star Trails?
If you’re still seeing star trails after applying the Rule of 600, consider using a shorter exposure time. Remember, the rule is a guideline, not a one-size-fits-all solution. Factors like sensor resolution, the part of the sky you’re photographing, and personal preferences for what constitutes an acceptable trail may require you to adapt the rule. Try using the Rule of 500 or even 400 as an alternative to achieve sharper images.
How Do I Balance ISO Settings with Noise in my Astrophotography?
Balancing ISO settings with noise is a common challenge in astrophotography. Start with a moderate ISO setting and gradually increase it until you achieve a bright enough exposure without introducing excessive noise. Take test shots and review them to see how high you can push your ISO before the noise becomes detrimental to your image quality. Utilizing noise reduction in post-processing can also help mitigate some of the graininess.


