When you look up at the night sky, you’re greeted with a canvas of twinkling stars, each radiating with its own hue and intensity. Capturing that beauty through astrophotography is an art form that combines passion, patience, and technical prowess. And one crucial aspect of this art is understanding and mastering white balance settings to ensure the colors of the cosmos are depicted accurately in your images.
Key Takeaways
- White balance in astrophotography is crucial for accurate color representation of celestial objects.
- Shooting in RAW format allows for greater flexibility in adjusting white balance during post-processing.
- Daylight white balance settings often serve as a good starting point for night sky photography.
- Custom white balance settings can be adjusted in-camera for specific astrophotography needs.
- Post-processing software provides tools to fine-tune white balance for the perfect shot.
Capturing the Cosmos: A Guide to White Balance in Astrophotography
Why White Balance Matters in Capturing the Night Sky
Imagine capturing the Milky Way only to find it tinted with an unnatural orange glow or a deep sky object like a nebula losing its delicate shades of pink and green. That’s where white balance comes into play. It’s the tool that ensures the colors in your astrophotographs match what we see with our eyes, or at least come as close as possible given the limitations of our equipment and the Earth’s atmosphere.
Understanding the Science of Light and Color in Space
Light is a spectrum, and different sources of light have different color temperatures. These temperatures are measured in Kelvin (K). The night sky has a color temperature that often exceeds the common range of our cameras’ white balance settings, which is why astrophotography can be challenging. The goal is to set your camera to a white balance that matches the true color temperature of the night sky, thus ensuring the colors of stars and other celestial bodies are rendered accurately.
Mastering White Balance Settings for Stellar Shots
Most cameras have preset white balance settings like ‘Daylight’, ‘Tungsten’, or ‘Fluorescent’, but these presets might not do justice to the complexities of the night sky. A ‘Daylight’ setting, for instance, is a good starting point because it’s designed for a sunlit environment, similar to the light emitted by many stars. However, it may still need adjustments based on the specific conditions of your shoot. For more detailed guidance, check out our ultimate guide to color temperature for astrophotography.
Optimal White Balance for Starry Landscapes
To capture a starry landscape where the sky meets the Earth, start with these steps:
- Set your camera to ‘Daylight’ white balance as a baseline.
- Review your test shots and look for any color casts. If the stars appear too warm (yellow/orange), you’ll need to adjust the white balance towards a cooler (blue) setting.
- If you’re shooting in RAW, don’t stress too much about getting it perfect in-camera. You’ll have the opportunity to adjust it later during post-processing.
Remember, different light sources on the ground, like city lights or campfires, can affect the white balance of your sky. You’ll need to find a balance that works for both the landscape and the stars.
For a more detailed understanding, consider the following scenario:
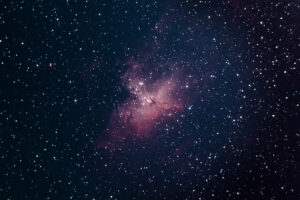
While photographing the Orion Nebula, you notice the surrounding stars have a slight yellow tint in your images. By shifting your white balance setting towards a cooler temperature, you can correct this and bring out the true color of the stars.
Now, let’s move on to deep sky objects, which require a bit more finesse.
Custom White Balance: Step-by-Step Configuration
Setting a Custom White Balance in the Field
When you’re out under the stars, you have the unique opportunity to set a custom white balance that caters to the specific lighting conditions of your celestial scene. Here’s how to do it:
- Point your camera at a neutral-colored surface, like a gray card, that’s illuminated by the same light as your subject.
- Access the custom white balance setting in your camera’s menu and follow the prompts to capture a white balance reference image.
- Set this custom reading as your white balance, and take a test shot to ensure the colors look natural.
With these steps, you’ll be able to minimize color casts and bring out the true beauty of the night sky in your astrophotography.
White Balance Adjustment Tips for Different Cameras
Different cameras have different ways of handling white balance adjustments. Here’s a quick guide:
- DSLRs: Usually offer a custom white balance option where you can set the Kelvin value manually or use a reference photo.
- Mirrorless: Similar to DSLRs, but often with more intuitive touchscreen interfaces for selecting white balance settings.
- Point-and-Shoot: These cameras might have fewer options, but you can still often select from presets or a custom setting based on a reference image.
Take the time to learn your camera’s white balance capabilities before heading out for your night photography session.
For example, understanding the correct white balance settings is crucial for capturing the true colors of the night sky in astrophotography.
If you’re using a Nikon DSLR, you might find the ‘Presets Manual’ white balance setting that allows you to use a reference photo. For a Canon DSLR, look for the ‘Custom White Balance’ option in the menu.
Post-Processing Techniques for Perfect Color Balance
Navigating White Balance in Post-Processing Software
Once you’ve captured your raw astrophotography images, you can fine-tune the white balance during the editing process. Software like Adobe Lightroom or Photoshop allows you to adjust the temperature and tint sliders to achieve the desired color balance. This is particularly useful if you didn’t get the white balance quite right in the field or if you’re looking to creatively alter the mood of your image.
For instance, you might want to enhance the cool blues of a starry night or bring out the reds and oranges in a nebula. Post-processing gives you the control to make these adjustments with precision.
- Open your RAW file in your chosen editing software.
- Use the white balance selector tool (often an eyedropper icon) to pick a neutral area in the image. This sets a baseline for color correction.
- Adjust the temperature and tint sliders to fine-tune the colors until you’re satisfied with the appearance.
- Compare the before and after to ensure you’ve achieved a natural-looking color balance.
Advanced Tips for Refining White Balance in Editing
Beyond the basics, here are some pro-level tips for refining white balance in your astrophotography edits:
- Use the histogram to guide your adjustments. Ensure there’s a balance across the shadows, midtones, and highlights.
- Split toning can add depth to your images by applying different colors to the highlights and shadows.
- For challenging light conditions, consider using gradient filters to apply white balance adjustments to specific areas of your image.
Remember, the goal is to maintain the integrity of the celestial colors while also creating an image that resonates with the viewer.
Practical Exercises to Hone Your Color Accuracy
Practice makes perfect, and this is especially true when it comes to white balance in astrophotography. Try these exercises:
- Take multiple shots of the same scene using different white balance presets and custom settings. Compare them to see which is most accurate.
- Edit a single image multiple times, experimenting with various white balance adjustments in your software. Note the changes and how they affect the mood of the image.
- Challenge yourself by photographing in locations with different light pollution levels and adjusting your white balance accordingly.
Through these exercises, you’ll develop a keen eye for color and white balance that will elevate your astrophotography to new heights.
Real-World Scenarios: White Balance Adjustments
Now, let’s dive into some real-world scenarios. Say you’re out in the field, and you’ve set up your gear for a night of astrophotography. You’ve checked all your settings, but the preview on your camera’s screen seems off, with the stars appearing too blue. This is a clear sign that your white balance needs adjustment. You’ll want to warm up the image, so you adjust your white balance towards a higher Kelvin number to introduce some reds and balance out the blues.
Another scenario might be when you’re shooting a landscape under moonlight. The moon, reflecting sunlight, should ideally give you a natural white light, but the camera might interpret this light as too cool. By setting a custom white balance using a gray card illuminated by the moonlight, you can achieve a more accurate color representation in your photos.
It’s all about experimentation and understanding the impact of your adjustments. There’s no one-size-fits-all setting for white balance in astrophotography, so take the time to learn what works best for your specific situation.
Experimenting with White Balance: Practice Guide
Here’s a simple guide to help you practice and perfect your white balance settings:
- Start with your camera’s preset white balance settings and take note of how they affect the color of the sky and stars.
- Progress to setting a custom white balance using a reference point that’s neutral under the lighting conditions you’re shooting in.
- Review your images on a computer, not just on your camera’s screen, to truly assess the color accuracy.
- Make a habit of shooting in RAW so you can refine your white balance in post-processing if needed.
- Keep a log of the white balance settings you use in different conditions to build a personal reference over time.
With practice, you’ll develop an intuitive sense of how to adjust white balance to suit any astrophotography session.
FAQ
Is auto white balance sufficient for astrophotography?
While auto white balance can sometimes provide acceptable results, it often doesn’t account for the unique lighting conditions of the night sky. Therefore, I recommend starting with a preset like ‘Daylight’ and then fine-tuning from there, or better yet, setting a custom white balance if your camera allows it.
What is the Kelvin scale and how does it relate to astrophotography?
The Kelvin scale measures the color temperature of light, which is a way to describe the appearance of the light source. Cooler light has higher Kelvin values and appears more blue, while warmer light has lower Kelvin values and appears more yellow. In astrophotography, we use the Kelvin scale to adjust our white balance so that the colors of the night sky are accurately represented in our images.
How does one handle white balance in light-polluted areas?
In light-polluted areas, it’s particularly challenging to get the white balance right because of the various artificial light sources. A custom white balance setting is often necessary. You can use a gray card to set this in the field or adjust the white balance in post-processing to counteract the orange glow of city lights.
Example: After setting up your camera in a suburban area with moderate light pollution, you notice an orange tint to your images. By adjusting the white balance towards a cooler temperature, you can mitigate the effects of the light pollution and reveal the true colors of the night sky.
Can white balance be corrected if shooting in JPEG format?
While it’s possible to correct white balance in JPEG images to some extent, the flexibility is limited compared to RAW files. JPEG files are already processed and compressed, so making significant changes to white balance can lead to a loss in image quality. It’s always best to shoot in RAW for maximum post-processing leeway.
Are certain cameras better for white balance control in astrophotography?
While most modern cameras offer adequate white balance control for astrophotography, some may provide more advanced features or better performance at high ISO settings, which is beneficial for low-light photography. Mirrorless cameras, for example, tend to have more intuitive interfaces for adjusting white balance and may offer better live previews, which can be helpful when setting up your shot.
In conclusion, understanding and mastering white balance is essential for capturing the true beauty of the cosmos. Whether you’re adjusting settings in the field or fine-tuning colors in post-processing, the time and effort you put into learning this skill will pay off in the stunning clarity and vibrancy of your celestial photographs. Keep practicing, keep experimenting, and most importantly, keep looking up—your next breathtaking astrophotograph is just a shutter click away.


