Key Takeaways
-
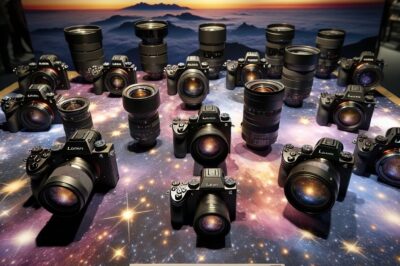
Mirrorless cameras offer advantages like lighter weight and electronic viewfinders which are beneficial for astrophotography.
-
When choosing a camera, prioritize features such as sensor size, ISO range, and dynamic range.
-
Popular choices for astrophotography include the Sony A7R IV and Nikon Z6 II due to their high-resolution sensors and excellent low-light performance.
-
Proper camera setup and the use of accessories like tripods and remote releases can significantly improve astrophotography results.
-
Post-processing is a crucial step in bringing out the details and colors of the night sky in your images.
Capturing the Cosmos: Top Mirrorless Cameras for Astro-Enthusiasts
Why Mirrorless for the Stars?
When the night sky beckons with its celestial wonders, having the right gear is crucial. Mirrorless cameras have emerged as a favorite for astrophotographers, and for good reason. They’re typically lighter than DSLRs, making them easier to carry on nocturnal adventures. But that’s just the start. The electronic viewfinders in mirrorless cameras provide a real-time preview of your image, which is incredibly helpful in the dark where framing a shot can be challenging. Plus, the absence of a mirror reduces camera shake, a vital factor when capturing the delicate details of the stars.
Picking the Brightest Stars: Features to Look For
Before diving into the vast ocean of stars with your camera, let’s focus on the features that will make the most difference. First, the sensor size is paramount. A larger sensor can gather more light, which is essential in the low-light conditions of astrophotography. Then, consider the ISO range. A camera that can handle high ISO settings without significant noise can be a game-changer for capturing dim stars. Dynamic range is another key factor, as it allows you to capture a wide spectrum of light, from the faintest star to the brightest galaxy.
Don’t forget about the lens mount compatibility. The ability to use a variety of lenses, especially wide-angle and fast aperture ones, can greatly enhance your astrophotography experience. And most importantly, look for a camera with manual controls. Having the ability to manually adjust settings like exposure, focus, and ISO lets you fine-tune your shots for the best possible results.
Mirrorless Marvels: The Game Changers in Night Sky Photography
Understanding Sensor Sizes
Let’s break it down. Sensors are the digital equivalent of film; they’re what capture the light to create your image. In mirrorless cameras, full-frame sensors are the gold standard for astrophotography. They’re the same size as a 35mm film frame and allow for more light to be captured, which is exactly what you need when shooting the night sky. But that doesn’t mean you should dismiss crop sensors, which are smaller and can still deliver impressive results, especially when paired with the right lenses.
The Benefit of High ISO Capabilities
Now, onto ISO. Think of ISO as the sensitivity setting of your camera. The higher the ISO, the more sensitive it is to light, which is crucial in astrophotography where light is scarce. However, cranking up the ISO can introduce noise, which looks like grain in your images. The best mirrorless cameras for astrophotography have sensors that can handle high ISO settings while keeping noise to a minimum. This allows you to reveal those elusive celestial bodies without compromising on image quality.
Sony A7R IVA: A High-Resolution Heavyweight
The Sony A7R IVA is a powerhouse when it comes to resolution. Boasting a full-frame sensor with a whopping 61 megapixels, it’s a titan in the realm of detail and clarity. This is a big deal for astrophotography, where capturing the intricate patterns of the cosmos is key. The A7R IVA also has a remarkable dynamic range, which means it can handle the extreme contrasts between the dark sky and bright stars without losing detail.
Nikon Z6 II: The Rugged Night Sky Warrior
The Nikon Z6 II is a formidable contender in the night sky arena. With a 24.5-megapixel full-frame sensor, it offers excellent low-light capabilities, ensuring your starry skies are noise-free and detailed. It’s built tough, too, so whether you’re setting up on a rocky outcrop or in a dew-covered field, the Z6 II can handle the elements. Additionally, its dual card slots mean you can back up your breathtaking images on the spot, securing your celestial captures.
Shooting Stars: Cameras That Bring the Heavens Closer
So, you’ve got your hands on a top-notch mirrorless camera. Now it’s time to make the magic happen. Capturing the night sky isn’t just about pointing and shooting; it’s about patience, precision, and preparation. The right settings are crucial. You’ll want to shoot in RAW format to ensure you capture all the data your camera is seeing. This gives you the best chance to enhance those images later.
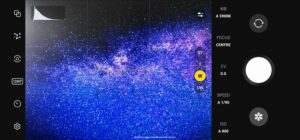
Start with a wide aperture to let in as much light as possible – think f/2.8 or wider. Then, dial in a long exposure time; 20-30 seconds is a good starting point. But be wary of going too long, or you’ll get star trails (unless that’s what you’re after). As for ISO, start around 1600 to 3200 and adjust based on your camera’s performance and the darkness of your location.
-
Shoot in RAW format.
-
Use a wide aperture (f/2.8 or wider).
-
Set a long exposure time (20-30 seconds).
-
Adjust ISO between 1600 and 3200.
-
Use a sturdy tripod to prevent camera shake.
-
Utilize a remote shutter release to avoid vibrations when pressing the button.
And remember, the earth is rotating. If you’re aiming for pinpoint stars rather than star trails, keep your exposure time in check or use a tracking mount that follows the stars’ movement.
Camera Setup and Settings for Perfect Astro Shots
Getting the setup right can be the difference between a good shot and a galactic masterpiece. Mount your camera on a tripod to keep it as still as the night. Use a wide-angle lens to capture as much of the sky as possible. Set your focus to infinity, but double-check by zooming in on a bright star using your camera’s live view. This ensures sharp focus where it counts.
Accessories That Complement Your Astrophotography Journey
-
A sturdy tripod to stabilize your camera for long exposures.
-
A remote shutter release to minimize vibrations when taking a shot.
-
Extra batteries, because long exposures and cold nights drain power faster.
-
A fast wide-angle lens to capture more light and a wider view of the sky.
-
A red flashlight to preserve your night vision while adjusting your camera.
Besides the camera and lens, these accessories will help you capture the night sky in all its glory without the frustration of shaky shots or dead batteries. They’re the trusty sidekicks to your star-shooting hero.
With your gear ready, venture out on a clear, moonless night. Far from city lights, the Milky Way awaits. As you set up, let your eyes adjust to the darkness, and the stars will begin to reveal themselves. Take a moment to simply look up and marvel at the universe’s vast beauty. Then, it’s time to let your camera capture that beauty for all to see.
Galactic Guidance: Tips and Tricks for Epic Astro Imagery
Every astrophotographer has a few tricks up their sleeve, and I’m here to share some with you. First, embrace patience. Astrophotography is a waiting game, but the results are worth it. Take the time to find the perfect composition and wait for the perfect conditions. And while you’re waiting, experiment with different settings to see how they affect your image.
Next, learn to love the dark. Your camera sees differently at night, and understanding that difference is key. A scene that looks one way to your eyes can transform into something entirely different through your lens. Use this to your advantage to create images that not only capture the stars but also tell a story about the night.
Mastering Manual Mode for Sharper Stars
Manual mode is your best friend in astrophotography. It gives you control over your exposure, which is critical for capturing the nuances of night sky images. Start by setting your lens to manual focus. Autofocus won’t work on the stars, so switch to manual and adjust until the stars are sharp pinpoints of light. Then, set your aperture to its widest setting, usually denoted by the smallest f-number, to let in as much light as possible. For more in-depth tips, consider exploring the best practices on astrophotography cameras.
For exposure, begin with the 500 rule: divide 500 by your lens’s focal length to find the maximum exposure time before stars start to trail. So, if you’re using a 20mm lens, you can expose for up to 25 seconds before star trails appear. This rule helps keep stars looking crisp in your images.
Post-Processing: Bringing Out the Universe’s Colors
Once you’ve captured the stars, it’s time to make them shine in post-processing. Start by adjusting the exposure and contrast to bring out the details in the Milky Way’s dust lanes and star clusters. Then, tweak the white balance to remove any color casts and make the stars’ colors pop. Finally, use noise reduction sparingly; you want to reduce grain without smudging the fine details of your stars. For more detailed guidance, consider reading our star stacking guide which can further enhance your astrophotography images.
Remember, the goal is to enhance, not overpower. You’re bringing out the beauty that’s already there, not creating it from scratch. With these tips and the right gear, you’re well on your way to capturing the cosmos like never before.
After a night spent under the stars, capturing the raw beauty of the cosmos, post-processing becomes the next critical step. This is where you transform good shots into breathtaking ones. Adjusting exposure, contrast, and sharpness can unveil details in your astrophotos that were not visible at first glance. Manipulating the white balance can correct color casts and ensure the stars appear true to life. And with the careful application of noise reduction, you can maintain the integrity of the night sky’s splendor while reducing unwanted grain.
Frequently Asked Questions
As you embark on your astrophotography journey, questions are bound to arise. With the right information, you’ll be well-equipped to navigate the complexities of night sky photography and capture the awe-inspiring beauty of the universe.
Understanding the intricacies of your equipment and the environment will help you make the most of your mirrorless camera’s capabilities. Let’s tackle some common questions that might be twinkling in your mind.
Can Any Mirrorless Camera Be Used for Astrophotography?
While many mirrorless cameras can be used for astrophotography, not all will give you the stellar results you’re after. Cameras with larger sensors, higher ISO capabilities, and better dynamic range will outperform others. It’s also important to have manual controls to adjust settings like focus, exposure time, and ISO to suit the challenging lighting conditions of the night sky.
However, don’t be discouraged if you don’t have the latest and greatest model. With the right techniques and settings, even entry-level mirrorless cameras can capture the wonders of the cosmos. It’s about understanding your camera’s strengths and limitations and using them to your advantage.
-
Choose a camera with a large sensor for better light gathering.
-
Look for high ISO capabilities with minimal noise.
-
Ensure your camera has manual controls for precise adjustments.
Remember, the best camera for astrophotography is the one you have with you, as long as you know how to use it effectively.
What Makes a Camera Good at Low Light?
A camera that excels in low light will have a combination of a large sensor, a wide aperture lens, and an advanced image processor capable of handling high ISO settings with minimal noise. These features allow the camera to capture more light and render a clearer, more detailed image in dim conditions. Additionally, a good low light camera will have a reliable autofocus system that can lock onto subjects even when they’re barely visible.
Most importantly, the user’s knowledge of how to balance these settings plays a significant role in the camera’s low light performance. Knowing when to push the ISO, how to stabilize the camera for longer exposures, and when to use additional lighting techniques can make all the difference.
Is a Full-Frame Sensor Necessary for Astrophotography?
While a full-frame sensor is not strictly necessary for astrophotography, it does provide advantages. The larger surface area of a full-frame sensor allows for greater light collection, which is particularly beneficial when shooting in the dark sky environments required for astrophotography. This can lead to images with less noise and more detail.
However, crop sensors have made significant advancements and, when paired with the right lenses and settings, can also produce stunning astrophotographs. Ultimately, the choice between sensor sizes will depend on your budget, preferences, and the specific requirements of your astrophotography projects.
How Important is Image Stabilization for Astrophotography?
Image stabilization can be a useful feature in many photography scenarios, but for astrophotography, it’s not as critical. This is because you’ll typically be using a tripod to stabilize your camera during the long exposures needed to capture the night sky. In fact, it’s often recommended to turn off image stabilization when your camera is mounted on a tripod, as it can sometimes introduce unwanted vibrations.
That said, if you’re shooting handheld for some reason, or using a lens with a particularly long focal length, image stabilization can help to minimize blur caused by small hand movements or vibrations.
Can I Use My Regular Lenses for Astrophotography or Do I Need Special Lenses?
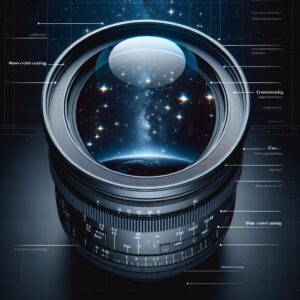
You can absolutely use your regular lenses for astrophotography, but some lenses are better suited to the task than others. Wide-angle lenses with a large maximum aperture (low f-number) are typically preferred because they can capture more of the sky and allow more light to reach the sensor, which is essential in low-light conditions.
However, if you want to photograph specific celestial objects like planets or distant galaxies, a telephoto lens may be necessary. Some photographers also invest in special astrophotography lenses that are designed to reduce aberrations like coma, which can distort points of light at the edges of the image.
In the end, the lens you choose should be based on the type of astrophotography you’re interested in and the capabilities of your camera. Experimenting with different lenses can lead to unique and stunning captures of the night sky.


Leave a Reply