
Key Takeaways
- Full moon photography offers a unique challenge due to the moon’s brightness and size.
- Essential gear includes a camera with manual settings, a tripod, and a long lens or a telescope with an adapter.
- Optimal camera settings involve a low ISO, a small aperture (high f-number), and a shutter speed of 1/125th to 1/500th of a second.
- The best time to capture the full moon is during moonrise or moonset, when atmospheric effects add color and dimension.
- Post-processing can enhance details and contrast, but be cautious to preserve the moon’s natural features.
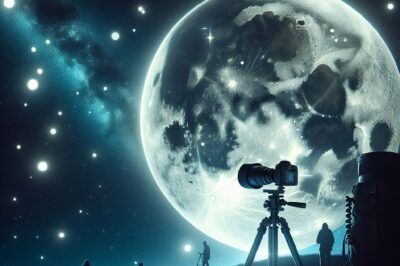
Capturing the Luminous Orb: A Guide to Full Moon Photography
There’s something magical about the full moon. It’s a beacon in the night sky, a subject of myth and lore, and a mesmerizing sight through the lens of a camera. But capturing its essence isn’t as simple as pointing and shooting. Full moon photography requires patience, the right equipment, and a bit of know-how. Let’s dive in and learn how to photograph this celestial wonder, so you can create stunning images that capture the imagination.
Why Full Moon Photography Is Unique
Photographing the full moon is a unique experience because of the intense light it reflects and its significance in our skies. Unlike other celestial photography, the moon is close enough to us that we can capture its surface details, but bright enough that it can easily become overexposed or appear flat in photographs. It’s not just about snapping a picture; it’s about finding the perfect balance to bring out the textures and features of the moon’s surface.
Choosing the Right Gear for Moon Shots
Before you head out into the night, make sure you have the right equipment. A sturdy tripod is a must to eliminate camera shake, especially when using a long lens or zooming in on the moon. Speaking of lenses, a telephoto lens of at least 200mm is recommended, but if you can go longer, your moon shots will only get better. If you’re using a telescope, make sure you have the right adapter to connect your camera.
Most importantly, use a camera that allows you to adjust settings manually. You’ll need to be able to control the ISO, aperture, and shutter speed to get a clear shot of the moon’s features. And don’t forget extra batteries and memory cards; there’s nothing worse than running out of power or storage at the crucial moment.
Setting Up for Success Under the Moonlight
Once you’ve got your gear, it’s time to set up. Find a spot with a clear view of the moon, away from bright city lights. Set your tripod firmly on the ground and mount your camera. If it’s windy, hang a weight from the tripod’s center column to keep it stable. Now, frame the moon in your viewfinder or LCD screen. If you’re using a long lens, the moon will move quickly out of frame, so be prepared to adjust your position frequently.
Best Camera Settings for Full Moon Brilliance
Getting your camera settings right is crucial. Start with a low ISO, around 100 or 200, to reduce noise. Set your aperture to a high number, like f/11 or f/16, to ensure the moon is in sharp focus. For shutter speed, begin with 1/125th of a second and adjust as needed. Remember, the moon is moving, so too slow of a shutter speed will result in a blur. Use your camera’s spot metering mode to expose for the moon, since it’s the brightest part of your image. For more detailed guidance, consider reviewing this astrophotography rule of 600 guide which includes techniques and camera settings tailored for night sky photography.
Timing Your Shoot: When the Moon Is at Its Best
The best time to photograph the full moon is during moonrise or moonset. This is when you can capture the ‘moon illusion’, where the moon appears larger near the horizon. Plus, the atmosphere adds a warm glow and can cause interesting color effects. Check a moonrise and moonset calendar to plan your shoot. Besides that, the days leading up to and just after the full moon also offer great opportunities for photography, with the added bonus of capturing some foreground context.
Framing the Night: Composition and Focus Techniques
With your camera set up and the full moon climbing the sky, it’s time to think about composition. The moon can be a striking subject on its own, but the surrounding landscape can transform your shot from a simple moon photo to a stunning composition. Consider including trees, buildings, or water in your frame to add interest and scale. These elements can lead the viewer’s eye to the moon and give your image a sense of place.
Remember, the rule of thirds is your friend. Imagine your image is divided into nine equal segments by two vertical and two horizontal lines. Try to position the moon along these lines, or at the points where they intersect. This technique creates more tension, energy, and interest in the composition than simply centering the subject would.
Composing Your Moon Photographs
As you compose your shot, think about what you want to convey. Is it the isolation of the moon against a vast, starry sky? Or perhaps the way it hangs above a silhouetted landscape? Maybe you want to capture the interaction between the moon and urban life. Whatever your vision, take the time to explore different angles and perspectives. Get creative – shoot through branches, reflect the moon in water, or frame it with architectural elements.
Don’t be afraid to let the moon drift to the corner of the frame, especially if you’re capturing something interesting in the foreground. This can create a sense of depth and narrative in your photo. But be aware of distracting elements like power lines or bright lights, which can draw attention away from the moon. For more on capturing the perfect shot, consider reading about the 400 rule in astrophotography.
Another consideration is the phase of the moon. While a full moon is bright and detailed, the days before and after provide a chance to capture the beautiful ‘terminator’ – the line between the moon’s day and night side, where shadows enhance the moon’s craters and mountains.
Mastering Sharp Focus on a Bright Moon
Focusing on the moon can be tricky, especially if you’re using a long lens or zoom. The key is to use manual focus. Switch off your autofocus, as it may struggle in the low light and could end up focusing on something other than the moon. Look through the viewfinder or use your camera’s live view mode to zoom in on the moon and adjust the focus until it’s sharp. If your camera has a focus peaking feature, use it to ensure the edges of the moon are crisp.
If you’re also including foreground elements, you might need to compromise on focus. An alternative is to take two shots – one focused on the moon and the other on the landscape – and blend them in post-processing. This way, you can maintain sharpness throughout the image.
Enhancing the Glow: Post-Processing Tips
Even with perfect exposure, your moon photos can benefit from a little post-processing. This is where you can fine-tune the details and really make your image pop. Start by adjusting the white balance to ensure the moon’s color is true to life. Then, tweak the contrast and brightness to bring out the moon’s features.
- Adjust the highlights and shadows to add depth to the craters.
- Sharpen the image slightly to enhance the surface texture.
- Consider converting to black and white for a classic, dramatic look.
Be cautious with saturation; too much can make the image look unnatural. It’s all about enhancing, not overpowering, the moon’s natural beauty.
When editing, zoom in on the moon to check for any loss of detail or unwanted noise. If you find some, use noise reduction software to clean it up. But be careful not to overdo it, as this can lead to a loss of detail.
Adjusting Contrast and Exposure for Clarity
To ensure the moon stands out, you may need to adjust the contrast. Increase it to make the bright parts brighter and the dark parts darker, which will help to define the moon’s features. However, watch out for ‘clipping’, where the brightest parts of the image lose detail and become pure white. Use the histogram feature in your editing software to monitor this.
Exposure adjustments can be a little trickier. If the moon is too bright, you’ll want to bring down the exposure slightly. On the flip side, if the moon is too dark, you’ll need to increase it. Again, keep an eye on the histogram to avoid losing detail in the highlights or shadows.
Advanced Techniques for Moon Image Editing
For those looking to take their full moon photography to the next level, consider blending multiple exposures. This technique allows you to capture the wide dynamic range of a scene with a bright moon and a darker landscape. Take one exposure for the moon and another for the landscape, then blend them together in post-processing software like Photoshop.
Another advanced technique is stacking. If you’ve taken multiple shots of the moon, you can stack them to reduce noise and bring out more detail. Software like RegiStax is designed specifically for this purpose and can yield impressive results.
Tales of the Tides: Creative Angles on Full Moon Photography
The full moon has inspired countless stories and myths, and your photography can tap into that sense of wonder. Use the full moon to tell a story in your image. Perhaps it’s a tale of the tides, with the moon hanging over a restless sea. Maybe it’s the narrative of a nocturnal creature, with the moon casting a spotlight. Or it could be a story of human connection, with silhouetted figures gazing up at the night sky.
Remember, the full moon is more than just a subject; it’s a character in your photographic tale. It can set the mood, create tension, or offer a moment of tranquility. By considering the moon’s role in your composition, you can create images that resonate on a deeper level. For those interested in capturing the night sky, here’s a comprehensive guide on astrophotography lens sizes to help you make the best choice for clear night sky photography.
Incorporating the full moon into themed photo shoots can add an extra layer of intrigue. Whether it’s a portrait session, a landscape series, or a conceptual piece, the full moon can complement and enhance your creative vision. Just ensure that the moon’s presence serves the theme and doesn’t overpower the other elements.
Now, with these techniques and tips at your disposal, you’re ready to embark on your full moon photography adventure. Remember to plan, be patient, and most importantly, enjoy the process. The moon has captivated us for millennia; now it’s your turn to capture its allure.
Incorporating the Full Moon in Themed Photo Shoots
When the full moon ascends, it’s not just an opportunity to capture its beauty alone, but to weave it into themed photo shoots that tell a story or enhance a concept. Imagine a Halloween theme with the full moon casting eerie shadows, or a romantic couple framed against the night sky, the moon symbolizing enduring love. The key is to let the moon complement the subject, not compete with it. The luminous orb can become a powerful backdrop that adds mood and drama to your themed photographs.
Frequently Asked Questions (FAQ)
What Equipment Is Essential for Full Moon Photography?
For full moon photography, you’ll need:
- A digital camera with manual mode to control exposure settings.
- A telephoto lens, ideally 200mm or longer, to get a closer view of the moon.
- A sturdy tripod to stabilize your camera for sharp images.
- A remote shutter release or your camera’s timer to avoid camera shake when pressing the button.
- Optionally, a telescope with a camera adapter for extreme close-ups of the moon’s surface.
With this equipment, you’ll be well-prepared to capture the moon in all its glory.
How Do I Avoid Overexposing the Moon in My Photos?
To avoid overexposing the moon, start by using the ‘looney 11’ rule as a baseline for your settings: set your aperture to f/11 and match the shutter speed to the reciprocal of your ISO value. For example, if you’re shooting at ISO 100, start with a shutter speed of 1/100 seconds. From there, take test shots and check your camera’s histogram to ensure you’re not losing detail in the highlights. Adjust your settings accordingly if the moon appears too bright or too dark.
Remember, the moon is a bright subject, so you might need to use faster shutter speeds than you expect at night. Experiment and adjust your settings to find the perfect balance for a well-exposed moon.
Can I Capture Full Moon Photos with a Smartphone?
Yes, you can photograph the full moon with a smartphone, but there are limitations. Many newer smartphones have manual or pro modes that allow you to adjust exposure settings. Some also offer telephoto lenses, which can help you zoom in on the moon. However, for the best results, use a tripod and a smartphone adapter to keep your phone steady. Smartphone apps designed for low light and astrophotography can also help you achieve better results.
What Is the Best Time to Shoot the Full Moon?
The best time to shoot the full moon is during the golden hours of moonrise or moonset. This is when the moon is close to the horizon and appears larger due to the moon illusion. Atmospheric conditions can also add a warm tint and soften the light, making the moon easier to photograph. Additionally, shooting during these times can provide context and interesting landscapes to frame your moon shots.
How Can I Edit Full Moon Photos Without Losing Detail?
When editing full moon photos, the goal is to enhance, not overwhelm. Use editing software to adjust exposure, contrast, and clarity to bring out the moon’s features without losing detail. Here’s a step-by-step approach:
- Adjust the highlights and shadows to enhance the moon’s texture while avoiding clipping.
- Sharpen the image to bring out surface details but avoid oversharpening which can introduce noise.
- Consider using noise reduction tools to clean up the image, but do so sparingly to preserve detail.
- If the moon’s color looks off, tweak the white balance for a more natural appearance.
By following these steps, you’ll maintain the natural beauty of the moon in your final image.


