Key Takeaways
-
Dithering in astrophotography is a technique where the camera is slightly shifted between exposures to reduce noise and enhance image quality.
-
Even beginners with basic equipment can practice dithering to improve their night sky images.
-
Manual dithering is an option, but using auto-guiding software makes the process easier and more precise.
-
Troubleshooting common issues like tracking errors is crucial for successful dithering.
-
Post-processing is essential to bring out the best in your dithered astrophotos.
Unlock the Night Sky: Mastering Dithering Techniques in Astrophotography
If you’ve ever gazed up at the stars and wished you could capture their beauty, you’re in the right place. Astrophotography is not just for scientists with fancy equipment; it’s a hobby that anyone with passion can enjoy. And one of the most effective ways to enhance your night sky photos is through a technique called dithering.
The Definition and Role of Dithering
Dithering might sound complicated, but it’s actually pretty simple. Imagine you’re drawing with a set of colored pencils, and you want to blend the colors smoothly. By slightly shifting the colors as you go, you create a more even, less grainy picture. That’s what dithering does for your astrophotos. It slightly moves your camera between each shot, which helps to reduce noise—those random speckles of color that can plague digital images—and improve the overall clarity of your pictures of the cosmos.
Advantages of Dithering in Night Sky Imaging
So, why bother with dithering? Well, it has some pretty stellar benefits:
-
Reduces noise: By shifting the frame slightly, dithering helps to average out the noise over multiple exposures.
-
Minimizes hot pixels: Those pesky, falsely lit pixels on your camera’s sensor get redistributed across the final image, making them less noticeable.
-
Enhances detail: With less noise and fewer hot pixels, the true details of the night sky come through more clearly.
Getting Started with Dithering
Ready to try dithering? Great! You don’t need the most expensive setup; just a camera, a telescope, and a mount that can handle slight movements between shots. If you’ve got an auto-guiding system, that’s a bonus, but it’s not a requirement. Let’s get your gear ready.
Choosing the Right Equipment
The first step is to make sure you have the right equipment. For those interested in dithering in astrophotography, you’ll need:
-
A camera capable of long exposure times, like a DSLR or a dedicated astrophotography camera.
-
A telescope that can track the stars as the Earth rotates, to keep your target in frame.
-
A sturdy mount to keep everything stable. If it has a built-in autoguider port, that’s a plus!
Once you’ve got your setup, it’s time to prepare for your first dithering session.
Setting Up for Your First Dithering Session
For your initial foray into dithering, follow these steps:
-
Align your telescope with the night sky to ensure accurate tracking.
-
Mount your camera to the telescope and focus on a bright star to ensure sharp images.
-
Set your camera to take a series of long-exposure shots. The exact exposure time will depend on your equipment and the object you’re photographing.
-
If you’re using auto-guiding software, connect it and make sure it’s communicating with your mount.
With everything set, start taking photos. After each exposure, slightly shift the position of your telescope. If you’re doing this manually, be gentle and consistent with your movements. If you’re using auto-guiding software, it will handle the dithering for you.
Remember, the key to dithering is subtlety. You want to move the telescope just enough to change the position of the stars slightly between each image. This technique will help you create a final image that’s smooth, detailed, and truly out of this world.
Manual vs. Automated Dithering
When it comes to dithering, you’ve got two choices: manual or automated. Manual dithering means you’ll nudge your telescope slightly by hand between each exposure. It’s a good way to get a feel for the process, but it requires a steady hand and a lot of patience. Automated dithering, on the other hand, uses software to make precise, consistent movements. This is where things get really exciting for astrophotography enthusiasts.
Automated dithering takes out the guesswork. With the right setup, your mount can be instructed to move a tiny bit between shots, ensuring each frame is just slightly different from the last. This is perfect for reducing patterns of noise in your images and making those hot pixels disappear into the background of deep space.
Integration with Auto-Guiding Software
If you’re using auto-guiding software, integrating dithering into your workflow is a breeze. Most auto-guiding programs have a dithering option built right in. All you need to do is activate it, and the software will take care of the rest. This means you can focus on the creative aspects of astrophotography, like framing your shot and choosing your subject, while the software handles the technical details.
Some popular auto-guiding software options include PHD2 Guiding and Astro Photography Tool (APT). They’re user-friendly and designed to work seamlessly with a variety of camera and mount setups. Just make sure your auto-guider is properly calibrated, and you’ll be ready to capture the cosmos like never before.
Troubleshooting Common Dithering Challenges
As with any technique, dithering comes with its own set of challenges. But don’t worry; most issues are easy to fix once you know what to look for.
Dealing with Tracking Errors
One common issue is tracking errors. If your mount isn’t tracking the stars accurately, dithering can make those errors more noticeable. To prevent this, take the time to align your mount carefully at the beginning of your session. A well-aligned mount is the foundation of great astrophotography.
If you notice star trails or elongated stars in your images, it’s a sign that your tracking might be off. Double-check your alignment and make sure your mount is moving smoothly. Sometimes, a simple adjustment is all it takes to get back on track.
Minimizing Noise and Hot Pixels
Noise and hot pixels can be a nuisance, but dithering helps to minimize their impact. If you’re still seeing a lot of noise in your images, try increasing the number of exposures you’re stacking. The more data you have, the better your chances of averaging out that noise.
Hot pixels, on the other hand, are stubborn, but not unbeatable. If dithering isn’t fully solving the problem, consider using dark frames in your post-processing. These are images taken with the camera’s lens cap on, at the same temperature and exposure settings as your light frames. They help to identify and remove hot pixels during the stacking process.
Tips for Perfecting Dithered Images
Now that you’re familiar with dithering and how to troubleshoot common issues, let’s talk about perfecting your images.
Calibrating Your Setup for Optimal Results
Calibration is key. Before you dive into a night of imaging, spend some time getting to know your equipment. Understand the limits of your mount’s movements and how your auto-guiding software responds to different settings. The better calibrated your setup is, the smoother your dithering process will be.
Don’t be afraid to experiment with different dithering magnitudes and intervals. Some subjects, like wide-field Milky Way shots, might benefit from more subtle dithering, while deep-sky objects like galaxies or nebulae could handle more aggressive movements.
Most importantly, keep detailed notes on your sessions. Record what works and what doesn’t, so you can replicate your successes and learn from your challenges.
Post-Processing: Enhancing Your Dithered Photographs
Once you’ve captured your dithered exposures, the magic of post-processing comes into play. This is where you’ll stack your images, aligning them perfectly and combining them to create a single, noise-free masterpiece.
There are several software options for stacking, like DeepSkyStacker and Sequator. They’ll help you align your dithered frames and stack them to bring out the best in your images. Remember to use flat frames to correct for vignetting and field curvature, and to apply those dark frames to take care of any remaining hot pixels.
Finally, don’t rush the post-processing. Take your time to tweak the levels, contrast, and colors until you’re happy with the result. This is your chance to bring out the details and beauty of the night sky that you’ve worked so hard to capture.
Creating Stellar Images: Dithering Success Stories
Success in astrophotography is not just about the technicalities; it’s about the stories you tell through your images. Dithering has transformed many astrophotographers’ work, from fuzzy, noisy shots to clear, detailed portraits of the universe.
Transformative Effects of Dithering on Image Quality
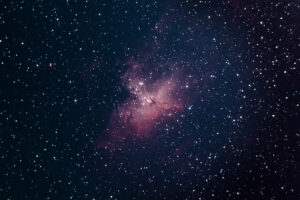
Take the story of a fellow night sky enthusiast who, after struggling with noisy images, decided to give dithering a try. The difference was night and day. The once-obscure details of the Orion Nebula became crisp and clear, and the colors more vibrant. This is the power of dithering—it can turn a good photo into a great one, and a great one into a breathtaking view of the cosmos.
So, whether you’re just starting out or looking to refine your skills, remember that dithering could be the key to unlocking the true potential of your astrophotography. Go out there, under the stars, and create your own success story. Who knows, your next shot could be the one that inspires someone else to look up and start their own journey among the stars.
Gallery of Before and After Dithering Comparisons
Seeing is believing, and the proof of dithering’s effectiveness is best shown through comparison. Let’s look at some before and after images to truly appreciate the impact dithering can have on astrophotography.

Before dithering: The image shows noticeable noise and graininess, with hot pixels disrupting the view.
After dithering: The same section of the sky now reveals a smoother background, with improved detail and contrast in the celestial objects.
It’s this kind of transformation that can take your astrophotography from a hobby to a passion, as the results speak for themselves. Dithering doesn’t just enhance images; it reveals the true beauty of the night sky.
FAQs for Aspiring Astrophotographers
What exactly is astrophotography dithering?
Astrophotography dithering is a technique where you slightly shift the position of your camera between each exposure when taking multiple long-exposure images of the night sky. These small movements help to reduce noise and other unwanted artifacts in the final stacked image, resulting in clearer and more detailed photos of stars, galaxies, and nebulae.
Can you dither with a basic telescope setup?
Yes, you can! Even if you have a basic telescope setup, you can still practice dithering. While having an auto-guiding system can automate the process, you can manually adjust the position of your telescope between exposures to achieve the dithering effect. The key is to make consistent, small adjustments and to keep track of your movements.
What are the best software tools for dithering?
For those looking to dither with the help of software, there are several great options out there. PHD2 Guiding is a popular choice for auto-guiding and dithering, and it’s free. Astro Photography Tool (APT) also provides dithering capabilities and is well-regarded among astrophotographers. Both programs offer a range of features to suit various levels of expertise.
How do you know if you’re dithering correctly?
You’ll know you’re dithering correctly if, after stacking and processing your images, you see a noticeable reduction in fixed pattern noise and hot pixels. The stars should appear as sharp points rather than elongated trails, and the background of space should look smooth and even.


