Key Takeaways
- Star stacking is a technique that combines multiple exposures to reduce noise and reveal the stunning details of the Milky Way.
- To capture the Milky Way, you’ll need a camera capable of manual settings, a sturdy tripod, and ideally, a remote shutter release.
- Scout for a dark location away from light pollution and plan your shoot according to the position of the Milky Way in the sky.
- Use specific camera settings such as a wide aperture, high ISO, and long exposure times to photograph the night sky effectively.
- Sequator is a powerful software tool for stacking Milky Way photos that can dramatically enhance the quality of your images.
Capturing the Celestial Dance: A Beginner’s Guide to Milky Way Photography
When you gaze up on a clear night far from the city’s glow, the Milky Way stretches across the sky in a dazzling band of light. Capturing that splendor through photography is not just about pointing your camera upwards and clicking the shutter; it’s an art form that requires patience, precision, and a touch of cosmic timing. But don’t worry, I’ll walk you through the process so that even if you’re just starting out, you’ll be able to produce breathtaking images of our galaxy.
Understanding Star Stacking
Star stacking is our secret weapon in the battle against noise, a common challenge in astrophotography. By taking multiple shots of the same scene and combining them, we can smooth out the random noise that tends to plague single, long-exposure images. Imagine each photo as a piece of a puzzle; when put together correctly, they reveal a clearer, more detailed picture of the night sky.
Gathering Your Gear
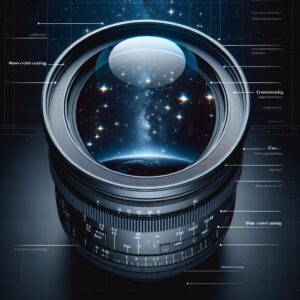
Before we dive into the night, let’s talk gear. At the core, you’ll need a digital camera with manual settings capability. This could be a DSLR or a mirrorless wonder. A lens with a wide aperture, say f/2.8 or wider, will gather more light and make the stars pop. A sturdy tripod is non-negotiable; it will be the rock that holds your camera still as the Earth turns. And a remote shutter release or a camera’s built-in timer will help you avoid any shake when pressing the shutter button.
Planning Your Shoot
Success in Milky Way photography is as much about preparation as it is about execution. Use apps or websites like PhotoPills or Stellarium to track the galactic core’s position. You’re looking for a new moon night, far from the city’s light pollution. Spring and summer months usually offer the best views of the Milky Way in the Northern Hemisphere, while in the Southern Hemisphere, the galactic center is more visible from February to October.
Setting Up in the Field
Once you’ve arrived at your carefully chosen spot, set up your tripod and mount your camera securely. If you’re using a remote shutter release, connect it now. Take a moment to let your eyes adjust to the darkness. It’s time to transform the night sky into your canvas.
Importing Your Starry Shots
Once you’ve captured a series of Milky Way images, it’s time to transfer them to your computer. Make sure you’ve shot in RAW format for the highest quality and most flexibility during post-processing. Open Sequator, a free and user-friendly software, and import your images. It’s as simple as dragging and dropping the files into the program or using the ‘Open’ button to navigate to your photos.
Sequator works with both RAW and JPEG files, but remember, RAW files hold more data and allow for more detailed adjustments later on. With your shots loaded, you’re ready to begin the magic of stacking.
Sequator’s Key Features for Noise Reduction
Noise is the grainy speckles that often plague night sky photos, especially when shooting at high ISO settings necessary for Milky Way photography. Sequator’s strength lies in its ability to align stars across multiple images, stacking them to average out the noise. The software identifies stars as anchor points, aligning each image precisely before blending them to enhance the signal and suppress the noise. It’s like turning up the volume on the stars while muting the static.
Tweaking Settings for a Pristine Finish
Sequator offers a suite of settings to fine-tune your stack. You can adjust the star alignment for pinpoint accuracy and even compensate for slight movements if you didn’t use a tracker. The software also provides options to reduce light pollution, which can be a lifesaver if you’re shooting from a location with some intrusive artificial light. Play around with the settings, and don’t be afraid to experiment. The ‘High Dynamic Range’ and ‘Noise Reduction’ features are particularly useful for bringing out the best in your Milky Way shots.
Unleashing the Power of Sequator
With your images imported and settings dialed in, hit the ‘Start’ button and watch Sequator work its magic. The software will begin processing your images, aligning the stars and stacking them into a single composite image. This process can take a few minutes to an hour, depending on the number of images and the power of your computer.
As Sequator works, it’s blending the light from each photo, increasing the overall exposure without the noise typically associated with a single long exposure. The result? A Milky Way image that’s crisp, clear, and teeming with celestial wonder.
Aligning Stars for a Crisp Composition
One of the challenges in astrophotography is ensuring that stars appear as sharp points of light rather than blurry streaks. Sequator’s alignment feature is designed to handle this by comparing the position of stars in each image. It then aligns them to ensure that they are in the same position in the final stacked image, resulting in a sharp and focused Milky Way.
Remember, if you’re shooting without a tracker, you’ll need to keep your exposure times short enough to prevent star trails, usually around 20-30 seconds depending on your lens and camera sensor size. Sequator compensates for this by stacking the shorter exposures to create the illusion of a longer one.
Foreground Management Tips
While the stars might be the main event, a compelling foreground can turn a good Milky Way photo into a great one. When setting up your shots, consider including interesting elements like trees, mountains, or structures to add depth and context to the scene. Sequator allows you to choose a reference image with the best foreground sharpness, ensuring that the final stacked image maintains the clarity of these elements.
Enhancing Star Color and Clarity
The Milky Way is not just about light; it’s about color too. Sequator has options to enhance the saturation and contrast of your stars, bringing out the subtle hues of the galactic core. Additionally, the ‘Enlarge Stars’ feature can be used sparingly to make the stars stand out more, although overuse can lead to an unnatural look. Always aim for subtlety; you want to enhance, not overpower.
Most importantly, don’t forget to tweak the white balance. The right temperature can warm up the night sky or cool it down, depending on the mood you’re aiming for.
Saving and Exporting Your Work
After Sequator has finished stacking and you’re satisfied with the adjustments, it’s time to save your work. You can export the image as a TIFF or JPEG. TIFF will retain more information and is best if you plan on doing further editing in another program like Adobe Lightroom or Photoshop.
With your Milky Way masterpiece saved, you’re ready to share it with the world, print it for your wall, or simply sit back and admire the cosmic beauty you’ve captured.
Advanced Sequator Strategies for the Avid Astrographer
Once you’ve mastered the basics of Sequator, you can explore advanced features to push your Milky Way photography even further. These techniques require a bit more effort and understanding, but the results can be truly out of this world.
Time Blending for Dynamic Range
Time blending is a technique where you combine images taken at different times to capture a broader range of light. For example, you might take some shots during blue hour for a beautiful twilight foreground, then stack Milky Way shots taken later in the night. By blending these together, you get an image with both a well-exposed foreground and a vibrant Milky Way.
Focus Stacking for Depth of Field
Focus stacking involves taking multiple photos with different focus points and combining them to achieve greater depth of field. This is especially useful when you have a foreground element that’s close to the camera and you want it to be as sharp as the stars. By stacking these focused layers, everything from the nearest rock to the furthest star can be in crystal clear detail.
Handling Light Pollution in Post-Processing
Even the best-laid plans can be foiled by unexpected light pollution. But don’t despair; Sequator offers tools to help reduce the orange glow of distant cities. By carefully adjusting the light pollution slider, you can mitigate some of the effects and bring the focus back to the stars.
Key Takeaways
- Star stacking is a technique that combines multiple exposures to reduce noise and reveal the stunning details of the Milky Way.
- To capture the Milky Way, you’ll need a camera capable of manual settings, a sturdy tripod, and ideally, a remote shutter release.
- Scout for a dark location away from light pollution and plan your shoot according to the position of the Milky Way in the sky.
- Use specific camera settings such as a wide aperture, high ISO, and long exposure times to photograph the night sky effectively.
- Sequator is a powerful software tool for stacking Milky Way photos that can dramatically enhance the quality of your images.
Shoot for the Stars: Enhancing Your Milky Way Images
After you’ve collected your set of night sky photographs, it’s time to move into the realm of post-processing. This is where you can truly transform your images, bringing out the faint whispers of the Milky Way into a roaring chorus of stars. Learn more about how to stack Milky Way photos using Sequator to enhance your astrophotography skills.
Post-Processing Techniques to Bring Out Galactic Detail
The raw images straight out of your camera are only the beginning. With post-processing, you can adjust exposure, contrast, and color balance to make the Milky Way stand out. Software like Adobe Lightroom and Photoshop are excellent for this, but don’t overlook the power of Sequator in enhancing specific details in the stars.
Turning Up the Contrast on Starlight
Increasing the contrast can help differentiate the Milky Way from the sky’s background. Be careful not to overdo it, though; too much contrast can lead to an unnatural appearance. Aim for a balance that highlights the Milky Way’s structure without losing the subtlety of its cloud-like formations.
Final Touches for a Gallery-Worthy Milky Way Image
Once you’re happy with the contrast and details, consider adding some final touches like sharpening the stars slightly or dodging and burning to guide the viewer’s eye. These subtle adjustments can make all the difference in creating a captivating image that draws the viewer into the depths of our galaxy.
FAQs on Milky Way Photography and Sequator
What is the Best Time to Photograph the Milky Way?
The best time to photograph the Milky Way is during the new moon phase when the sky is darkest. In the Northern Hemisphere, the Milky Way is best viewed from late spring to early fall, while in the Southern Hemisphere, it’s most visible from late summer to early winter.
Can I Use Sequator on a Mac or Is It Windows Only?
Sequator is primarily designed for Windows, but Mac users aren’t left out. You can run Sequator on a Mac using virtual machine software or look for Mac-specific alternatives like Starry Landscape Stacker for your star stacking needs.
How Many Photos Do I Need for Effective Star Stacking?
Generally, a set of 10-20 images is sufficient for effective star stacking. However, the more images you stack, the better the noise reduction and the finer the details that can be resolved in the Milky Way.
What Type of Camera is Best for Capturing the Milky Way?
A camera with manual settings, capable of shooting in RAW, with good high ISO performance is ideal for Milky Way photography. Both DSLRs and mirrorless cameras can be excellent choices.
Option A.


