Article-at-a-Glance
- Banding in astrophotography can degrade image quality, but there are effective ways to minimize and remove it.
- Understanding the causes of banding is essential to prevent it during image capture.
- Optimal camera settings and high-quality equipment can significantly reduce the risk of banding.
- Post-processing software and techniques are available to remove banding from astrophotographs.
- Advanced strategies, such as noise reduction and image stacking, can enhance night sky captures even further.
What is Astrophotography Banding?
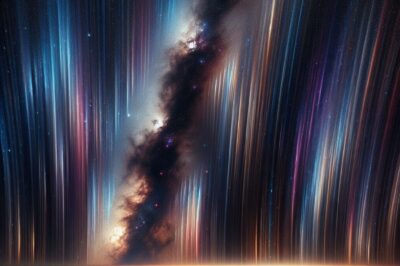
Banding is like an uninvited guest at a party. It shows up in your astrophotographs as unwanted stripes or lines, marring the beauty of the night sky. These patterns can be subtle or pronounced, and they’re often most visible in the smooth gradients of the sky, like during twilight or in areas with light pollution. Most importantly, banding is not a permanent fixture; it can be addressed with the right know-how.
The Nature of Banding
Imagine you’re painting a sunset and instead of a smooth transition from orange to pink, you get a striped effect. That’s what banding looks like in astrophotography. It happens when there’s a limited number of colors to display the transition smoothly, often due to camera sensor limitations or file compression.
Common Causes of Banding
Banding sneaks into your photos for several reasons. One of the main culprits is low bit-depth. When you capture images with fewer bits, you’re essentially working with a smaller palette of colors, making smooth transitions between tones harder to achieve. Besides that, aggressive noise reduction or poor-quality editing can also introduce banding. Therefore, understanding these causes is your first line of defense.
Preventing Banding in Your Celestial Shots
To keep the night sky in your photos as pristine as the real thing, preventing banding right from the start is key. This means taking control of your camera settings and environment to minimize the risk of banding occurring in the first place.
Optimal Camera Settings for Band-Free Images
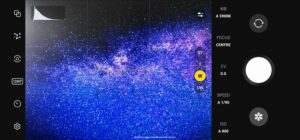
Camera settings can make or break your astrophotography. To avoid banding, you should always shoot in RAW format. RAW files have a higher bit-depth than JPEGs, which means they can store more color information and produce smoother gradients. Also, keep your ISO as low as possible to reduce noise, which can exacerbate banding. Finally, use a slow shutter speed to gather more light and detail, but not so slow that you introduce star trails, unless that’s the effect you’re after.
- Shoot in RAW format for maximum color detail.
- Keep ISO low to minimize noise.
- Adjust shutter speed to balance light capture and desired star motion.
Here’s a simple way to remember it: ‘RAW for richness, Low ISO for clarity, and Shutter speed for stability.’
The Role of High-Quality Equipment
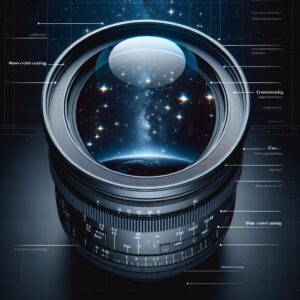
Just as a painter needs high-quality brushes, astrophotographers need top-notch gear. A camera with a large sensor and high dynamic range will capture more details in the darks and lights, which translates to less banding. A good quality lens with a wide aperture allows more light to reach the sensor, reducing the need for high ISO settings that can introduce noise and, consequently, banding.
When it comes to telescopes, those with a steady mount and accurate tracking will ensure sharp images. Vibrations or movements can blur the stars, creating gradients that are prone to banding when processed.
Step by Step: Removing Banding in Post-Processing
Now, let’s dive into the digital darkroom. If banding has crept into your astrophotos, fear not. Post-processing is like having a magic wand that can help you clean up those pesky lines. But, as with any magic, you need to know the right spells—or in this case, the right tools and techniques.
The process of removing banding in astrophotography is delicate and requires a gentle touch, as heavy-handed edits can make your images look unnatural or introduce other artifacts. Patience and practice are your allies here.
Software Tools You’ll Need
To start the banding removal process, you’ll need software designed for detailed image editing. Adobe Photoshop is a popular choice among astrophotographers for its extensive features and control. Another excellent option is Lightroom, which offers a more user-friendly interface for those new to editing. Free software like GIMP can also get the job done, though it might lack some advanced features.
Detailed Editing Techniques
Within your chosen software, there are specific techniques to target and eliminate banding. Here’s a step-by-step guide:
- Open your image and zoom in to identify areas with banding.
- Add a new adjustment layer for levels or curves to gently tweak the contrast in the affected areas.
- If the banding is color-specific, use the selective color adjustment layer to fine-tune the problematic hues.
- For subtle banding, adding a bit of noise (grain) can help to mask it. This might seem counterintuitive, but a slight increase in noise can make the transition between bands less noticeable.
- Use the healing brush or clone stamp tools to manually blend the bands with surrounding areas if they are isolated to small parts of the image.
Remember, less is often more when it comes to post-processing. You want to maintain the natural beauty of the night sky, not create a digital masterpiece detached from reality.
Advanced Strategies for Dealing with Stubborn Banding
Sometimes, banding can be particularly stubborn, and the usual fixes just don’t cut it. In these cases, it’s time to bring out the big guns. Advanced strategies can be more complex, but they can also be incredibly effective.
Digital Noise Reduction Methods
Noise reduction can be a double-edged sword. While it can smooth out banding, it can also obliterate fine details if overused. A smarter approach is to use noise reduction software like Topaz DeNoise AI, which uses artificial intelligence to differentiate between noise and detail. When using such tools, always adjust the settings carefully and preview the results to ensure you’re not losing critical starlight or galaxy details.
The Power of Stacking in Astrophotography
Stacking is a technique where multiple images of the same scene are combined to improve signal-to-noise ratio, which inherently reduces banding. By aligning and averaging your shots, you can significantly enhance the quality of your final image. Software like DeepSkyStacker or Sequator can automate this process, making it less daunting for beginners.
Wrap-Up: Ensuring Crisp and Clear Night Skies
After you’ve put in the effort to capture and process your astrophotos, you want to ensure they’re as clear and crisp as the night sky itself. A final review of your work is crucial to catch any lingering imperfections.
Final Review Checklist
Before you consider your image finished, run through this astrophotography exposure guide checklist:
- Check for any remaining signs of banding, especially in the darker areas of the image.
- Ensure noise reduction hasn’t softened important details like stars or nebulae edges.
- Inspect the image at various zoom levels to make sure edits look natural across the board.
- Review the image on different devices or screens to see how it appears in various display settings.
- Ask for feedback from fellow astrophotographers or share your work in online communities for additional perspectives.
Additional Tips for Advanced Clarity
Besides the steps mentioned above, consider these additional tips for that extra touch of clarity:
- Calibrate your monitor to ensure accurate color representation during editing.
- Use lens correction profiles to fix any optical distortions that could be contributing to banding.
- Experiment with different blending modes for adjustment layers to achieve more subtle and effective results.
Every astrophotography session is a chance to hone your skills further. Embrace the process, and with each photo, you’ll find yourself closer to capturing the awe-inspiring beauty of our universe.
Frequently Asked Questions (FAQ)
What causes banding in astrophotography?
Banding can be caused by several factors, including low bit-depth, poor-quality image compression, excessive noise reduction, and incorrect camera settings. It’s often more noticeable in areas of smooth color transition, like the night sky.
Can banding be fixed in all images?
While most banding can be reduced or removed with the right techniques, some images may have irreparable banding due to extreme compression or low-quality original data. It’s always best to prevent banding during the capture phase.
Does image stacking reduce banding?
Yes, image stacking is an effective way to reduce banding as it increases the signal-to-noise ratio, smoothing out color transitions and reducing artifacts.
How does shooting in RAW vs JPEG affect banding?
Shooting in RAW captures more color data and has a higher dynamic range than JPEG, which means smoother gradients and less potential for banding.
Are there any in-camera techniques to prevent banding?
Absolutely. Using a low ISO setting, shooting in RAW, and ensuring proper exposure can all help prevent banding. Additionally, using a high-quality camera sensor with a wide dynamic range can also reduce the likelihood of banding occurring.
Frequently Asked Questions (FAQ)
What causes banding in astrophotography?
Banding in astrophotography often arises from limitations in the camera’s sensor, which can lead to issues with color gradation, particularly in the dark, smooth areas of the sky. It can also be a result of low bit-depth in image files, which restricts the number of colors available to display transitions. Additionally, aggressive noise reduction and poor post-processing techniques can introduce or exacerbate banding.
Can banding be fixed in all images?
Not all banding can be completely removed, especially if the original image has been captured with significant compression or in a low-quality format. However, many post-processing techniques can reduce or even eliminate banding in most cases. It’s always best to address banding during the capture process to minimize the need for correction later on.
Does image stacking reduce banding?
Yes, image stacking is a powerful technique in astrophotography that can significantly reduce banding. By combining multiple exposures of the same scene, you increase the signal-to-noise ratio, which helps to smooth out the transition between colors and reduce the appearance of banding.
How does shooting in RAW vs JPEG affect banding?
Shooting in RAW is highly advantageous for reducing banding because RAW files contain more data and have a higher bit-depth compared to JPEG files. This additional information allows for smoother transitions between colors and tones in the image, making banding less likely to occur.
Are there any in-camera techniques to prevent banding?
Indeed, there are several in-camera techniques to prevent banding:
- Shoot in RAW format to capture the widest range of color and detail.
- Use the lowest ISO setting possible to minimize noise, which can contribute to banding.
- Ensure that your exposure settings are optimal to avoid underexposure, which can lead to banding when the image is brightened during post-processing.
- Utilize a camera with a high dynamic range sensor to better capture the subtleties in light and color transitions.


