Key Takeaways
- The f-ratio, or focal ratio, is crucial because it affects the brightness and field of view of your astrophotography images.
- For deep-sky objects, a lower f-ratio, such as f/2 to f/5, allows for faster light gathering and shorter exposure times.
- When photographing planets or the Moon, a higher f-ratio, like f/10 or above, provides greater magnification and detail.
- Understanding your equipment’s capabilities and the target you’re shooting will help you choose the best f-ratio for your session.
- Adjustments to f-ratio can be made with accessories such as focal reducers or Barlow lenses to optimize your setup.
Capturing the Cosmos: F-Ratios Demystified
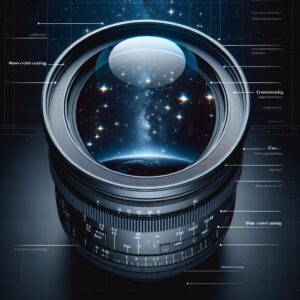
When we talk about capturing the cosmos, one term that often pops up is ‘f-ratio’. But what is it exactly? Think of the f-ratio as the heartbeat of your telescope or camera lens. It’s the number that tells you how wide the ‘eye’ of your equipment can open to let in light. And when you’re trying to photograph stars, galaxies, or nebulae millions of miles away, you need all the light you can get.
Why F-Ratios Are Crucial for Stellar Shots
So, why does this f-ratio matter so much? It’s simple: light is everything in astrophotography. The more light your camera sensor collects, the clearer and more detailed your photos will be. A lower f-ratio means your equipment can gather light faster, which is especially helpful in the dim reaches of outer space. However, it’s not always about going as low as possible – different celestial wonders require different approaches.
Defining F-Ratio and How It Influences Image Quality
Let’s break it down. The f-ratio is calculated by dividing the focal length of your telescope or lens by the diameter of its aperture. So, if you have a 1000mm focal length telescope with a 200mm aperture, your f-ratio is f/5. A smaller f-ratio number means a wider aperture, allowing more light to hit the sensor in a shorter amount of time. This is key for dim objects, like distant galaxies or nebulae, where every photon counts.
But it’s not just about brightness. The f-ratio also influences the field of view. Lower f-ratios provide a wider field of view, which is excellent for capturing expansive star fields or larger nebulae. Conversely, higher f-ratios give a narrower field of view, perfect for zooming in on planets or the Moon.
- Lower f-ratios (wider aperture): More light, shorter exposure, wider field of view.
- Higher f-ratios (narrower aperture): Less light, longer exposure, narrower field of view.
Stellar Equipment Selection: Finding Your F-Ratio
Choosing the right f-ratio for your astrophotography adventure is like picking the perfect pair of shoes for a marathon – it can make or break your experience. You need to match your equipment’s f-ratio with the celestial subject you’re aiming to capture. For a more in-depth understanding, see how focal ratio affects your astro images.
If you’re just starting out, you might be using a standard camera lens or a beginner’s telescope. These often have fixed f-ratios, so you’ll work within those limits. But if you’re ready to dive deeper, you can start to play around with different setups and even modify your f-ratio with additional gear.
Remember, the best f-ratio for your session depends on several factors, including the brightness of your target, the amount of ambient light pollution, and the capabilities of your camera sensor.
The Sweet Spot: Ideal F-Ratios for Different Celestial Subjects
Let’s find that sweet spot for different types of celestial photography. Whether you’re capturing wide star fields or zooming in on distant galaxies, understanding the best astrophotography lens size and f-ratio can make all the difference in your images.
- Deep-sky objects (DSOs) like galaxies and nebulae: Aim for an f-ratio between f/2 and f/5. This allows you to gather light quickly and capture these faint objects without needing excessively long exposures that can introduce noise or tracking errors.
- Planetary and lunar photography: You’ll want a higher f-ratio, typically f/10 or above. This provides the magnification necessary to see details on these relatively bright and small subjects.
And don’t forget, you can tweak your f-ratio with tools like focal reducers or Barlow lenses to fit your specific needs.
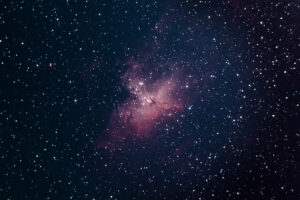
Example: If you’re photographing the Orion Nebula, a bright and relatively large DSO, an f-ratio of f/3.5 could be ideal. This would allow you to capture its vibrant colors and intricate structures without a prohibitively long exposure time.
Now, let’s get ready to explore techniques for achieving top-notch star shots with the right f-ratio.
Dialing In: Setting Your F-Ratio for Crisp Images
Getting your f-ratio dialed in is a bit like tuning a guitar – it needs to be just right to hit the perfect note. For astrophotography, that ‘note’ is a crisp, clear image of the night sky. To set your f-ratio, start by understanding the capabilities of your lens or telescope. If you can adjust the aperture, start with a lower f-ratio for dimmer objects and increase it if you’re capturing something brighter, like the Moon. It’s a balancing act: too low, and you might get distortions; too high, and your images may be too dark. For a deeper understanding of how this works, consider reading about how focal ratio affects your astro images.
Maximizing Light Capture: F-Ratio Adjustments for Dark Skies
Dark skies are a blank canvas for astrophotographers, and the f-ratio is your brush. Under these ideal conditions, a lower f-ratio can work wonders, maximizing the light capture from stars and nebulae. If your skies are truly dark and you’re after those faint galaxies, drop that f-ratio down. This will allow you to shorten exposure times and capture stunning images without the worry of light pollution washing out the faintest of details.
Pro Tips for Aspiring Astro-Photogs
Here’s a pro tip: always test your setup during the day. Point your telescope or lens at a distant object and play around with the f-ratio settings. Notice how the brightness and clarity change. This practice run will save you precious time under the stars and give you a feel for how your equipment performs at different settings.
Another tip is to keep a logbook of your astrophotography sessions. Note down the f-ratio you used, the celestial objects you captured, and the resulting image quality. Over time, you’ll see patterns that will guide you to the best f-ratio for each situation.
And remember, the right f-ratio is not just about the number. It’s about understanding how it interacts with the other settings on your camera, like exposure time and ISO. It’s the synergy of these settings that will result in breathtaking astrophotography.
- Test your setup during daylight to understand how different f-ratios affect your image.
- Keep a logbook of your sessions to identify the best f-ratios for various targets.
- Understand that the right f-ratio is about how it works in conjunction with exposure and ISO.
When to Compromise: Balancing F-Ratio with Exposure and ISO
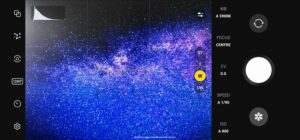
Sometimes, you have to make compromises. Maybe your lens doesn’t go to f/2, or you’re dealing with some light pollution. In these cases, you’ll need to balance your f-ratio with longer exposures or higher ISO settings. Remember, increasing the ISO can introduce noise, so try to find a happy medium where your exposure time is manageable, but your ISO isn’t sky-high.
For example, if you’re stuck with an f-ratio of f/6 and you’re after a dim nebula, you might need to bump up the ISO to 1600 and extend your exposure to several minutes. It’s all about finding the right combination that gives you the best possible image given your constraints.
Don’t forget to take multiple shots and stack them in post-processing. This technique can compensate for a less-than-ideal f-ratio by improving the signal-to-noise ratio, making your final image clearer and more detailed.
Improving Clarity: Reducing Star Trails with Optimal F-Ratios
Long exposures can lead to star trails, those streaks of light that occur as Earth rotates. To minimize this, use an optimal f-ratio that allows you to reduce exposure time. For instance, if you’re using a tracking mount, you might get away with a slightly higher f-ratio since the mount compensates for Earth’s movement. But if you’re shooting without a tracker, a lower f-ratio will be your best friend to keep those stars as sharp pinpoints.
Navigating Common F-Ratio Myths and Facts
There’s a lot of lore in the world of astrophotography, and not all of it is true. Let’s navigate through some common myths and facts about f-ratios to ensure you’re getting the right information.
Debunking Misconceptions: Clearing the Air Around F-Ratios
One common myth is that you always need the lowest f-ratio possible. Not true. While a low f-ratio is great for gathering light quickly, it can also introduce optical aberrations and a shallower depth of field, which might not be what you want for certain subjects. It’s about using the right tool for the job, not just the one with the lowest number. Learn more about how focal ratio affects your astro images to make informed decisions.
True or False: Addressing Common F-Ratio Queries
Let’s play a little game of true or false: Can you do astrophotography with any telescope?
- True or False: A lower f-ratio always results in better images. False. It depends on the subject and conditions.
- True or False: You can’t change the f-ratio on a fixed-aperture telescope. False. Accessories like focal reducers can alter the effective f-ratio.
- True or False: Higher f-ratios are better for detailed shots of the Moon and planets. True. Higher f-ratios provide greater magnification.
FAQ: Unveiling the Secrets of Perfect F-Ratios
Let’s tackle some frequently asked questions to unveil the secrets of perfect f-ratios for astrophotography:
What Exactly Is an F-Ratio and Why Does It Matter in Astrophotography?
The f-ratio is a measure of your telescope or camera lens’s light-gathering ability. It matters because it affects the brightness, clarity, and field of view of your astrophotography images. It’s a crucial factor in capturing detailed and vibrant images of celestial objects.
How Do I Determine the Best F-Ratio for My Equipment?
To determine the best f-ratio for your equipment, consider the type of celestial object you’re photographing, the capabilities of your camera or telescope, and the level of ambient light pollution. Test different f-ratios to see what works best for your specific situation. For more in-depth information, read about how focal ratio affects your astro images on Sky & Telescope.
Can I Use the Same F-Ratio for Different Types of Astrophotography?
While you can use the same f-ratio for different types of astrophotography, it’s not always optimal. Different subjects may require different f-ratios to bring out the best in your images. Adjust your f-ratio based on what you’re aiming to capture.
Is a Lower F-Ratio Always Better for Capturing Stars?
A lower f-ratio is generally better for capturing stars, especially faint ones, because it allows more light to reach the sensor in less time. However, this isn’t a hard and fast rule, and sometimes a higher f-ratio may be necessary to achieve the desired effect.
How Does F-Ratio Affect the Exposure Time During Astrophotography?
The f-ratio directly affects exposure time. A lower f-ratio means you can use shorter exposure times to capture an image with the same brightness as a longer exposure at a higher f-ratio. This is especially useful when trying to minimize the effects of Earth’s rotation or when shooting under dark skies.
FAQ: Unveiling the Secrets of Perfect F-Ratios
As we reach the conclusion of our journey through the stars, it’s time to address some of the most common questions about f-ratios in astrophotography. This section is dedicated to clarifying doubts and shedding light on this pivotal aspect of capturing the cosmos.
What Exactly Is an F-Ratio and Why Does It Matter in Astrophotography?
The f-ratio, also known as the focal ratio, is the ratio of the telescope’s focal length to the diameter of its aperture. It’s a measure of the telescope’s light-gathering ability and affects the exposure time needed to capture an image. In astrophotography, where light is scarce and details are fine, the f-ratio is a critical factor in determining the quality and clarity of your celestial images.
How Do I Determine the Best F-Ratio for My Equipment?
Determining the best f-ratio for your equipment starts with knowing what you want to photograph. If your goal is deep-sky objects, a lower f-ratio, such as f/2 to f/5, is typically best. For planets and the Moon, a higher f-ratio, like f/10 or greater, is ideal. Consider your equipment’s limitations and experiment with different settings to find the sweet spot for your specific target.
Can I Use the Same F-Ratio for Different Types of Astrophotography?
While you might be tempted to stick to one f-ratio, different types of astrophotography often require different settings. A single f-ratio can be versatile, but for optimal results, adjust your f-ratio to match the type of celestial body you’re capturing. This ensures that you’re always getting the best possible image quality.
Is a Lower F-Ratio Always Better for Capturing Stars?
- A lower f-ratio is generally preferred for capturing stars because it allows more light to reach the camera sensor in a shorter amount of time.
- However, this isn’t a one-size-fits-all answer. The type of stars, the level of detail desired, and environmental conditions can all influence whether a lower f-ratio is the best choice.
For instance, capturing wide star fields might benefit from a lower f-ratio, while zooming in on individual stars or planets may require a higher f-ratio for more detail. To understand how focal ratio affects your astro images, different scenarios and equipment can play a significant role.
How Does F-Ratio Affect the Exposure Time During Astrophotography?
The f-ratio plays a significant role in determining the exposure time. A lower f-ratio means the telescope can capture more light in a shorter period, reducing the need for long exposures. This is particularly beneficial when trying to minimize the impact of Earth’s rotation or when shooting in areas with minimal light pollution.
In contrast, a higher f-ratio results in less light reaching the sensor, necessitating longer exposure times to achieve a well-exposed image. While this can be useful for bright objects like the Moon or planets, it may not be ideal for fainter deep-sky objects.


