Key Takeaways
-
Autoguiding is essential for capturing clear, long-exposure images of deep sky objects.
-
Selecting the right telescope and mount is crucial for successful deep sky astrophotography.
-
Understanding and implementing shooting techniques can greatly enhance image quality.
-
Proper setup of your telescope and autoguiding equipment is the foundation of good astrophotography.
-
Addressing common autoguiding issues can save you time and frustration during your stargazing sessions.
Your Gateway to the Cosmos: Mastering Deep Sky Autoguiding
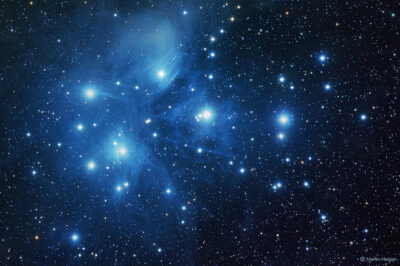
Have you ever looked up at the night sky and marveled at the stars, wishing you could capture their splendor? Autoguiding in astrophotography is your ticket to not just viewing, but immortalizing the beauty of the cosmos. It’s the technique that allows us to take long-exposure photographs of celestial objects without the stars turning into blurry streaks. So, let’s embark on this journey to discover how you can harness the power of autoguiding to bring the universe a little closer to home.
The Magic of Autoguiding
Imagine trying to take a picture of a bird in flight with a zoom lens. If you don’t track the bird’s motion perfectly, you’ll end up with a blurry photo. The same principle applies to astrophotography. Our planet is constantly rotating, which means the stars appear to move across the night sky. Autoguiding is the process that compensates for this movement, ensuring that your telescope tracks a chosen star with precision, keeping it steady in your camera’s field of view. This allows you to take long-exposure images that reveal the wonders of galaxies, nebulae, and star clusters in sharp detail.
Choosing Your Telescope and Mount
Selecting the right equipment is like choosing the best paintbrush for a masterpiece. For deep sky astrophotography, you need a telescope that can gather enough light to capture distant celestial objects. The mount, on the other hand, is what holds and moves your telescope. It’s essential to have a sturdy and reliable mount, preferably an equatorial mount, which is designed to follow the rotation of the Earth with the help of motors. This makes it much easier to track stars accurately over long periods.
The Role of Shooting Techniques
Autoguiding isn’t just about having the right gear; it’s also about knowing how to use it. Shooting techniques, such as setting the correct exposure time and ISO, play a vital role in capturing the perfect shot. You’ll need to balance these settings to ensure your images are neither too dark nor overexposed. And remember, patience is key. The longer your exposure, the more light you’ll capture, which means more details of those distant suns and galaxies.
Stepping into the Universe: Setting up Your Telescope
Before we dive into the night sky, let’s talk about setting up your telescope. The first step is to find a dark spot away from city lights. Once you’ve found the perfect location, it’s time to set up your telescope and mount. Make sure everything is level and stable – any vibrations or movements can ruin a long-exposure shot. After setting up, you’ll need to align your telescope with the North Star, Polaris, which is a critical step for accurate tracking in the Northern Hemisphere.
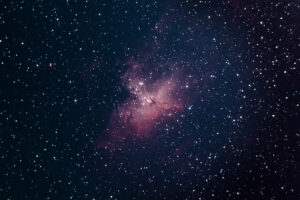
Example: When I first set up my telescope for autoguiding, I made sure to align it with Polaris. It took some time to get it right, but the effort paid off with beautifully sharp images of the Orion Nebula.
Finding the Perfect Telescope for Deep Sky Wonders
Choosing a telescope can be overwhelming, but here’s a simple tip: start with a reflector or a refractor with a large aperture. The aperture is the diameter of the telescope’s main lens or mirror, and a larger aperture means more light can be captured. This is especially important for deep sky objects that are faint and far away. A good starting point might be an 8-inch reflector or a 4-inch refractor. These sizes offer a balance between light-gathering capability and portability.
Mounting Success: Securing Your Telescope for Precision
Once you’ve selected your telescope, securing it to a mount is the next critical step. A sturdy mount is the backbone of astrophotography; it’s what keeps your telescope aimed precisely at the stars. An equatorial mount is the gold standard for deep sky work because it can be aligned with the Earth’s axis, allowing for smooth tracking of celestial objects across the night sky. Take your time to balance your telescope on the mount correctly. This means adjusting the counterweights until the telescope can glide smoothly in all directions without resistance.
For example, think of your telescope like a seesaw. When it’s perfectly balanced, it takes very little effort to move it up or down. This is exactly how your telescope should feel on its mount. If it’s not balanced, your mount’s motors will have to work harder, leading to tracking errors and potential damage over time.
After balancing, perform a polar alignment. This process aligns your mount’s axis with the celestial pole, ensuring that your telescope can accurately follow the stars’ apparent motion caused by the Earth’s rotation. There are many methods to achieve polar alignment, from using dedicated polar scopes to sophisticated software. Choose the method that works best for you, but remember, the more precise your polar alignment, the better your autoguiding will be.
Precision is paramount in astrophotography. Even the slightest error in mounting or alignment can result in trailed stars and loss of detail. So, invest the time to get it right; your images will thank you for it.
Stellar Guidance: The Autoguiding Process
Autoguiding is like having a co-pilot for your telescope, keeping your shots steady as you capture the night sky. The process begins by selecting a guide star. This star will be your reference point, and your autoguiding system will make minute adjustments to keep this star centered in your camera’s field of view. It’s like playing a video game where you have to keep the target in the center of your screen, except in this game, the autoguiding system does it for you.
To start autoguiding, you’ll need to connect your guide camera to the telescope and link it to a computer running autoguiding software. The software analyzes the position of the guide star in real-time and sends commands to the telescope mount to make adjustments as needed. This keeps your telescope precisely aligned with the stars, enabling you to take clear, long-exposure images.
Equipment Essentials: What You Need for Autoguiding
Here’s a quick rundown of the essential equipment for autoguiding:
-
Guide Scope: This is a small telescope mounted on top of your main telescope. It feeds images of the night sky to your guide camera.
-
Guide Camera: A specialized camera that captures images from the guide scope and sends them to your computer for analysis.
-
Autoguiding Software: Software such as PHD2 Guiding processes the images from your guide camera and sends correction signals to your mount.
-
Mount Interface: A connection between your mount and computer that allows the software to communicate with and control the mount.
Each piece of equipment plays a crucial role in the autoguiding process. When assembled together, they form a system that keeps your telescope tracking stars with incredible accuracy.
Troubleshooting Common Autoguiding Issues
Even with the right setup, you may encounter issues. Here are some common autoguiding problems and how to fix them:
-
Drifting Guide Star: This could be due to poor polar alignment or balance. Re-check your setup and make the necessary adjustments.
-
Connection Errors: Ensure all cables are securely connected and that the software is configured correctly for your guide camera and mount.
-
Frequent Corrections: If the software is making constant corrections, it could be due to backlash in the mount’s gears. Adjust the settings in your autoguiding software to compensate for this.
Remember, troubleshooting is part of the learning process in astrophotography. Don’t get discouraged; each problem you solve brings you one step closer to capturing the universe’s beauty.
The Dance of the Celestials: Shooting Techniques and Tips
Now that your telescope is set up and your autoguiding system is ready, it’s time to start shooting. But before you do, let’s go over some shooting techniques and tips that will help you capture the cosmos in all its glory.
Capturing the Cosmos: Camera Settings for Deep Sky Imaging
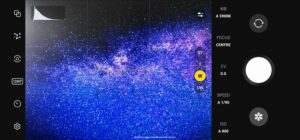
Your camera settings are your tools for capturing the night sky. For deep sky imaging, you’ll want to use a low ISO to reduce noise and a long exposure to collect as much light as possible. Start with an ISO between 400 and 800 and an exposure time of at least 30 seconds. As you become more comfortable with your setup, you can experiment with longer exposures to capture fainter details.
Long-Exposure Mastery: Reducing Noise and Increasing Details
Long exposures are the secret to detailed astrophotographs, but they also increase the risk of noise. To combat this, use a technique called ‘dithering.’ Dithering slightly shifts the position of your telescope between exposures. When you stack these images in post-processing, the noise is reduced, and the details become sharper. Think of it like shaking a puzzle box to help the pieces fall into place.
The Art of Patience: Timing Your Deep Sky Sessions
Lastly, timing is everything. The best deep sky images are captured when objects are high in the sky, away from the distorting effects of Earth’s atmosphere near the horizon. Plan your sessions around the position of your target objects. Use apps or star charts to determine the best time to shoot, and be patient. Sometimes, waiting just a bit longer for an object to rise can make all the difference in your images.
Autoguiding has opened up a universe of possibilities for astrophotographers. With the right setup, shooting techniques, and a little patience, you can capture breathtaking images of deep sky objects. Remember, every night under the stars is an opportunity to improve and learn. So set up your telescope, choose your guide star, and let the dance of the celestials begin.
Remember – Be Patient
Patience isn’t just a virtue; it’s a requirement in astrophotography. The cosmic ballet of the stars and galaxies unfolds on a timescale far beyond our everyday experiences. For the sharpest images, it’s essential to time your sessions when the celestial bodies you’re targeting are highest in the sky. This positioning minimizes atmospheric distortion and maximizes the clarity of your captures. So, plan your astrophotography adventures around the rise and set times of your chosen deep sky objects. A little waiting can mean the difference between a good image and a stellar one.
Navigating the Night Sky: Optimization and Advanced Strategies
Now that you’ve got the basics down, let’s delve into some advanced strategies to optimize your deep sky autoguiding experience. From the right apps to the best filters, these tips will help you navigate the night sky like a pro and bring those distant wonders into focus.
Finding Your Target: Using Apps and Guides to Locate Deep Sky Objects
Before you can photograph them, you need to find them. The night sky is vast, and locating deep sky objects can be like finding a needle in a haystack. Luckily, there are many apps and guides that can help. Applications like Stellarium or SkySafari provide interactive star charts that can direct you to your target. Enter your location, select the object you’re after, and these tools will show you where to point your telescope. It’s like having a personal guide to the universe at your fingertips.
Enhancing Clarity: Filter Types and Their Impact on Your Shots
Filters can be the unsung heroes of astrophotography. They can suppress light pollution, increase contrast, or isolate specific wavelengths of light to bring out details in nebulae and galaxies. There are several types of filters to consider:
-
Light Pollution Filters: These reduce the orange glow from artificial lighting, allowing the true colors of celestial objects to shine through.
-
Hydrogen-Alpha Filters: They isolate the light emitted by hydrogen in nebulae, enhancing the structure and detail in your images.
-
Color Filters: Useful in planetary photography, these can increase contrast and bring out details in the planets’ atmospheres.
Choose your filters based on what you’re aiming to photograph and the conditions you’re shooting in. They can make a significant difference in the quality of your astrophotography.
When you’re out in the field, remember to take test shots with and without your filters. This will give you a real-time comparison of their effects and help you decide which ones to use for your final shots.
Action! Automated Sequencing Strategies for Efficient Imaging Runs
Autoguiding isn’t just about keeping your telescope on target; it’s also about making the most of your time under the stars. Automated sequencing software can control your entire imaging run, from taking light frames to calibration frames like darks and flats. This automation ensures you’re capturing images consistently throughout the night. Set up your sequence, hit ‘start,’ and you can sit back and enjoy the cosmos while your setup does the heavy lifting. It’s like having a robotic assistant dedicated to your astrophotography journey.
FAQs: Deep Sky Autoguiding and Astrophotography
Let’s address some frequently asked questions that can help clear up any lingering uncertainties about deep sky autoguiding and astrophotography.
Why is Autoguiding Important in Astrophotography?
Autoguiding is critical because it allows for long-exposure photography without star trailing. As the Earth rotates, stars appear to move across the sky. Without autoguiding, exposures longer than a few seconds would result in blurry images. Autoguiding keeps your telescope perfectly aligned with the stars, ensuring that your images are sharp and detailed. It’s the difference between capturing a smudge and a spiral galaxy in all its glory.
What Type of Mount is Best for Deep Sky Imaging?
For deep sky imaging, the best type of mount is an equatorial mount. These mounts are designed to follow the rotation of the Earth, allowing for precise tracking of celestial objects over long periods. Look for a mount with GoTo capabilities, which can automatically point your telescope to thousands of objects in the sky. A solid equatorial mount with autoguiding capability is the cornerstone of any successful deep sky astrophotography setup.
In conclusion, mastering deep sky autoguiding is a journey filled with learning and wonder. From setting up your telescope to capturing the faintest nebulae, each step brings you closer to the cosmos. Use these tips and strategies to guide your way, and remember that every clear night is an invitation to explore the universe. Embrace the challenge, and let the stars be your guide.


