
Key Takeaways
- Vignetting in astrophotography refers to the darkening of corners in an image, which can detract from the photo’s quality.
- Causes of vignetting include lens design, obstructions, and the angle of light entering the lens.
- To fix vignetting, you can adjust your aperture, use lens hoods judiciously, and employ image processing software.
- Some vignetting can be intentional for artistic effect, but unwanted vignetting can be distracting.
- Understanding your equipment and mastering post-processing techniques are key to managing vignetting.
Shedding Light on Vignetting in Astrophotography
When you gaze up at the night sky and capture its celestial wonders through your camera, the last thing you want is a dark shadow creeping around the edges of your masterpiece. This phenomenon, known as vignetting, can be the bane of astrophotographers everywhere. But fear not, because with a little know-how, you can banish those unwanted shadows from your nightscapes.
What Exactly is Vignetting?
Vignetting is like a subtle thief in the night, sneaking into your photos and dimming the edges. Imagine you’re looking through a tunnel — the way the tunnel’s edges obscure the light is similar to how vignetting affects your astrophotography. It’s a gradual darkening towards the corners of an image that can either be a nuisance or an artistic choice.
Why Vignettes Are More than Just Shadows
Vignettes aren’t just about light and dark; they’re about focus, attention, and the story you’re telling with your photograph. They can add depth and direct the viewer’s eye to the central subject. However, when it comes to astrophotography, where the beauty of the stars should be unimpeded, unintentional vignetting can distract from the celestial show.
Piercing Through Darkness: Causes of Vignetting
Let’s dive into the causes of vignetting. It’s important to understand why it happens, so you can take steps to prevent or fix it. For more detailed information on this, you can refer to a guide on what’s vignetting in photography.
The Culprit Behind Uneven Illumination
One of the main causes of vignetting is the physical design of your lens. Wide-angle lenses, in particular, are notorious for this effect, especially when shooting wide open. It happens because the light rays hitting the edges of the sensor have traveled a longer, more oblique path compared to those hitting the center, leading to a reduction in light intensity.
Another cause is the use of improper lens hoods or stacking too many filters, which physically block some of the incoming light. This is akin to partially closing the curtains on a window — less light gets through, and a shadow is cast.
How Equipment Can Cast a Shadow on Your Images
Your choice of equipment plays a significant role in the vignetting saga. Besides the lens itself, the camera sensor size and even the telescope you might be attaching your camera to can contribute to the problem. Here’s a quick breakdown:
Lens Design: Lenses with large elements or complex designs are more prone to vignetting.
Sensor Size: Full-frame sensors are more likely to show vignetting because they capture more of the lens’s projected image circle, including the darker edges.
Telescope Adapters: When connecting a camera to a telescope, any misalignment or inadequate adapter size can cause vignetting.
Understanding these factors is the first step in addressing vignetting. By choosing the right equipment and knowing how it interacts with light, you can minimize the effect before it even occurs.
Dimming the Edges: The Role of Aperture and Angle
Aperture settings can significantly impact the amount of vignetting in your photos. A wide-open aperture often results in more pronounced vignetting due to the angle at which light enters the lens. By stopping down your aperture, you can reduce this effect, as less of the outer edges of the lens are used, and light travels more directly to the sensor.
But it’s not just about the aperture. The angle of light is also a key player. Light entering the lens at sharper angles is more susceptible to vignetting. This is especially true for astrophotography, where you’re often dealing with extreme contrasts between the dark sky and bright stars.
So, to keep those starry edges as bright as the center, consider these steps:
- Stop down your aperture to at least f/4 or smaller, depending on your lens’s sweet spot for sharpness and vignette control.
- Be mindful of the angle at which light enters your lens and adjust your composition accordingly.
- Use lens hoods with caution, ensuring they’re the correct size and shape for your lens to avoid unintentional blockage of light.
Remember, it’s all about balance. You want enough light for a clear, vibrant image, but not so much that it overwhelms the sensor and leads to unwanted vignetting.
The Digital Darkroom: Correcting Vignetting
When you’ve done all you can in the field but still find those pesky dark corners in your images, it’s time to turn to the digital darkroom. Here, software becomes your ally, providing powerful tools to bring back the light to the edges of your astrophotography shots.
Leveraging Software for Evenly Lit Photographs
Programs like Adobe Lightroom and Photoshop have dedicated features to correct lens vignetting. They can recognize the lens used through the image’s metadata and automatically apply a correction profile. But you’re not just limited to presets; manual adjustments allow for fine-tuning to get the look just right.
For instance, in Lightroom, you can easily slide controls for ‘Amount’, ‘Midpoint’, ‘Roundness’, and ‘Feather’ to reduce or even remove vignetting. It’s all about subtle changes, and here’s the kicker: you can preview the effect in real-time, ensuring you don’t overdo it.
Photoshop takes it a step further, allowing for more intricate edits. You can create a vignette correction layer and use a soft brush to paint in light where it’s needed. Or, use the Lens Correction filter for a quick fix. Remember, the goal is to maintain the natural look of the night sky, so keep adjustments minimal.
Expert Tricks in Post-Processing
For those who want to delve deeper, there are more advanced techniques. Here are a couple of expert tricks:
- Use the radial filter in Lightroom to selectively brighten the corners without affecting the entire image.
- In Photoshop, create a levels or curves adjustment layer specifically for the vignette area and use a feathered mask to blend it seamlessly.
These methods give you granular control over the correction process, allowing you to address vignetting without compromising the integrity of your stars and galaxies.
“The beauty of astrophotography lies in its ability to capture the night sky in all its glory. Don’t let vignetting dim the stars. Embrace the power of post-processing to illuminate every corner of the cosmos.” – Renowned Astrophotographer
And for those who love the open-source way, software like GIMP and RawTherapee offer vignetting correction tools as well. They might require a bit more manual effort, but they’re free and incredibly effective once you get the hang of them.
Preventive Measures: Avoiding Vignetting Altogether
Prevention is better than cure, they say, and it’s true for vignetting as well. By understanding what causes it and taking steps to avoid it, you can save yourself a lot of post-processing time.
Choosing the Right Equipment
Start with the right gear. Lenses known for their edge-to-edge sharpness and minimal vignetting are a great investment for astrophotography. Research and read reviews before purchasing to ensure you’re getting a lens that performs well in low light and at wide apertures.
Be cautious with filters. While they can protect your lens and enhance colors, they can also contribute to vignetting. Opt for high-quality, slim-profile filters to minimize the risk.
Finally, consider a full-frame camera if you’re serious about astrophotography. The larger sensor size not only captures more light but also reduces the vignetting effect seen with smaller sensors.
Optimal Camera Settings for Vignette-Free Photos
Camera settings can also play a role in preventing vignetting. Here’s what you can do:
- Stop down your lens. Shooting at the widest aperture can increase vignetting, so try using an aperture that’s one or two stops smaller than the maximum.
- Be mindful of your field of view. If you’re using a telescope or a lens with a known vignetting issue, frame your subject away from the edges where vignetting is most prominent.
- Regularly check your equipment for any misalignments or attachments that could block light, such as lens hoods or filters.
By following these steps, you can often capture images that are free from vignetting, allowing you to focus more on the wonders of the night sky and less on fixing issues afterward.
Remember, astrophotography is as much about preparation as it is about the actual shooting. Take the time to set up correctly, and you’ll be rewarded with stunning images that require minimal post-processing.
- Vignetting in astrophotography refers to the darkening of image corners, which can detract from the photo’s overall impact.
- It can be caused by lens design, obstructions, or the angle of light entering the lens.
- Correcting vignetting may involve adjusting aperture settings, choosing the right equipment, and employing post-processing techniques.
- Intentional vignetting can be used artistically to focus the viewer’s attention or enhance the mood of the image.
- Understanding both the technical and artistic aspects of vignetting can lead to better astrophotography outcomes.
Setting the Mood with Intentional Vignetting
While often seen as an annoyance, vignetting can also be a powerful tool in the astrophotographer’s arsenal. Used intentionally, it can add a dramatic effect, guiding the viewer’s eye to the central subject or creating a sense of depth in the night sky. It’s all about using light and shadow to enhance the story you’re telling with your image.
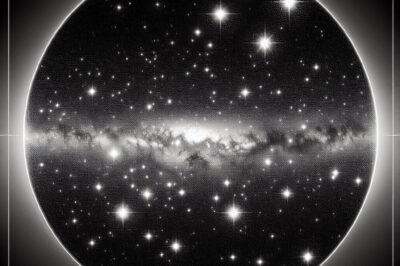
For example, if you’re capturing the Milky Way, a slight vignette can help to frame the galaxy’s core, making it stand out against the vastness of space. It’s like setting a spotlight on the main act in a play—the stars take center stage, and the vignette provides the perfect backdrop.
Creative Control: Adding Depth to Your Astrophotos
Intentional vignetting is a creative decision, and like all artistic choices, it should be made with purpose. By subtly darkening the edges of your image, you can create a feeling of depth, as if the viewer is peering into the universe through a telescope. This technique can turn a flat, two-dimensional photo into a window to the cosmos, inviting the audience to step into the scene.
FAQs
Is Vignetting Always Unwanted in Astrophotography?
No, vignetting isn’t always unwanted. While it can be a nuisance if it occurs unintentionally and obscures important details, it can also be used deliberately to enhance the composition and mood of an image. The key is to have control over its presence and effect.
Can Vignetting Be Corrected for All Types of Lenses?
Most types of lenses can experience vignetting, and while it can be corrected in post-processing for many, some lenses may have characteristics that make complete correction difficult. Ultra-wide-angle lenses, for example, can exhibit complex vignetting that isn’t easily fixed with standard software profiles.
What Causes Vignetting in Telescope Photography?
In telescope photography, vignetting can be caused by several factors, including the telescope’s optical design, the size of the telescope’s focuser, and any adapters used to connect the camera. It’s important to ensure that all equipment is compatible and correctly aligned to minimize vignetting.
Does Sensor Size Affect Vignetting?
Yes, sensor size can affect vignetting. Larger sensors, such as those found in full-frame cameras, are more likely to exhibit vignetting because they capture a wider field of view, which includes the edges of the lens where vignetting occurs. Conversely, smaller sensors may crop out the vignetted edges, reducing the effect.
Are There Any Tools Specifically Made to Combat Vignetting?
Yes, there are tools designed to combat vignetting. Lens hoods can be used to prevent stray light that might contribute to vignetting, and lens profiles in editing software can automatically correct for known vignetting patterns. Additionally, specialized plugins and filters for post-processing software can provide more control over vignetting correction.
Vignetting is a common issue in astrophotography where the corners of an image appear darker than the center. This can be caused by a number of factors including the design of the telescope and the camera, the use of an improper eyepiece, or even the presence of a dust particle on the sensor. Understanding the causes of vignetting is the first step to mitigating it. To get rid of vignetting, one can use flat frames during image processing, adjust the telescope’s focus, or ensure that the camera and telescope are properly aligned.


