Key Takeaways
- Discover the ideal camera settings for capturing the quarter moon, such as a low ISO and fast shutter speed.
- Understand the significance of the quarter moon phase for photography and the unique opportunities it presents.
- Learn how to use a tripod and remote trigger to eliminate camera shake and achieve sharp lunar images.
- Explore the necessary gear, including the right camera, lenses, and accessories, for successful quarter moon photography.
- Get tips on composing your shot with the moon as a stunning focal point in the night sky.
Capturing the Quarter Moon: Your Ultimate Guide
There’s something about the quarter moon that captivates us. It’s a time when the moon reveals its rugged landscape, casting dramatic shadows that invite photographers to capture its magnificence. Whether you’re a seasoned astrophotographer or someone who’s just starting to explore the night sky, this guide will walk you through the steps to take awe-inspiring photos of the quarter moon.
Essentials for Astounding Quarter Moon Imagery
When it comes to quarter moon photography, preparation is key. You’ll want to start by checking the lunar calendar to find out when the next first or last quarter moon will occur. These are the phases when half of the moon’s face is illuminated, offering the best contrast and detail for your shots. Besides that, ensure you have a clear view of the sky, away from city lights, to avoid light pollution.
Aligning the Shot: Positioning and Timing for Clarity
Positioning yourself correctly is crucial. Since the moon rises in the east and sets in the west, find a spot with a clear horizon in those directions. Timing is also important; the best photos can often be captured when the moon is near the horizon, where you can include interesting foreground elements. Remember, the moon moves quite rapidly across the sky, so be ready to adjust your composition accordingly.
Now, let’s dive into the specifics of the gear you’ll need to capture the quarter moon’s beauty.
The Gear You Need for Stunning Lunar Photos
Choosing the Right Camera for Moon Shots
Most importantly, the type of camera you use can make a significant difference. A DSLR or mirrorless camera with manual mode capabilities is ideal because you’ll need to adjust settings that aren’t available on a point-and-shoot or smartphone camera. The ability to change lenses is also a plus, allowing you to zoom in closer to the moon.
Telescope or Lens: Magnifying Your View
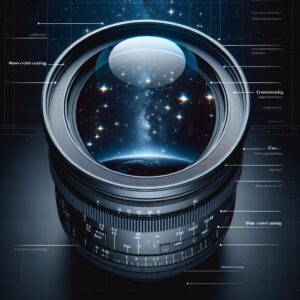
Regarding lenses, a long telephoto lens, preferably 200mm or more, will help you fill the frame with the moon’s surface. If you have access to a telescope, you can use a T-ring adapter to connect your camera to the telescope for an even closer view. However, remember that the longer the focal length, the more any camera movement will be magnified, which brings us to the importance of stability.
Sturdy Tripods and Remote Triggers: Reducing Shake
Using a sturdy tripod is non-negotiable. It’s essential to keep your camera still during the long exposures needed for moon photography. A remote trigger or your camera’s timer function will allow you to take photos without touching the camera, eliminating the risk of camera shake.
Mastering the Art of Quarter Moon Photography
As we delve deeper into the nuances of quarter moon photography, understanding the technical aspects of your camera is crucial. You’ll be dealing with less light than a full moon, which means you’ll need to adjust your camera settings to capture the moon’s details without overexposing it. For more detailed techniques, consider reading our full moon astrophotography guide which can also be applied to quarter moon scenarios with slight modifications.
Let’s start with the ISO setting. While the moon is a bright subject, the surrounding night sky is not. You’ll want to keep your ISO as low as possible, ideally around 100 or 200, to reduce noise. This will give you a cleaner image to work with, both in-camera and during post-processing.
The shutter speed will also play a vital role. Because the moon is moving relative to the Earth, a fast shutter speed is necessary to freeze the motion and prevent a blurry photo. Start with a shutter speed of 1/250th of a second and adjust from there based on the brightness of the moon and your lens’s focal length.
Aperture is the next consideration. A smaller aperture, such as f/8 or f/11, will give you a sharper image of the moon’s surface. However, if you’re using a lens with a long focal length and you’re experiencing camera shake, you may need to open the aperture to allow for a faster shutter speed. It’s all about finding the right balance for your particular situation.
- Set ISO between 100-200 to keep noise low.
- Use a fast shutter speed, starting at 1/250th of a second, to capture the moon’s motion.
- Adjust aperture to f/8 or f/11 for sharpness, but be prepared to adapt if necessary.
Phases Matter: Understanding the Best Time to Shoot
The quarter moon phase offers a unique opportunity for photography. Unlike a full moon, the quarter moon’s shadows reveal the texture and depth of the lunar surface. The best time to photograph the quarter moon is within a few days of the first or last quarter phase. This is when the contrast between light and dark is most pronounced, giving your photos more dimension and character.
Light and Shadow: Composing with Contrast
When composing your quarter moon shots, pay attention to the interplay of light and shadow. The terminator line – the dividing line between the moon’s day and night – is where you’ll find the most dramatic contrast. Positioning the terminator line off-center can create a more dynamic composition. Also, consider including some earthbound elements, such as trees or buildings, for scale and added interest.
Remember, the moon’s position in the sky changes throughout the night, so plan your shoot accordingly. Early evening or just before dawn are often the best times to capture the moon with some context from the surrounding landscape.
Post-Processing Techniques to Enhance Your Moon Photos
After you’ve captured your quarter moon photos, post-processing can take them from good to great. Software like Adobe Lightroom or Photoshop offers tools to refine your images and bring out the best in them.
Start by adjusting the exposure and contrast sliders to enhance the moon’s details. If the moon appears too bright or too dark in your photo, these adjustments can help balance the image. Next, increase the clarity or sharpness slightly to bring out the texture of the lunar surface.
For example, if your photo looks a bit dull, you can boost the contrast to make the moon’s features pop. Just be careful not to overdo it, as too much contrast can lead to an unnatural-looking image.
Another useful tool is the highlight and shadow sliders. These can help recover details in the brightest and darkest parts of your image. The white and black sliders can then be used to set the absolute brightest and darkest points in the photo, adding depth and definition.
Sharpening the Craters: Detail Enhancement Strategies
Sharpening is a subtle but powerful tool in your post-processing arsenal. Use it to enhance the edges of craters and other features on the moon’s surface. But again, moderation is key. Over-sharpening can introduce unwanted noise and artifacts.
Balancing Brightness and Contrast: Making the Moon Pop
Once you’ve sharpened your image, revisit the brightness and contrast. Adjusting these settings can help your photo strike the perfect balance between highlighting the moon’s brilliance and maintaining the integrity of the surrounding night sky.
Consider using local adjustments, such as the radial filter in Lightroom, to selectively brighten the moon while keeping the sky dark. This can help your subject stand out even more.
Color Corrections: Achieving True Lunar Tone
Lastly, color correction may be necessary to achieve a true representation of the moon’s color. The moon can sometimes appear too blue or too yellow, depending on the white balance setting you used when shooting. Adjust the temperature slider until the moon’s color looks natural.
- Use exposure and contrast adjustments to balance the moon’s brightness.
- Apply sharpening to enhance craters and lunar features, but avoid overdoing it.
- Adjust the white balance to correct the moon’s color for a natural look.
With these tips and techniques, you’re well on your way to capturing stunning quarter moon photographs. Remember to be patient and enjoy the process. Each time you shoot, you’ll learn something new and improve your skills. So grab your gear, head out under the night sky, and capture the quarter moon’s splendor.
Integrating the Quarter Moon into Landscapes
Now that you’ve mastered the technical aspects of quarter moon photography, it’s time to get creative. Integrating the quarter moon into landscape shots can produce breathtaking results. To do this, scout locations during the day to find compelling foreground subjects that will complement the moon. When the time comes, position the moon in the frame to create balance and harmony with the landscape. The juxtaposition of the moon against earthly elements can yield a captivating story in your image.
Experimenting with Exposure: Long vs. Multiple Exposures
Experimenting with different exposure techniques can add variety to your moon photography. Long exposures can create a sense of movement in the clouds or water, adding a dynamic element to your images. However, remember that long exposures might blur the moon, so it’s a balancing act. Multiple exposures, on the other hand, allow you to expose for the moon and the landscape separately, then blend the images in post-processing for a perfectly exposed composite.
FAQ
After diving into the details of quarter moon photography, you might still have a few questions. Let’s address some common queries to ensure you’re fully equipped for your next lunar shoot.
Understanding the right camera settings and techniques is essential to capturing the beauty of the quarter moon. With the right knowledge, you can create stunning images that reflect the majesty of the night sky.
What is the best camera setting for quarter moon photography?
The best camera setting for quarter moon photography involves a combination of a low ISO, a fast shutter speed, and a small aperture. Start with an ISO between 100-200, a shutter speed of at least 1/250th of a second, and an aperture of f/8 to f/11. These settings will help you capture the moon’s details sharply against the night sky.
Can I take a good photo of the moon with a smartphone?
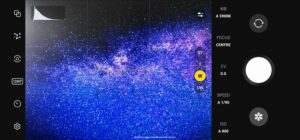
While a smartphone may not offer the same level of detail as a DSLR or mirrorless camera with a telephoto lens, you can still take a decent photo of the moon. Use a smartphone with a manual mode or download a camera app that allows you to adjust settings. Use a tripod with a smartphone adapter, and if possible, attach a clip-on telephoto lens designed for smartphones.
Remember to focus manually and adjust exposure settings to prevent the moon from appearing as a bright, featureless spot. Some modern smartphones have surprisingly good zoom capabilities and can produce a clear image of the moon, especially when used in conjunction with editing apps to enhance the final result.
Do I need a telescope to photograph the moon?
A telescope is not a necessity for moon photography, but it can enhance the level of detail you’re able to capture. If you have access to a telescope, use a T-ring adapter to attach your camera to it. This can allow for a much closer view and more detailed shots of the moon’s surface. However, a good telephoto lens on a camera can also yield excellent results.
How can I prevent my moon photos from being blurry?
To prevent blurry moon photos, use a sturdy tripod and a remote trigger or the camera’s self-timer to minimize camera shake. Choose a fast shutter speed to freeze the moon’s motion and use manual focus to ensure the moon is sharp. If using a long lens or telescope, also consider using mirror lock-up if available to reduce vibration.
What are some creative ways to compose my quarter moon shots?
There are numerous creative approaches to composing your quarter moon shots:
- Frame the moon with natural elements like trees or mountains to add depth.
- Use the rule of thirds to place the moon in an off-center position for a more engaging composition.
- Photograph reflections of the moon on water for a tranquil and symmetrical shot.
- Include silhouettes of subjects against the moon to create a sense of scale and drama.
- Combine the moon with urban landscapes for a contrast between nature and human-made structures.
Remember, the quarter moon is a dynamic subject that can be portrayed in countless ways. Keep experimenting and you’ll find the style that best captures your vision of the night sky.


