When the night sky beckons with its celestial wonders, the last thing we want is for light pollution to wash out the stars and galaxies we aim to capture. That’s where light pollution reduction filters come into play, turning a city sky into a stargazer’s paradise. These filters are not just accessories; they’re essential tools for anyone serious about astrophotography.
Key Takeaways
- Light pollution filters are crucial for capturing clear astrophotography images in urban areas.
- There are various types of filters, each designed for specific lighting conditions and celestial objects.
- Choosing the right filter depends on your camera gear and the type of astrophotography you’re pursuing.
- Proper setup and camera settings are vital for making the most of these filters.
- Post-processing plays a significant role in enhancing the final images captured with light pollution filters.
Galaxies Through the Lens: Mastering Light Pollution Filters
Gazing up at the night sky, you might think capturing the Milky Way or distant galaxies is a dream reserved for those far from city lights. But with the right light pollution reduction filter, you can peel back the veil of urban glow and reveal the universe’s splendor, right from your own backyard.
What Sets Apart Light Pollution Reduction Filters
These filters are not just pieces of glass or plastic; they are the result of sophisticated engineering designed to selectively block out the wavelengths of light most commonly associated with urban areas. This allows the faint light from distant stars and galaxies to pass through, giving you a clearer and more contrasted image. The difference is night and day—literally.
Most importantly, a good filter can mean the difference between a washed-out sky and a stunning astrophoto. They’re especially valuable in areas where sodium and mercury-vapor streetlamps dominate, emitting the amber and greenish hues that can obscure celestial objects.
When and Where to Leverage Light Pollution Filters
You’ll find these filters most useful in suburban and urban settings where artificial light is prevalent. However, don’t discount them even in semi-rural areas, as any light pollution can affect your images. When the Moon is bright in the sky, a light pollution filter can also help to reduce the glare and improve the visibility of galaxies and nebulae.
Because light pollution varies by location, the filter that works wonders in one city may not be as effective in another. It’s all about matching the filter to your environment.
Selecting the Right Filter for Your Astrophotography Adventure
The quest for the perfect astrophotography filter can be as vast as the cosmos itself. But fear not! With a little knowledge, you can navigate this space with confidence.
Types of Light Pollution Filters and Their Functions
There are a few main types of light pollution filters, each designed to tackle different challenges:
- Broadband Filters: Ideal for reducing the effects of general light pollution, they allow a wider range of wavelengths to pass through.
- Narrowband Filters: These are more specialized, designed to let through only the specific wavelengths emitted by certain types of celestial objects, like emission nebulae.
- Line Filters: These target very specific wavelengths of light, such as those from hydrogen-alpha or oxygen-III emissions, which are common in many galaxies and nebulae.
Matching a filter to the type of astrophotography you’re doing is key. For instance, if you’re interested in capturing the colors of nebulae, a narrowband filter might be your best bet.
Matching Filters to Your Gear
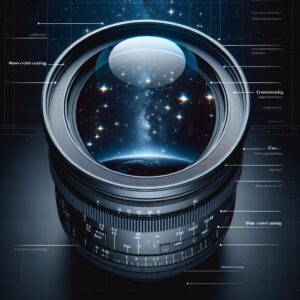
Filters come in various sizes and formats, from screw-on filters that attach directly to your camera lens to clip-in filters designed for DSLRs and mirrorless cameras. The filter you choose must be compatible with your equipment. For telescopes, filters are typically mounted between the telescope and the camera.
Here’s a simple guideline: If you’re shooting with a DSLR or mirrorless camera, clip-in filters can be incredibly convenient. For dedicated astronomy cameras or when using a telescope, you’ll likely be looking at threaded filters that attach to the camera or the eyepiece.
Remember, the goal is to reduce light pollution without losing the precious light from stars and galaxies. Therefore, the right filter should strike a balance between cutting out unwanted light and preserving the good stuff.
Setting Up for Success: Pre-Shoot Checklist
Before you even think about pressing the shutter button, there’s a bit of groundwork to be done. A successful astrophotography session begins with preparation.
Scoping Out the Skies: Planning Your Session
Start by checking the weather and moon phases. Clear, moonless nights are ideal for astrophotography. Use apps or websites to find out when the galactic center of the Milky Way will be visible, or when your target galaxies will be at their highest point in the sky.
Getting Your Equipment Ready
Charge your camera batteries, format your memory cards, and make sure your lenses and filters are clean and free from dust. If you’re using a telescope, ensure that it’s properly aligned and that you have all necessary adapters for attaching your camera.
Now that we’ve covered the essentials, it’s time to dive deeper into camera settings, shooting techniques, and post-processing magic in the next sections of our guide. Stay tuned, and get ready to capture the cosmos like never before!
Capturing the Cosmos: Camera Settings and Techniques
Balancing Exposure for Stellar Clarity
Once you’re out under the stars, camera in hand and filter in place, it’s time to talk about exposure. A long exposure is essential for astrophotography, as it allows your camera to collect enough light from those distant celestial bodies. But too long, and you’ll get star trails instead of sharp points of light. To start, aim for an exposure time that follows the ‘500 Rule’—which is 500 divided by the focal length of your lens to get the maximum exposure time before stars begin to trail.
Harnessing White Balance for True Colors
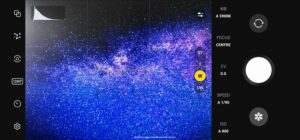
White balance can be tricky in astrophotography. Auto white balance might leave your images with an unnatural tint, so it’s often better to set it manually. For most night sky photography, a white balance setting between 3800K and 4500K tends to give a natural look to the stars and the sky. Play around with these settings; the right balance will make the colors of galaxies and nebulae pop against the darkness of space.
The Art of Framing Galactic Subjects
Framing is as much an art as it is a technical skill. When you look through your viewfinder or at your camera’s screen, imagine the rule of thirds grid overlaying your shot. Positioning your galactic subject along these lines or at their intersections can create a more engaging composition. Don’t be afraid to let the Milky Way stretch diagonally across the frame or to place a galaxy off-center for a dynamic effect.
Post-Processing: From Raw Images to Celestial Wonders
Stacking for Depth and Detail
Stacking is a post-processing technique where you combine multiple images of the same scene to improve the signal-to-noise ratio. This means your final image will have less noise and more detail. Most astrophotographers will take dozens, if not hundreds, of photos to stack. Use software like DeepSkyStacker or Sequator for this process, and you’ll be amazed at the difference it makes.
- Load your images into the stacking software.
- Select the best frames with clear, sharp stars.
- Align the images based on the stars.
- Let the software do its magic, combining the images into a single, detailed photo.
Once you have your stacked image, it’s time to move on to fine-tuning your masterpiece.
Navigating Software for Spectacular Edits
Post-processing is where good astrophotos become great. Programs like Adobe Photoshop and Lightroom are staples for many photographers. Start by adjusting the levels and curves to bring out the contrast between the stars and the night sky. Then, tweak the saturation to enhance the natural colors of the galaxies. Noise reduction can be helpful, but be careful not to erase the fine details of your celestial subjects.
Remember, the goal is to enhance, not overpower. Your light pollution filter has already done the heavy lifting by providing a clearer starting point. The edits you make should honor the true beauty of the night sky.
The Final Frontier: Advancing Your Astrophotography Skills
Continuous Learning and Community Engagement
The journey of an astrophotographer is one of lifelong learning and community. Join online forums, attend local astronomy club meetings, and participate in workshops. Sharing your experiences and learning from others can inspire new techniques and ideas. And who knows? You might just inspire someone else with your images and discoveries.
Experimenting for Artistic Expression
Astrophotography is not just a scientific pursuit; it’s an art form. So, experiment! Try different filters, settings, and compositions. Each adjustment can lead to a new and unexpected portrayal of the cosmos. And each image you create is a personal connection to the vast universe we call home.
Now, go out there and capture the night sky. With your light pollution filter in hand, the galaxies are waiting for you.
FAQ
Can You Reduce Light Pollution Without Filters?
While filters are incredibly effective at reducing light pollution, there are other methods to minimize its effects. One way is to choose your shooting location wisely—areas with less artificial light will naturally have less pollution. Additionally, shooting during a new moon phase will reduce the amount of natural light pollution in the sky. Post-processing techniques can also help to mitigate light pollution, such as using gradient removal tools and tweaking the levels and curves of your images.
Are Certain Filters Better for Different Types of Galaxies?
Yes, different filters can enhance different types of galaxies. For example, a UHC (Ultra High Contrast) filter can be particularly good for observing spiral galaxies as it blocks out common wavelengths of urban light while allowing the important lines from celestial objects to come through. On the other hand, an H-alpha filter might be better for capturing the red hues of emission nebulae within galaxies. It’s all about matching the filter to the specific features you want to capture.
Therefore, it’s important to research the galaxies you’re interested in and choose a filter that will highlight their most distinctive qualities.
How Does Moonlight Affect Light Pollution Filtering?
Moonlight can be a form of natural light pollution, especially when it’s at or near its full phase. It can wash out the faint details of galaxies and nebulae. Light pollution filters can help to some extent, but for the best results, plan your astrophotography sessions around the new moon, when the skies are darkest. Narrowband and line filters can also help to cut through the moonlight to capture specific details of your celestial targets.
Can Smartphone Cameras Use Light Pollution Filters?
Smartphone cameras can indeed use light pollution filters, but it’s a bit more complicated than with DSLRs or dedicated astrophotography cameras. You’ll need an adapter to hold the filter in front of your smartphone’s lens, and these are less common than those for traditional cameras. However, with the right setup, smartphone astrophotography can be a fun and accessible way to start exploring the night sky.
Is There a One-Size-Fits-All Solution for Light Pollution in Astrophotography?
Unfortunately, there’s no one-size-fits-all solution when it comes to light pollution in astrophotography. The filter that works best for you will depend on a variety of factors, including the type of celestial objects you’re photographing, the severity of the light pollution in your area, and the equipment you’re using. It’s often a matter of trial and error to find the perfect filter for your needs, but the journey is part of the adventure in capturing the night sky.


Leave a Reply