Article-at-a-Glance
- Understanding the difference between JPG and PNG file formats is crucial for astrophotography.
- JPG files use lossy compression, making them smaller but potentially reducing image quality.
- PNG files offer lossless compression, preserving image details but resulting in larger file sizes.
- Choosing the right file format depends on the intended use, such as web sharing or printing.
- Knowing when to use each format can significantly impact the final presentation of your celestial captures.
Defining the Contenders: JPG and PNG Explained
When you’re gazing up at the night sky, eager to capture its splendor, the last thing you might think about is file formats. Yet, it’s a decision that can make or break your astrophotography. Let’s get to know our two main contenders: JPG, which stands for Joint Photographic Experts Group, and PNG, or Portable Network Graphics. JPG is like a space-saving wizard; it shrinks your cosmic photos down to manageable sizes, making it easier to share them with fellow star enthusiasts. On the other hand, PNG is a detail-preserving champion, ensuring every little star and nebula looks just as sharp on your screen as it did through your telescope.
But why does this matter? Well, in the vast universe of digital photography, every pixel counts, especially when you’re trying to capture something as grand as the Milky Way or as delicate as a distant nebula. Each file format has its own method of storing these pixels, which affects everything from the image’s quality to its size on your hard drive.
Zooming in on Quality: Compression and Clarity
Now, let’s zoom in on what really sets these formats apart: compression. JPG uses what’s called lossy compression. Imagine you’re drawing the night sky with a set of colored pencils, but to save space in your sketchbook, you decide to blend some similar colors together. You’ll still get a beautiful picture, but some of the finer details might get lost. That’s what happens with JPG – it blends pixels together to make the file smaller, which can sometimes mean a loss in the crispness of your stars.
PNG, however, uses lossless compression. This is like having an unlimited number of pages in your sketchbook, allowing you to capture every little detail without having to blend any colors. The result is a larger file, but one that keeps all the intricate details of your astrophotography intact.
Storage Space Odyssey: Balancing File Size and Detail
So, we’ve got JPG, the space saver, and PNG, the detail preserver. But what does this mean for you, the stargazer and photographer? It means you need to strike a balance between file size and image quality. If you’re sharing your photos online, where speed is key, you might lean towards JPG. But if you’re printing a large photo to hang on your wall, PNG might be your go-to for its superior quality.
Remember, when you’re out there under the stars, camera in hand, you’re not just taking pictures; you’re capturing moments in the universe that are billions of years in the making. Choosing the right file format helps you do justice to these cosmic wonders.
The Stellar Debate: JPG vs PNG in Capturing the Cosmos
Let’s dive deeper into the stellar debate between JPG and PNG. It’s not just about the stars and galaxies; it’s about how we bring them to life in our photos. The file format you choose can affect the colors, the sharpness, and even the mood of your astrophotography. It’s like choosing the right telescope for your stargazing; the better suited it is to your needs, the more breathtaking the views.
Most importantly, think about where your photos will go after you take them. Will they be shared with friends on social media, or are you planning to enter them into an astrophotography competition? This decision can guide you towards the right file format for each situation.
Therefore, let’s set the stage for when you might want to use JPG and when PNG could be the better choice. Because, in the end, whether you’re an amateur stargazer or a seasoned astrophotographer, what we all want is to capture the beauty of the night sky as best we can.
The Art of Compression: Fine-Tuning JPG Settings
When you’re out in the field, under the celestial ballet of the cosmos, and you choose JPG, you’re making a conscious decision to trade a bit of quality for convenience. But don’t worry; you can still capture the majesty of the night sky. The trick lies in fine-tuning your camera’s JPG settings. Most cameras allow you to adjust the level of compression. By selecting a higher quality JPG setting, you minimize the loss of detail. Remember, it’s like packing your suitcase; the better you pack, the less you have to leave behind.
Here’s a quick guide to ensure you’re getting the best out of your JPG files:
- Set your camera to the highest resolution and quality settings.
- Use the lowest ISO possible to reduce noise, which can be exacerbated by JPG compression.
- Review your images on a larger screen as soon as possible to check for any loss in quality.
Keep in mind, while these settings help preserve quality, they won’t prevent all compression artifacts. If your aim is to capture the night sky in all its glory, with no compromise on the twinkling details, then PNG might be your starship of choice.
Unlocking Details: The Case for PNG in Astrophotography
In the pursuit of astrophotography, the details are not just details; they make the image. This is where PNG files shine like Sirius in the winter sky. PNG is a format that was created to improve upon and replace the older GIF format. Unlike JPG, PNG handles detailed, high-contrast images with finesse, preserving every star, planet, and nebula without losing a single detail to compression.
And here’s the proof. Let’s look at a side-by-side comparison of the same celestial image saved as a JPG and a PNG:
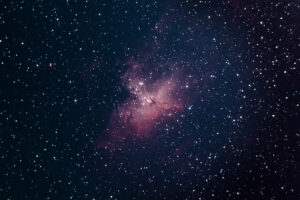
Example: A close-up of the Orion Nebula, M42, shows the stark difference. In the JPG image, some of the subtle color gradations within the nebula’s gas clouds are lost. In the PNG version, these delicate hues are retained, presenting a more accurate and vibrant depiction of this stellar nursery.
This example illustrates why PNG is often the preferred choice for astrophotographers who are after the highest fidelity in their images. If you’re aiming to print your work or you need the very best for image processing, PNG is the way to go.
Preserving the Night Sky: PNG’s Lossless Quality
Imagine capturing the intricate swirls of the Andromeda Galaxy or the delicate tendrils of the Veil Nebula. With PNG’s lossless compression, what you see through your lens is what you get in your final image. This means that every pixel is preserved, just as you intended, without any data being thrown away. It’s like having a photographic memory for all the cosmic sights you’ve witnessed.
Transparent Truths: Why PNG Wins on Details and Edits
But PNG’s superpowers don’t end with its lossless quality. This format also supports transparency, which can be a game-changer when you’re editing images. Say you want to composite different elements of the night sky or create an educational graphic. PNG allows you to overlay these elements seamlessly, without the white or black boxes that would accompany a JPG. This transparency feature is one of the many reasons why PNG often wins in the realm of digital edits and detailed astrophotography work.
Editing the Universe: Post-Processing Formats
Once you’ve captured the cosmos, the journey doesn’t end there. Post-processing is where your images come to life, and it’s crucial to choose the right format for this stage. While shooting in RAW is the gold standard for post-processing flexibility, you’ll eventually need to convert your edited images into a standard format like JPG or PNG.
During post-processing, consider the following:
- Editing in a non-destructive format like TIFF or PSD preserves quality.
- Convert to PNG if you need to maintain detail and color depth after editing.
- Switch to JPG for final sharing if file size is a concern and you’ve made all your critical edits.
The workflow you choose can greatly impact the final look of your astrophotography. By carefully selecting your post-processing format, you ensure that your celestial captures not only inspire awe but also withstand the scrutiny of fellow enthusiasts and experts.
Crafting Constellations: Editing Software Preferences
When it comes to editing software, each has its own strengths. Some prefer the comprehensive tools of Adobe Photoshop, while others might choose the dedicated astrophotography features of software like Starry Landscape Stacker or DeepSkyStacker. Regardless of your choice, the ability to handle different file formats is paramount. Most software can manage both JPG and PNG, but for the best editing experience, work with the format that retains the most information — usually PNG.
As you weave through the editing process, remember that software preferences are as personal as your choice of telescope. What matters most is that the software meets your needs, allows you to express your vision, and supports the file formats that align with your astrophotography goals.
From Raw to Real: The Editing Workflow
The transformation from a raw capture of the night sky to a finished masterpiece is a journey of its own. Starting with RAW files gives you the most data to work with, like having a palette full of every possible color. As you edit, you can adjust exposure, bring out hidden stars, and correct color balance without losing quality. Once you’re satisfied with your edits, you’ll want to save a master copy in a lossless format like PNG for archiving.
For sharing your creations with the world, converting to JPG is often the final step. This is when you’ll apply your knowledge of compression to maintain as much quality as possible. The key is to find the sweet spot where the file size is manageable for sharing, but the image still takes your breath away, just like the night sky itself.
Navigating File Formats in Practice
Choosing the right file format is like selecting the right lens for your telescope; it can make all the difference in what you’re able to capture and share. When it comes to telescopes and cameras, the technology varies, and so do the file formats they support. Some cameras may offer better results with JPG, especially if they have limited storage or processing power. Others, particularly those with advanced sensors and features, can take full advantage of PNG’s capabilities.
When selecting the right format, consider these factors:
- Your camera’s capabilities and the formats it supports.
- The storage space available, both on your camera and your computer.
- Your end goal, be it sharing online, printing, or archiving.
Remember, the format you choose should serve your vision and the wonders of the universe you’re aiming to capture. Whether you’re sharing a meteor shower over social media or exhibiting a high-resolution print of the Horsehead Nebula, make sure the file format you choose does justice to your hard work and the beauty of the stars above.
FAQ: Navigating the Stars of File Formats
What impact does file format have on color representation in astrophotography?
Color representation in astrophotography is vital for accurately displaying the hues and subtleties of celestial objects. JPG, due to its lossy compression, can sometimes alter subtle color gradients, leading to less accurate color representation. PNG, with its lossless compression, preserves the original colors as captured by your camera sensor, ensuring a more true-to-life representation of the cosmos. This is especially important when capturing objects with fine color details, such as planetary nebulae or galaxies.
How does the choice of file format affect image processing speed?
The choice of file format can significantly affect image processing speed. JPG files are smaller and therefore faster to open, save, and edit, which can be a boon when working with a large number of images. PNG files, being larger due to their lossless nature, can slow down the processing speed. This is something to consider if you’re stacking multiple exposures or working on a computer with limited resources.
Can the file format affect the perception of depth and contrast in celestial images?
Absolutely. The file format plays a crucial role in how depth and contrast are perceived in celestial images. JPG’s compression often results in a loss of dynamic range, which can flatten the perceived depth and reduce contrast, especially in shadow and highlight areas. PNG, preserving all the original data, maintains the full dynamic range captured by the camera, which can enhance the perception of depth and bring out the contrast between the bright and dark regions of space.
What’s the best file format for beginners in astrophotography?
For beginners in astrophotography, JPG might be the most straightforward format to start with due to its ubiquity and smaller file sizes, which are more manageable on most devices. It allows newcomers to easily share their captures and get a feel for processing and editing. However, as skills advance, transitioning to PNG or even RAW formats can offer greater control over the final image quality.
Here’s a simple guideline for beginners:
- Start with JPG to learn the basics of capturing and editing.
- As you become more comfortable, experiment with PNG to see the difference in quality.
- Eventually, move on to shooting in RAW for the most post-processing flexibility.
Are there specific circumstances where JPG might be preferable to PNG for night sky images?
Yes, there are certain situations where JPG might be the better choice for night sky images. For example, when you need to quickly share images online or when you’re limited by storage capacity, such as during long astrophotography sessions or when using a camera with limited memory. Additionally, for images that will be displayed on platforms that do not support PNG’s higher quality, such as some social media sites, JPG is a practical option.
Consider these scenarios for using JPG:
- When quick upload times are essential, such as live-tweeting a meteor shower.
- If you’re capturing time-lapse sequences and need to save space for thousands of frames.
- When your image is intended for web use where the differences in quality are less noticeable.


Leave a Reply