Key Takeaways
- Discover the essential equipment needed for Andromeda galaxy photography.
- Learn the best times to capture the Andromeda galaxy and how to find it in the night sky.
- Understand the importance of location and light pollution in astrophotography.
- Explore camera and telescope settings for the perfect shot of Andromeda.
- Get practical tips and techniques to enhance your astrophotography skills.
Preparing for Your Andromeda Adventure
Imagine capturing the mesmerizing beauty of the Andromeda galaxy, our cosmic neighbor, with your own camera. With the right approach, you can transform the twinkling dots in the night sky into a stunning portrait of celestial wonder. Let’s gear up for an unforgettable astrophotography journey.
Essential Astrophotography Gear Checklist
Before we dive into the cosmos, let’s ensure you have the necessary tools for the task. Here’s what you’ll need:
- A DSLR or mirrorless camera capable of manual settings and long exposures.
- A sturdy tripod to keep your camera stable during long exposures.
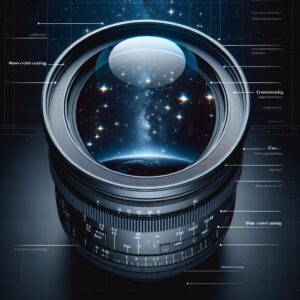
- A wide-angle lens, preferably with a fast aperture (f/2.8 or lower) to gather as much light as possible.
- An optional tracking mount to follow the stars as the Earth rotates, ensuring sharp images.
- Extra batteries and memory cards, because astrophotography can be a power and storage-intensive endeavor.
Remember, the best camera is the one you have with you. Start with what you’ve got and upgrade as your passion and skills grow.
Understanding the Celestial Schedule: When to Photograph Andromeda
The Andromeda galaxy is best viewed and photographed during the fall and early winter months in the Northern Hemisphere. During this time, it rises high in the sky, providing an optimal backdrop for your celestial shots. Moreover, aim for a new moon night or a time when the moon is not in the sky, as moonlight can wash out the delicate details of the galaxy.
Setting Up for Success
Great astrophotography starts long before the shutter clicks. Preparation is key.
Scouting Your Location: Minimizing Light Pollution
First, find a dark spot away from city lights. Light pollution is the nemesis of astrophotography; it obscures the faint details of galaxies. Websites like Dark Sky can help you locate the perfect observation point.
Camera and Telescope Settings: A Step-by-Step Guide
Now, let’s talk settings. Start with your camera on a tripod and point it towards Andromeda. If you’re using a telescope, make sure it’s properly aligned and focused. For those new to astrophotography, consider reading our guide for beginners to help get you started on the right foot.
To begin, set your camera to manual mode. This gives you complete control over the exposure settings. Start with these basic settings and adjust based on your specific conditions:
- ISO: 1600-3200 (higher ISOs may introduce more noise)
- Aperture: As wide as possible (f/2.8 or lower is ideal)
- Shutter Speed: 15-30 seconds (longer exposures require a tracking mount to prevent star trails)
- Focus: Set to manual and use live view to focus on a bright star
With your gear ready and the perfect location scouted, you’re set to capture the grandeur of Andromeda. Let’s proceed to the techniques that will help you take your astrophotography to the next level.
Setting Up for Success
With the right preparation, photographing the Andromeda galaxy can be a rewarding experience that combines the thrill of exploration with the satisfaction of creating stunning visuals. It’s a dance of patience, precision, and persistence. But the payoff? A snapshot of a galaxy over two million light-years away. Let’s make sure you’re set up for success.
Setting up your equipment properly is crucial. Take the time to familiarize yourself with your gear during the day. Know how to adjust the focus, change the ISO, and set the exposure time without fumbling in the dark. This will save you valuable time and frustration when you’re under the night sky.
- Charge your camera batteries fully and bring spares.
- Ensure your memory cards have plenty of space and bring extras.
- Practice setting up your tripod and camera or telescope quickly and efficiently.
- Pre-plan your shoot by knowing the times of moonrise, moonset, and the position of the Andromeda galaxy.
Now that you’re geared up and ready, let’s talk about where you’ll set up shop for the night.
Scouting Your Location: Minimizing Light Pollution
Choosing the right location is perhaps as important as the equipment you’re using. You’ll want to escape the city’s bright lights to give the stars above a chance to shine. Seek out remote areas known for their dark skies—national parks, designated dark-sky preserves, or even a friend’s backyard in the countryside can offer the perfect stage for Andromeda.
Camera and Telescope Settings: A Step-by-Step Guide
It’s time to dial in those settings. Whether you’re using a camera on its own or attached to a telescope, the principles are similar. Start with your camera in manual mode to take charge of the exposure. Set your ISO between 1600 and 3200 for a balance of sensitivity and noise. Open your aperture as wide as it goes—f/2.8 or wider is ideal. Begin with a shutter speed of about 20 seconds; if you see star trails, reduce the time or consider using a tracker.
Techniques and Tips for a Stellar Capture
Capturing the Andromeda galaxy is as much an art as it is a science. It requires you to blend technical skill with creative vision. Here are some tips to help you refine your technique and get that stellar capture you’re after.
Focus is critical in astrophotography. Use your camera’s live view and zoom in on a bright star to manually focus. If your lens has an infinity mark, start there, but be prepared to adjust slightly for the sharpest stars. Remember, even a slight misfocus can turn pinpoints into blobs.
Optimal Astrophotography Settings for Andromeda
While the settings mentioned earlier are a good starting point, you might need to tweak them based on your specific conditions. If you’re using a telescope, you may be able to go for longer exposures without star trails thanks to its narrower field of view. If you’re on a fixed tripod, keep those exposures short to avoid the stars turning into lines.
Consider the following when adjusting your settings:
- If the images are too dark, try increasing the ISO or exposure time.
- If you’re getting star trails, decrease the exposure time or use a tracking mount.
- Always check your focus periodically throughout the night, as temperature changes can affect it.
Remember, experimentation is key. Don’t be afraid to try different settings to see what works best for your setup.
Zooming In: Best Focal Lengths for Majestic Galaxies
The Andromeda galaxy is one of the few deep-sky objects that’s large enough to be well captured with camera lenses of various focal lengths. A wide-angle lens (14mm-35mm) can frame Andromeda within a vast star field, while a mid-range telephoto lens (100mm-200mm) can capture more detail of the galaxy itself. Choose your lens based on the composition you’re aiming for.
Shooting Stars: Photography in Action
With your camera’s settings dialed in and your composition framed, it’s time to start shooting. Take a deep breath and release the shutter. Watch as the camera sensor collects the faint light of stars millions of miles away. It’s a magical process, but one that might require several attempts to perfect.
From Darkness to Detail: Best Exposure Settings for Andromeda
Exposure is a balancing act. You want to capture as much light as possible without overexposing the core of the galaxy or introducing too much noise. Start with the settings recommended earlier and adjust from there. Take test shots and review them, checking for focus, exposure, and composition. Make incremental changes until you find the sweet spot.
- Use a remote shutter release or your camera’s timer to avoid camera shake when pressing the button.
- Take multiple exposures to stack later in post-processing for reduced noise and enhanced detail.
- Consider bracketing your exposures to capture the full dynamic range of the scene.
Each shot brings you closer to the perfect image. Keep refining your technique, and don’t get discouraged by the learning curve.
Tracking the Night Sky: Finding Andromeda
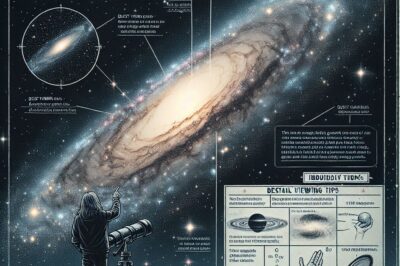
Andromeda can be elusive, but with a few tricks, you’ll have it in your sights in no time. In the fall and winter, look for the constellation Pegasus. The galaxy is located just off one corner of the Great Square of Pegasus. Use a star chart or an app to help pinpoint its location. Once you find it, Andromeda will appear as a faint, elongated cloud to the naked eye.
Getting the Big Picture: Equipment Essentials
While you can start with minimal equipment, as you delve deeper into astrophotography, you may want to upgrade. A dedicated astronomy camera or a modified DSLR that’s more sensitive to the red spectrum can bring out the hydrogen nebulas in Andromeda. A good-quality telescope with a motorized mount can allow for longer exposures without star trails, capturing finer details of the galaxy.
Remember, the journey is as important as the destination. Enjoy the process of learning and capturing the night sky, and with each click of the shutter, you’re not only taking a photo—you’re also taking a step closer to the stars.
Frequently Asked Questions
Why Do Astrophotography Settings Vary for Different Celestial Objects?
- Different celestial objects have varying levels of brightness and sizes, requiring adjustments to exposure, ISO, and aperture.
- Galaxies like Andromeda have both bright cores and faint outer regions, demanding a careful balance to capture all details.
- Planets, stars, and nebulae each emit light in unique ways, influencing the camera settings needed for optimal results.
For instance, capturing the vibrant colors of a nebula might require a different ISO setting compared to photographing the moon’s surface. It’s about adapting to the specific characteristics of each object to showcase its unique beauty.
Can I Use a Zoom Lens to Photograph Andromeda, or is Prime Better?
Both zoom and prime lenses can be used to photograph the Andromeda galaxy. The choice depends on your desired composition and the level of detail you wish to capture. Prime lenses often have wider apertures, which is beneficial for astrophotography, allowing more light to reach the sensor and potentially resulting in sharper images. However, zoom lenses offer versatility in framing your shot without having to change lenses in the dark.
What Are the Challenges of Shooting in Raw for Andromeda?
Shooting in RAW format presents a few challenges:
- Larger file sizes mean you’ll need more memory card space and longer processing times.
- RAW files require post-processing to bring out the best in your images, which can be a steep learning curve for beginners.
- However, the benefits of shooting in RAW—greater detail and the ability to adjust exposure and color balance—far outweigh these challenges.
My Photos Are Blurry. What Am I Doing Wrong?
Blurry photos can result from several factors:
- Incorrect focus: Ensure your camera is focused on a bright star using manual focus in live view mode.
- Camera shake: Use a remote shutter release or your camera’s timer function to prevent vibrations when taking the shot.
- Long exposure without tracking: If you’re not using a tracking mount, keep your exposure time short to prevent star trails.
How Can I Enhance the Colors of Andromeda in Post-Processing?
Enhancing the colors of Andromeda in post-processing can be done by:
- Adjusting the white balance to bring out the natural colors of the galaxy.
- Using curves and levels in your editing software to increase contrast and make the colors pop.
- Applying noise reduction techniques to maintain the quality of the image while boosting color saturation.
Remember, subtle enhancements can often lead to the most natural and striking images. It’s about finding the right balance to bring out the best in your astrophotography without overdoing it.