Key Takeaways
- The Orion Nebula is a brilliant astrophotography subject that can be captured with a DSLR camera and a lens or telescope with at least 500mm focal length.
- Using a tracking mount, such as an equatorial tracker or a star tracker, is essential to prevent star trails during long exposures.
- Recommended camera settings for the Orion Nebula include Manual mode, ISO 800-1600, exposure times of 2-3 minutes, and a low f-ratio if using a camera lens.
- Post-processing is crucial for bringing out the details and colors of the nebula, with software like DeepSkyStacker and Adobe Photoshop being popular choices.
- For the best results, aim for a clear, dark sky and consider blending multiple exposures to create a high dynamic range (HDR) image.
Capturing the Celestial Masterpiece: The Orion Nebula
Imagine pointing your camera up to the night sky and capturing not just stars, but an entire nebula – a vibrant, swirling nursery of stars. That’s the allure of photographing the Orion Nebula, one of the most spectacular deep-sky objects visible from Earth. With the right equipment and a bit of patience, even beginners can take breathtaking photos of this celestial wonder.
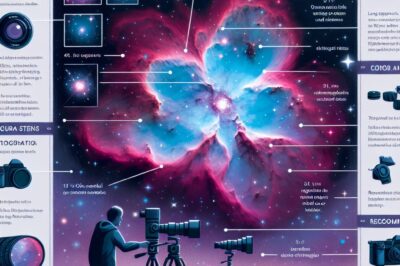
Snapshot of the Orion Nebula’s Majesty
The Orion Nebula, also known as M42, is a diffuse nebula situated in the Milky Way, being visible to the naked eye under dark skies. It’s part of a larger area of star formation, and its bright core is a popular target for both amateur and professional astronomers. Its distance from Earth is about 1,344 light-years, but with the proper gear, you can capture its essence from your own backyard.
Recommended Gear for Stellar Photos
To embark on this cosmic photography journey, you’ll need a few key pieces of equipment:
- A DSLR or mirrorless camera capable of manual mode and long exposures.
- A lens or telescope with a focal length of 500mm or more for a closer view of the nebula.
- A stable tripod to keep your camera steady.
- An equatorial tracking mount or star tracker to compensate for the Earth’s rotation.
These tools will be your ticket to capturing the Orion Nebula in all its glory.
Gearing Up for Galactic Grandeur
Camera Equipment Essentials
When it comes to choosing a camera for astrophotography, a DSLR or a mirrorless camera with the ability to manually control settings is key. You’ll want to be able to adjust the ISO, exposure time, and aperture to suit the challenging lighting conditions of the night sky. A full-frame sensor is ideal for its better low-light performance, but an APS-C sensor can also produce stunning results.
Telescopes and Lenses: A Match Made for the Cosmos
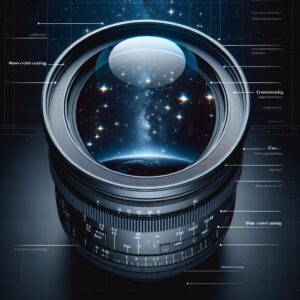
While a camera is the heart of your astrophotography setup, the telescope or lens acts as the eyes, magnifying and focusing the light from distant stars. A good quality lens with a focal length of 500mm or more is sufficient to capture the Orion Nebula. If you prefer using a telescope, ensure it’s designed for astrophotography and paired with the right type of camera adapter.
Most importantly, the entire setup must be mounted on a stable platform. A sturdy tripod is a must, as even the slightest movement can turn a crisp star into a blurry streak. To achieve pin-sharp stars and detailed nebula clouds, you’ll also need a tracking mount. An equatorial mount or a star tracker will follow the stars’ apparent motion across the sky, allowing you to take long exposures without creating star trails.
Setting the Stage: Camera Settings for Nebula Photography
Before you dive into the night, let’s talk camera settings. They are the linchpin in astrophotography, and getting them right is crucial. Remember, we’re trying to capture light that has traveled across the cosmos to reach us, so every setting counts.
ISO, Shutter Speed, and Aperture Triad
ISO, shutter speed, and aperture are the holy trinity of photography, and this is especially true in astrophotography. For the Orion Nebula, start with an ISO range between 800 to 1600. This provides a good balance between sensitivity to light and keeping the noise at bay. Shutter speed is a bit of a balancing act; too short and you won’t capture enough light, too long and you risk blurring. Aim for exposures of 2-3 minutes. Lastly, set your aperture as wide as it will go – a lower f-number means more light, and that’s exactly what we want.
Here’s a tip: shoot in RAW format to ensure you have the most data to work with during post-processing. This will give you the flexibility to really bring out the details in the nebula.
Navigating Dark Skies: Light Pollution Considerations
Light pollution is the bane of astrophotographers. It’s that annoying glow that washes out the night sky and obscures the faint details of deep-sky objects. To truly capture the Orion Nebula, you’ll need to find a dark spot away from city lights. Apps and maps are available online to help you locate the best dark-sky areas near you. Sometimes, a drive into the countryside can make all the difference.
The Art of Long Exposure: Catching the Nebula in Detail
Long exposure is where the magic happens in astrophotography. It allows your camera to soak in more light, revealing the faintest details of your celestial subject. But it’s not just about leaving the shutter open; it’s about doing it in such a way that the stars remain pinpoints of light rather than streaks across your image.
Guide to Star Tracking and Exposure Lengths
Star trackers are your best friend for long exposures. These devices align with the Earth’s axis and rotate your camera at the same rate as the sky’s motion. This keeps the stars stationary relative to your camera’s sensor, allowing you to capture the Orion Nebula with stunning clarity over several minutes. The longer the exposure, the more light you gather, and the more details emerge from the cosmic canvas.
But remember, exposure times can vary based on your equipment and the level of light pollution. It’s always best to experiment to find the sweet spot for your particular setup.
Synchronizing with the Celestial Dance
Setting up your tracking mount correctly is critical. It must be polar aligned, which means the mount’s axis is parallel to the Earth’s axis. This precision allows your tracker to match the rotation of the Earth accurately, keeping the stars in the same position throughout your exposure. It may take a few tries to get it right, but once you do, you’ll be able to capture the Orion Nebula without any trails.
Post-Processing Wonders: Bringing Nebula Photos to Life
Once you’ve captured your images, it’s time to move to the digital darkroom. Post-processing is where good astrophotos become great. It’s not just about adjusting brightness and contrast; it’s about revealing the hidden details and colors that are already there, just waiting to be uncovered.
Essential Editing Software for Enhancing Night Skies
There are several software options out there for astrophotographers, but two of the most popular are DeepSkyStacker and Adobe Photoshop. DeepSkyStacker is fantastic for stacking multiple exposures to reduce noise and bring out the faint details. Photoshop, on the other hand, offers a plethora of tools for fine-tuning your image to perfection.
Stacking is a technique where you combine several images of the same scene to improve the signal-to-noise ratio. This means the actual details of the nebula become clearer while random noise from the camera sensor is minimized. It’s a game-changer in astrophotography.
For example, stacking 10 images of the Orion Nebula with DeepSkyStacker can dramatically reduce the graininess compared to a single long exposure. This allows the vibrant colors and delicate structures within the nebula to emerge with clarity.
Tweaking Contrast, Brightness, and Saturation for Impact
The final step in post-processing is to adjust the contrast, brightness, and saturation to make your image pop. Increase the contrast to make the nebula stand out against the background sky. Adjust the brightness to bring out the nebula’s luminance without blowing out the core. And finally, tweak the saturation to enhance the colors without making them look artificial.
It’s a delicate balance, but when done right, these adjustments can transform a flat image into a dynamic snapshot of the cosmos.
Remember, the goal is to enhance, not alter. The Orion Nebula is already a masterpiece; you’re just bringing its beauty into focus.
Stellar Snapshots: Examples of Orion Nebula Photography
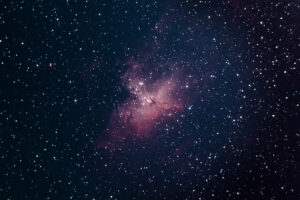
One of the joys of astrophotography is seeing the varied interpretations of a single subject. The Orion Nebula, with its vibrant gases and newborn stars, offers a plethora of opportunities for photographers to showcase their skills. Some capture its expansive grandeur with wide-angle shots, while others zoom in to reveal intricate details within the nebula’s core.
Take, for example, an image captured with a 600mm lens; it might focus on the heart of the nebula, highlighting the contrast between the bright Trapezium cluster and the surrounding dust. In contrast, a wide-field shot at 200mm could encompass the nebula’s vastness, including the fainter wings that extend far from the core.
Each photographer brings their unique perspective, making the gallery of the night sky as diverse as it is beautiful.
Gallery of the Night: The Many Faces of the Orion Nebula
Let’s take a moment to appreciate a few examples of the Orion Nebula’s many faces:
- A long exposure revealing the delicate filamentary structures of the nebula’s gas clouds.
- A high-dynamic-range (HDR) composite showing the intense core without overexposure, alongside the fainter outer regions.
- An image processed to emphasize the different colors within the nebula, representing various elements like hydrogen and oxygen.
These images serve as a testament to the Orion Nebula’s versatility as a subject and the creativity of astrophotographers worldwide.
Frequently Asked Questions (FAQ)
Now, let’s address some common questions that arise when delving into the world of Orion Nebula photography.
What Time of Year is Best for Photographing the Orion Nebula?
The best time to photograph the Orion Nebula is during the winter months in the Northern Hemisphere, from December to March. This is when the constellation Orion is most prominent in the night sky, providing ample opportunity to capture its namesake nebula.
Can I Photograph the Orion Nebula with a Smartphone?
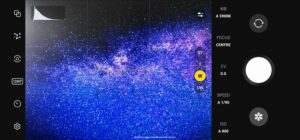
While smartphones have come a long way in camera technology, they typically lack the manual controls and sensor size needed to capture the faint light of nebulae effectively. However, with the right apps and attachments, it’s possible to get a glimpse of the Orion Nebula through a smartphone camera, especially if it’s attached to a telescope.
What Are the Ideal Weather Conditions for Nebula Photography?
Clear, dark skies are essential for nebula photography. This means no clouds, low humidity, and as little light pollution as possible. A new moon night is ideal, as the absence of moonlight allows for the faint details of the nebula to shine through.
How Do I Avoid Star Trails in My Nebula Image?
To avoid star trails, you need to use a tracking mount that compensates for the Earth’s rotation. Accurate polar alignment and the right exposure time for your specific equipment setup will ensure that the stars remain as sharp points of light.
What Is the Significance of Using an Equatorial Mount?
An equatorial mount is significant because it allows for precise tracking of celestial objects across the sky. By aligning the mount’s axis with the Earth’s axis, you can follow the Orion Nebula’s motion without introducing star trails, ensuring that long exposure images remain sharp and detailed.
Option A.


