Article at a Glance
- Discover the essential gear for capturing breathtaking Milky Way panoramas.
- Learn the best camera settings to ensure clear, vibrant shots of the night sky.
- Understand how to plan and compose your panoramic shots for maximum impact.
- Get tips on stitching and editing your images to create a seamless celestial scene.
- Find out how and where to share your astrophotography with others and join the community.
Capturing the Night Sky: The Beauty of Milky Way Panoramas
Have you ever gazed up at the night sky and felt a sense of wonder? That’s the magic of the Milky Way, our galactic home, stretching across the heavens like a celestial tapestry. And capturing that grandeur in a panorama is an adventure that combines art, science, and a bit of patience. Let’s embark on this journey to freeze a moment of the universe’s timeless beauty.
What is a Milky Way Panorama?
A Milky Way panorama is more than just a photograph; it’s a sweeping view of our galaxy as seen from Earth. It’s created by taking multiple images of the night sky and stitching them together to form a wide, expansive picture. This allows us to capture the vastness and splendor of the Milky Way in a way that a single frame cannot.
Why Milky Way Panoramas are Special
When you capture a panorama of the Milky Way, you’re not just taking a picture; you’re preserving a cosmic ballet of stars, planets, and nebulae. These panoramas allow us to see our place in the universe and inspire us to dream about what lies beyond our world. They remind us of the incredible scale and beauty of the cosmos.
Preparation is Key: Gear and Settings for the Perfect Shot
Before you head out into the night, it’s crucial to be prepared. The right gear and settings are your best friends in astrophotography. They’re the difference between a shot that’s merely good and one that’s truly out of this world.
Essential Equipment for Night Sky Photography
First, let’s talk gear. You’ll need: a reliable camera that can handle long exposures and high ISO settings. Consider reading this comprehensive guide on DSLR cameras for astrophotography to help you choose the right one for your needs.
- A camera capable of manual mode, so you have full control over your settings.
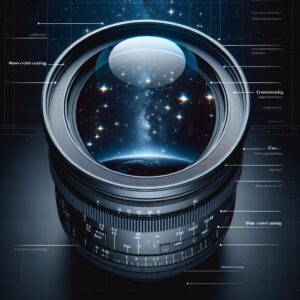
- A wide-angle lens with a large aperture (f/2.8 or wider) to let in as much light as possible.
- A sturdy tripod to keep your camera stable during long exposures.
- An optional but helpful item is a star tracker, which compensates for the Earth’s rotation and keeps stars sharp in longer exposures.
Most importantly, ensure your equipment is ready to go. Charge your batteries, clear your memory cards, and familiarize yourself with your gear’s functions in the dark—you won’t want to fumble with buttons under the stars.
Optimal Camera Settings for Milky Way Panoramas
Getting your camera settings right is critical. Here’s a quick guide:
- Set your lens to its widest aperture (for example, f/2.8).
- Choose a shutter speed that avoids star trails. A good rule of thumb is the “500 Rule,” where you divide 500 by your lens’ focal length to get the maximum exposure time in seconds.
- Boost your ISO but keep an eye on noise levels. A starting point could be ISO 3200, adjusting as needed.
- Focus manually on a bright star to ensure sharpness.
- Shoot in RAW format to capture the most data for editing later.
Remember, these are starting points. Experiment with different settings to see what works best for your specific conditions.
With your camera gear in check and the optimal settings dialed in, you’re almost ready to capture the Milky Way in all its glory. But before you press the shutter button, let’s talk about composing your shot. After all, a great panorama is as much about the landscape below as it is about the stars above.
When you’re out in the field, look for interesting foreground elements to anchor your composition. A lone tree, a mountain silhouette, or a winding river can add depth and context to the vastness of the sky. Consider the rule of thirds to create a balanced image, placing the horizon on the bottom or top third of the frame, not dead center. This gives the Milky Way the space it deserves in your panorama.
Now, as the sky darkens and the first stars appear, it’s time to capture the individual frames that will make up your panorama. Start with the left or right edge of where you want your panorama to be, and take your first shot. Then, rotate your camera about 15-30 degrees, making sure to overlap with the previous frame by about a third. Continue this process until you’ve covered the entire desired sweep of the sky. This overlap is crucial for seamless stitching in post-processing.
Composing Your Panorama: Tips and Techniques
Remember, the composition is about telling a story. Use leading lines and natural features to draw the viewer’s eye across the panorama. Keep an eye out for light pollution or unwanted distractions, and adjust your position to keep your panorama focused on the beauty of the Milky Way.
Stitching the Stars: Crafting Your Panorama in Post-Processing
After a night of shooting, you’ll have a series of images ready to be transformed into a single, stunning panorama. This is where post-processing comes in. The goal is to stitch these images together so seamlessly that the viewer feels they’re gazing at the Milky Way with their own eyes.
Begin by importing your images into your preferred photo editing software. Programs like Adobe Lightroom, Photoshop, or dedicated panorama tools like PTGui can automatically align and blend your images. However, don’t rely solely on software—take the time to manually check the overlaps and ensure everything lines up just right.
Once your images are stitched, you’ll likely notice some inconsistencies in exposure or color. Use the software’s tools to adjust these, aiming for a natural and consistent look across the panorama. Pay special attention to the edges of each frame, where blending can sometimes create artifacts or unevenness.
Example: During one of my astrophotography sessions, I captured a series of images that, when stitched together, revealed an unexpected shooting star that had graced several frames. By carefully aligning the frames, I preserved this serendipitous streak, adding a dynamic element to the panorama.
- Import your images into the photo editing software.
- Use the panorama stitching function to align and blend images.
- Manually check and adjust overlaps and seams.
- Correct exposure and color inconsistencies for a uniform look.
Software for Assembling Your Shots
When it comes to choosing software for assembling your shots, consider the features you need. Some software might offer better control over manual adjustments, while others might excel in automatic stitching. Don’t be afraid to try out a few different programs to find the one that suits your workflow best.
Most importantly, be patient. Stitching a panorama can be a time-consuming process, especially as you learn the ropes. But the results—your own slice of the cosmos to share and admire—are worth every minute.
Enhancing Detail and Minimizing Noise
One of the biggest challenges in night sky photography is managing noise while enhancing detail. High ISO settings can introduce graininess, but modern software offers powerful tools to tackle this. Noise reduction features can smooth out the grain without sacrificing the crispness of the stars. At the same time, sharpening tools can bring out the finer details of the Milky Way’s structure.
It’s a delicate balance, but here’s a tip: apply noise reduction sparingly. Overdoing it can lead to a loss of detail and an unnatural look. Instead, zoom in on your image and adjust the noise reduction until you find the sweet spot where the stars remain sharp, and the noise is not distracting.
Final Touches: Refining Your Milky Way Masterpiece
Now that your panorama is stitched and the noise is under control, it’s time for the final touches. This is where your artistic vision comes into play. Adjust the contrast to make the stars pop against the dark sky, and fine-tune the color balance to reflect the true hues of the night.
Don’t forget about the foreground. If your panorama includes elements of the landscape, make sure they’re well-integrated into the scene. Adjust their exposure and color to match the sky, so they complement rather than compete with the stars.
Finally, consider the overall mood of your panorama. Do you want to convey the serene stillness of the night or the dynamic energy of the galaxy? Use your edits to enhance that mood, guiding the viewer’s emotional response to your work.
Color Correction and Contrast Tips
Color correction is crucial in astrophotography. The night sky can take on different hues depending on light pollution and atmospheric conditions. Use your photo editing software to adjust the white balance and tint, aiming for a natural, true-to-life color palette.
For contrast, be subtle. The beauty of the Milky Way lies in its delicate gradations of light and dark. Increase the contrast to make these features stand out, but avoid pushing it to the point where you lose the subtleties of the galaxy’s dust lanes and star clusters.
Adding the Finishing Flares
As you wrap up your editing, consider if there’s anything else your image needs. A slight vignette can draw the eye toward the center, while selective dodging and burning can highlight specific areas or create a sense of depth. These final adjustments are your signature—the artistic flourishes that make your panorama uniquely yours.
Sharing Your Cosmic Journey: Displaying Your Work
With your Milky Way panorama complete, it’s time to share it with the world. There are many platforms online where you can showcase your work. Social media sites like Instagram and Facebook are great for reaching a wide audience, while astrophotography forums and websites offer a community of enthusiasts who can appreciate the technical skill behind your image.
If you prefer a tangible display, consider printing your panorama. There’s something profoundly satisfying about seeing your work in print, and a high-quality print can reveal details and subtleties that screens can’t always convey. Research printing services that specialize in large-format prints and use archival-quality materials to ensure your panorama stands the test of time.
Online Platforms and Physical Prints
Choosing where to share your work is a personal decision. Some astrophotographers build their own websites to showcase their portfolios, while others join collaborative projects or submit their work to contests. No matter where you choose to share your Milky Way panoramas, the important thing is to connect with others who share your passion for the night sky.
Remember, each panorama you create is more than just a photograph—it’s a record of your journey as an astrophotographer. So go ahead, share your work, and inspire others to look up and marvel at the wonders of the universe.
With your Milky Way panorama complete, it’s time to share it with the world. There are many platforms online where you can showcase your work. Social media sites like Instagram and Facebook are great for reaching a wide audience, while astrophotography forums and websites offer a community of enthusiasts who can appreciate the technical skill behind your image.
Joining the Astrophotography Community
Joining the astrophotography community is a rewarding step. Engaging with fellow night-sky enthusiasts not only provides a platform to display your work but also opens a channel for feedback, learning, and camaraderie. Participate in forums, attend local club meetings, or even collaborate on projects to expand your skills and share in the collective joy of capturing the cosmos.
Frequently Asked Questions (FAQ)
As you delve into the world of Milky Way panoramas, questions are bound to arise. Let’s address some of the most common queries to help you on your astrophotography adventure.
What is the Best Time of Year to Photograph the Milky Way?
The best time to photograph the Milky Way is during the ‘Milky Way season,’ which typically runs from March to October. This is when the core of the galaxy is visible and most prominent in the night sky. The exact timing can vary depending on your location, so check a star chart or app for the best viewing times in your area.
Do I Need a Telescope to Capture Milky Way Panoramas?
No, you don’t need a telescope to capture Milky Way panoramas. A digital camera with manual controls and a wide-angle lens is sufficient to photograph the grandeur of the Milky Way. Telescopes are more suited for deep-sky photography of individual celestial objects.
How Long Does it Take to Photograph a Milky Way Panorama?
The time it takes to photograph a Milky Way panorama can vary. Capturing the individual frames might only take a few minutes, but setting up your equipment, waiting for the perfect sky conditions, and post-processing can extend the process to several hours. Patience is key!
Can I Photograph the Milky Way in a City?
Photographing the Milky Way in a city is challenging due to light pollution. For the best results, travel to a dark-sky location away from urban areas. If you must shoot from a city, find the darkest spot possible and use a light pollution filter to improve your chances of capturing the galaxy.
What are the Challenges of Milky Way Panoramas Astrophotography?
Milky Way panoramas present several challenges, including finding dark skies free of light pollution, capturing images with minimal noise, and stitching multiple frames together seamlessly. Additionally, the weather and moon phase can affect your ability to capture clear shots of the galaxy. However, with the right planning and techniques, these challenges can be overcome.
In conclusion, creating Milky Way panoramas is an art form that blends technical skill with creative vision. From selecting the right gear to stitching together your final image, every step offers an opportunity to learn and grow as a photographer. By sharing your panoramas, you’re not just showcasing your work—you’re inviting others to look up and connect with the universe in a profound way. So grab your camera, head out under the stars, and capture the celestial dance of the Milky Way. The cosmos is waiting for you.