Key Takeaways
- Invest in a sturdy tripod and a fast aperture lens for sharper images.
- Manual focus set to infinity ensures clear shots of the stars.
- Scout for dark skies away from city lights to minimize light pollution.
- Use post-processing software to enhance your astrophotography without overdoing it.
- Patience and practice are crucial; learn from each shoot to improve your skills.
A Starry Blunder: Identifying Astrophotography Errors
Have you ever set out under the night sky, camera in hand, only to return with images that didn’t quite capture the awe-inspiring beauty you witnessed? You’re not alone. The journey to stellar astrophotography is dotted with potential pitfalls. But worry not, for every common mistake, there’s a solution that can elevate your night sky captures from mere snapshots to cosmic masterpieces.
Overlooking the Equipment Checklist
Before venturing out into the night, it’s essential to ensure you have all the right gear. It’s like packing for a camping trip – forgetting one item can turn a night of potential into a night of frustration. So, let’s start by ticking off the essentials:
Fumbling with Camera Settings in the Dark
Getting your camera settings right is crucial, and doing it in the dark can be tricky. It’s easy to overlook the importance of understanding your camera’s manual settings, but this knowledge is your ticket to capturing the night sky in all its glory.
- Manual mode is your best friend; it gives you full control over exposure settings.
- Set your focus to manual and adjust to infinity to ensure sharp stars.
- Keep ISO high enough for good exposure but low enough to avoid excessive noise.
The Composition Conundrum
Composition is key in any form of photography, but in astrophotography, it’s what separates a good photo from a breathtaking one. It’s not just about the stars; it’s about how you frame them, the foreground you choose, and the story you tell.
Getting the Gear Right
Let’s dive into the gear you’ll need. Remember, the right equipment can make a vast difference in astrophotography. It’s not just about having a camera; it’s about having the right camera and accessories to capture the night sky at its best.
Choosing a Sturdy Tripod
A sturdy tripod is non-negotiable. Long exposures are the backbone of astrophotography, and even the slightest movement can turn a crisp star into a blurry streak. Look for a tripod that’s robust enough to withstand wind and provide a stable foundation for your camera.
Opting for the Appropriate Lens
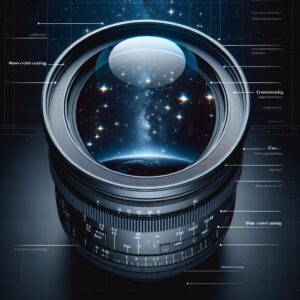
Your choice of lens can make or break your astrophotography experience. A wide-angle lens with a fast aperture, such as f/2.8 or wider, will allow you to capture more light and more of the sky, making it ideal for milky way shots and expansive nightscapes.
Understanding the Importance of a Camera’s Low-Light Capabilities
Not all cameras are created equal, especially when it comes to low-light performance. Cameras with larger sensors and better ISO capabilities will give you cleaner, more detailed night sky images. It’s worth investing in a camera that won’t let you down when the lights go out.
Star Tracker: Your Celestial Companion
For those looking to take their astrophotography to the next level, a star tracker is a game-changer. This device compensates for the Earth’s rotation, allowing you to take longer exposures without star trails. It’s an investment that can dramatically improve the quality of your photos.
Mastering the Manual: Camera Settings Demystified
Now that we’ve covered the gear, let’s talk settings. Manual mode on your camera is where the magic happens. It might seem daunting at first, but with a bit of practice, you’ll be dialing in settings like a pro. For more in-depth guidance, check out our ultimate guide to the NPF rule for achieving sharp astrophotography images.
Dialing in the Right Exposure
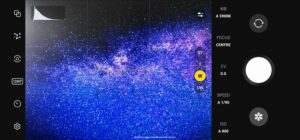
Exposure is a balancing act. Too long, and you’ll get star trails; too short, and your stars will be dim. Start with an exposure time of 15-30 seconds and adjust from there. Your aperture should be as wide as possible, and your ISO high enough to reveal the stars without introducing too much noise.
Finding Focus Among the Stars
Finding focus in the dark is a challenge, but it’s one you can overcome. Use your camera’s live view mode, zoom in on a bright star, and manually adjust the focus until it’s sharp. A little patience here goes a long way.
ISO: Balancing Brightness and Noise
Your ISO setting is a tug-of-war between brightness and noise. Start at around 1600 and see how your camera handles the noise. Some cameras can go higher without compromising image quality, while others may need to stay lower. It’s all about finding the sweet spot for your specific equipment.
With these tips in mind, you’re ready to embark on your astrophotography adventure. Embrace the night and capture the wonders it holds. And remember, every mistake is a step towards mastering the art of photographing the stars.
Composing the Cosmos: Framing Your Night Sky
When you gaze up at the night sky, you’re not just looking at stars; you’re looking at potential masterpieces. The difference between a good astrophotography image and a great one often lies in its composition. Composition is the way elements are arranged in your photo, and it’s vital to making your images tell a story that resonates.
Integrating Foreground Interest
Stars might be the highlight of your shot, but they shouldn’t be the only aspect. Including a point of interest in the foreground can add depth and context to your celestial shots. This could be anything from a silhouette of trees to an intriguing rock formation. The foreground element anchors the viewer in the scene and provides a scale to the vastness of the night sky.
For example, if you’re shooting the Milky Way, try to find a compelling foreground subject that leads the eye towards the galaxy. A winding river, a mountain peak, or even a lone tree can serve as a powerful focal point.
Utilizing Leading Lines and Shapes
Leading lines are a powerful compositional tool. They guide the viewer’s eye through the image and can be used to draw attention towards the main subject – in this case, the stars. Natural formations, man-made structures, or even the arc of the Milky Way itself can act as leading lines in your astrophotography.
The Rule of Thirds in the Night Sky
The rule of thirds is a classic composition technique where you divide your image into nine equal segments by two vertical and two horizontal lines. Placing points of interest at the intersections or along the lines creates balance and interest. This technique works wonderfully with astrophotography, where you can place the horizon on the bottom third to give prominence to the sky, or offset the Milky Way to one side for a dynamic composition.
The Dark Art: Battling Light Pollution
One of the biggest challenges in astrophotography is light pollution. It’s the unwanted ambient light that washes out the night sky. Even if you can’t see it with the naked eye, your camera can, and it can turn what should be a pitch-black sky into a washed-out haze.
Scouting the Ideal Locations
Finding the right location is crucial. You want to be as far away from city lights as possible. Dark Sky Parks are ideal, but any remote area with minimal light pollution will do. Apps and websites can help you find these dark sky locations and plan your shoot around the phases of the moon and weather conditions.
Filters and Techniques to Combat Ambient Light
If you can’t escape light pollution, don’t fret; there are still ways to mitigate its effects. Light pollution filters can be attached to your lens to block out specific wavelengths of light associated with common sources of light pollution. Additionally, shooting during a new moon phase can help, as the moonlight won’t interfere with star visibility.
Another technique is to take multiple exposures and stack them using software, which can help reduce the appearance of light pollution in your final image.
Patience and Practice: The Virtues of Astrophotography
Perhaps the most important piece of advice I can give you is this: astrophotography requires patience and practice. You won’t always get the shot on your first try, and that’s okay. Each time you go out, you’ll learn something new, and your skills will improve.
Chasing the perfect night sky shot means being prepared to spend hours outside, often in the cold, and sometimes coming away with nothing. But when everything aligns, and you capture that one shot that takes your breath away, all the effort will have been worth it.
Review your images after each session, note what worked and what didn’t, and adjust your approach accordingly. Over time, you’ll develop a keen eye for what makes a stellar astrophotography image.
Editing the Ethereal: Post-Processing Tips
After a successful night of capturing the cosmos, the next step is to bring out the best in your images through post-processing. This is where you can adjust exposure, contrast, and colors to truly make the stars shine. But be cautious – it’s easy to get carried away and end up with an image that looks more like a science fiction fantasy than the real night sky.
Software like Adobe Lightroom and Photoshop are popular choices, offering a wide range of tools to enhance your astrophotography. Free alternatives like GIMP or RawTherapee can also do a great job if you’re on a budget. The key is to learn the software and use it to subtly enhance, not overpower, your work.
Adjust the white balance to bring out the natural colors of the stars, increase the contrast to make the sky pop, and use noise reduction to clean up the image. But always remember, less is more. Your goal is to enhance the natural beauty of the night sky, not to create an artificial-looking scene.
Example: A photo of the Milky Way can often look washed out straight out of the camera. By slightly increasing the contrast and adjusting the white balance, the colors of the galaxy can become more pronounced, and the stars can appear more distinct.
FAQs
Why Are My Night Sky Photos Blurry?
There are a few reasons your night sky photos might be blurry. It could be due to incorrect focus, camera shake during a long exposure, or even atmospheric conditions. To ensure sharp photos, use a sturdy tripod, set your focus to infinity manually, and try to shoot on a night with clear, stable air. For more detailed guidance, consider reading our astrophotography guide to help capture the stars with optimal clarity.
Always double-check your focus by using the magnification feature on your camera’s live view. And remember, even a slight bump to your camera or tripod can result in blur, so use a remote shutter or your camera’s timer to minimize movement.
Atmospheric turbulence can also cause stars to appear blurry. This is something that can’t be controlled, but choosing nights with good seeing conditions can help mitigate this issue.
Can I Do Astrophotography in the City?
Yes, you can do astrophotography in the city, but you’ll face the challenge of light pollution. To maximize your chances of success, find the darkest spot possible, use a light pollution filter, and consider post-processing techniques to reduce the effects of artificial light.
It’s also a good idea to focus on objects that are less affected by light pollution, like the moon or brighter planets. While you might not capture the faintest stars or the Milky Way, you can still enjoy and photograph the night sky from an urban environment.
Remember, the most important thing is to get out there and try. You might be surprised at what you can capture, even under less-than-ideal conditions.
- Find the darkest location possible within the city.
- Use a light pollution filter to improve image quality.
- Post-process your images to reduce the effects of artificial light.
Do I Need an Expensive Camera for Astrophotography?
While having a high-end camera can help, it’s not a necessity for astrophotography. What’s more important is understanding how to use your camera to its fullest potential. A camera with manual mode and the ability to shoot in RAW will give you the control and data you need to create beautiful night sky images.
Remember, some of the most stunning astrophotography shots have been taken with entry-level DSLRs and mirrorless cameras. It’s all about technique, patience, and practice.
What’s the Best Time of Year for Astrophotography?
The best time of year for astrophotography largely depends on what you want to photograph. For the Milky Way, the best time is during the summer months in the Northern Hemisphere and the winter months in the Southern Hemisphere.
However, clear, dark nights can provide excellent opportunities year-round. Keep an eye on the moon phases, as a new moon offers the darkest skies. Weather conditions are also a factor, so look for nights with low humidity and clear skies for the sharpest images.
How Can I Learn More About Post-Processing Night Sky Images?
To learn more about post-processing night sky images, you can start by exploring tutorials on YouTube, joining online photography forums, and practicing with your own images. Many photographers also offer workshops that can provide you with hands-on experience and personalized guidance.
Books and magazines dedicated to astrophotography can also be excellent resources. The more you practice and learn from others, the better your post-processing skills will become.
Remember, astrophotography is a journey, not a destination. Each night out with your camera is an opportunity to capture a part of the universe that’s been around for billions of years. So go out, look up, and share the wonders of the night sky through your photography.


