Key Takeaways
- Plan your meteor shower photography session during peak times to maximize your chances of capturing meteors.
- Use a tripod, a wide-angle lens, and a camera capable of long exposures for best results.
- Scout for a dark location away from city lights to avoid light pollution.
- Experiment with camera settings, starting with a wide aperture, high ISO, and long exposure time.
- Incorporate interesting foreground elements to add depth and context to your celestial shots.
Capturing the Night Sky: Your Gateway to Meteor Shower Photography
There’s something truly magical about gazing up at the night sky and seeing a meteor streak across the darkness. It’s a moment that’s both fleeting and spectacular, and as an astrophotographer, you have the unique opportunity to capture that magic. With the right preparation and knowledge, you can transform those ephemeral flashes into stunning images that inspire and captivate.
When to Witness the Cosmic Show
To photograph a meteor shower, timing is everything. You’ll want to mark your calendar for the peak of well-known meteor showers like the Perseids, Geminids, or Leonids. These events are known for their high rates of meteors per hour, which means more opportunities to capture a great shot. Most importantly, check an astronomical calendar to find out the exact dates when meteor showers will be most active in your area.
Must-Have Gear for Meteor Captures
Before you head out into the night, make sure you’ve packed the essentials. You’ll need:
- A camera capable of manual settings: DSLRs and mirrorless cameras are great choices.
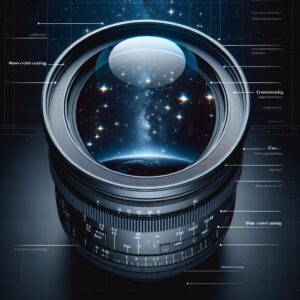
- A wide-angle lens: to capture as much of the sky as possible.
- A sturdy tripod: to keep your camera steady during long exposures.
- An intervalometer or a remote shutter release: to take continuous shots without shaking the camera.
- Extra batteries and memory cards: because you don’t want to run out of power or storage at the crucial moment.
Scouting the Perfect Spot
Location can make or break your meteor shower photography. You’re looking for the darkest sky possible, which means getting away from the light pollution of cities and towns. Use a dark sky map to find the best spots near you. Once you’ve picked your location, arrive early to set up and let your eyes adjust to the darkness. Remember, patience is key in astrophotography—you might be waiting a while for that perfect shot.
Finding Dark Skies
Dark skies are not just about being away from city lights, but also about the right atmospheric conditions. A clear, moonless night is ideal. Check the weather forecast and moon phases, and plan your shoot around them. The darker the sky, the more meteors you’ll see and photograph.
- Use a dark sky finder app or website to locate the best spots with minimal light pollution.
- Check the weather forecast to ensure clear skies on the night of the meteor shower.
- Plan around the moon phase—new moon nights are best.
Understanding Meteor Shower Peaks
Each meteor shower has a peak period, which is when the Earth passes through the densest part of the comet’s debris trail, resulting in more meteors. The peak is often a window of a few hours, so timing your session during this period is crucial for capturing the most action. Also, some meteor showers have better visibility in certain parts of the world, so make sure the one you’re planning to shoot will be visible in your region.
Camera Settings for Stellar Shots
When it comes to camera settings, there’s no one-size-fits-all approach, but there are some guidelines you can start with. First, set your camera to manual mode. This will give you complete control over the exposure, which is critical for night photography. You’ll be working with a balance of ISO, aperture, and shutter speed to capture the best images.
Optimal Exposure Settings
Start with a wide aperture (the lowest f-number your lens allows) to let in as much light as possible. Then, set your ISO to a higher value—start around 1600 and go higher if your camera can handle it without too much noise. As for shutter speed, you’ll want a long exposure to capture the trails of the meteors—anywhere from 10 to 30 seconds, depending on the ambient light and your desired effect.
Balancing ISO and Noise
While a high ISO is necessary for capturing meteors, it also introduces noise to your images. Test your camera ahead of time to see how high you can push the ISO before the noise becomes unacceptable. Some newer cameras handle high ISOs very well, allowing you to capture brighter meteors without sacrificing image quality.
The Role of Aperture in Astrophotography
The aperture not only affects the amount of light that reaches your camera’s sensor but also the depth of field. In meteor shower photography, you generally want to use the widest aperture your lens offers. This usually means using an f/2.8 or wider. However, be aware that very wide apertures can sometimes result in softer images, especially around the edges.
Now, let’s dive into the artistry of your shot. Composition is crucial in photography, and astrophotography is no exception. When you’re out in the field, look around you. What elements can you include to make your meteor shower photos more interesting? Perhaps there’s a silhouette of a mountain range, the outline of trees, or an old barn that could add character to your composition. These elements not only add interest but also scale, giving viewers a sense of size and space.
Foreground Interest vs. Star-studded Skies
While the meteor shower is undoubtedly the star of the show, don’t forget the power of a strong foreground to add depth to your compositions. A compelling foreground can turn a good photograph into a great one. Look for elements that can anchor your image and give context to the vastness of the night sky. But remember, your foreground should complement, not compete with, the meteor display above.
Using the Rule of Thirds Outdoors at Night
The rule of thirds is a compositional guideline that suggests dividing your image into thirds, both horizontally and vertically, and placing important elements along these lines or their intersections. At night, use the rule of thirds to position the horizon or a significant landscape feature. This will create a balanced composition that draws the viewer’s eye through the scene and towards the meteors.
Advanced Techniques for the Ambitious Astrophotographer
For those who want to push their meteor shower photography further, there are advanced techniques that can significantly enhance your images. These techniques require more time and effort but the results can be truly out of this world.
Stacking Images for Impact
Image stacking involves taking multiple photos and combining them in post-processing to create a single image. This technique can reduce noise, increase detail, and reveal fainter meteors. To stack images, you’ll need to take many photos with the same framing and settings. Later, use software like StarStaX or Adobe Photoshop to blend them together.
Capturing Motion: Star Trails and Meteor Paths
Long exposure times can not only capture the brief flash of a meteor but also the motion of the stars, resulting in star trails. To capture both meteors and star trails, use a longer exposure time—upwards of several minutes—and a lower ISO to prevent overexposure. Just be aware that very long exposures can lead to fewer visible meteors due to the brightening of the sky.
Time-lapse Photography and Meteor Showers
Time-lapse photography is another exciting way to document a meteor shower. By taking a series of photos at set intervals over a period of time, you can create a video that shows the motion of the stars and the streaking of meteors across the sky. To create a time-lapse, you’ll need an intervalometer to trigger your camera at regular intervals. The settings will depend on the effect you’re going for and the duration of the event you’re capturing.
Remember, meteor shower photography is as much about the experience as it is about the final image. So, dress warmly, bring some coffee, and enjoy the celestial show. With preparation, patience, and a bit of luck, you’ll capture something truly awe-inspiring.
Post-processing is the final step in meteor shower photography, and it’s where you can really make your images shine. Start by selecting the best shots from your session. You’ll likely have a large number to go through, so be patient and choose the ones with the clearest meteors and best composition.
Enhancing with Editing Software
Editing software like Adobe Lightroom or Photoshop can be invaluable for improving your meteor shower photos. Adjusting the contrast, brightness, and color balance can help make the meteors stand out. If you’ve taken a series of images for stacking, this is when you’ll combine them to reduce noise and bring out fainter meteors. Remember, the goal is to enhance, not to overdo it and make the photo look unnatural.
Frequently Asked Questions (FAQ)
As you embark on your journey to photograph meteor showers, you may have questions. Let’s address some of the most common queries to ensure you’re fully prepared for your astrophotography adventure.
What is the best camera for meteor shower photography?
The best camera for meteor shower photography is one that allows manual control over exposure settings, such as DSLR or mirrorless cameras. Look for models that perform well at high ISOs with minimal noise, and those that have a ‘Bulb’ mode for long exposures. Cameras with interchangeable lenses are also advantageous, as they allow you to use a wide-angle lens to capture more of the sky.
Can I photograph meteor showers in the city?
Photographing meteor showers in the city is challenging due to light pollution, but not impossible. To maximize your chances, find the darkest spot possible within the city, such as a park or an area shielded from streetlights. Using a lens hood can also help reduce glare. However, for the best results, it’s recommended to travel away from urban areas to darker locations.
- Seek out darker areas within the city, like parks or open spaces.
- Use a lens hood to minimize glare from surrounding lights.
- Adjust camera settings to compensate for light pollution, possibly using a higher ISO or longer exposure.
How do I predict when and where meteors will appear?
Predicting the exact location of meteor appearance is challenging, as they can occur anywhere in the sky. However, meteor showers do radiate from specific points, known as radiant points. To increase your chances of capturing meteors, point your camera toward the radiant point while still including a wide expanse of the sky. There are apps and websites that can help you locate the radiant point for each meteor shower.
For example, during the Perseid meteor shower, the meteors appear to originate from the constellation Perseus. By orienting your camera in that direction, you’re more likely to photograph Perseid meteors.
What is image stacking and how does it benefit meteor shower photography?
Image stacking is a technique where multiple images are digitally combined to reduce noise and increase detail. For meteor shower photography, stacking can help create a more impressive image by combining several meteors into a single frame. This technique also allows you to use a lower ISO, resulting in less noise. You’ll need software that can align and blend the images, such as StarStaX or Adobe Photoshop.
Do I need to use a tripod for photographing meteor showers?
Absolutely, a tripod is essential for meteor shower photography. The long exposure times required to capture meteors mean that even the slightest movement can blur your image. A sturdy tripod ensures that your camera stays perfectly still, allowing you to get sharp photos of the meteors as they blaze across the sky.
Remember, photographing meteor showers is an adventure that combines patience, skill, and a bit of luck. Embrace the challenge, and you’ll be rewarded with stunning images that capture the wonder of the cosmos. Now, go out there and chase the stars!