Article-at-a-Glance
- Essential camera gear for aurora borealis photography includes a DSLR or mirrorless camera with manual mode and a sturdy tripod.
- Optimal camera settings involve balancing ISO, aperture, and shutter speed to capture the aurora’s vibrant colors.
- Best times for photographing the northern lights are during the equinoxes, in dark, clear skies away from light pollution.
- Key locations include the Auroral Zone in the high latitude regions like Scandinavia, Canada, and Alaska.
- Post-processing can enhance aurora photos by adjusting color, brightness, and contrast, as well as using noise reduction techniques.
Capturing the Ethereal Glow: Aurora Borealis Photography Essentials
Imagine standing under a vast sky, the silence around you is palpable, and suddenly, like a celestial dance, the sky erupts into a symphony of colors. The aurora borealis, also known as the northern lights, is one of nature’s most spectacular displays. As a photographer, capturing this phenomenon can be both a challenge and a triumph. But with the right approach, you can immortalize the aurora’s fleeting beauty. Let’s dive into the essentials of aurora borealis photography and set you on the path to capturing your own stunning images.
Embracing the Magic of the Northern Lights
The aurora borealis is a natural light display predominantly seen in the high latitude regions around the Arctic and Antarctic. It’s caused by the collision of solar wind and magnetospheric charged particles with the high altitude atmosphere. These displays can range from subtle glows to vibrant streaks of green, pink, purple, and red. The key to capturing the northern lights is to be prepared and understand the phenomenon. Because the aurora can be unpredictable, knowing when and where to look increases your chances of success significantly.
Essential Gear for Chasing Luminous Skies
To photograph the aurora borealis, you’ll need some specific gear. Here’s a quick checklist:
- A DSLR or mirrorless camera that allows manual control of settings.
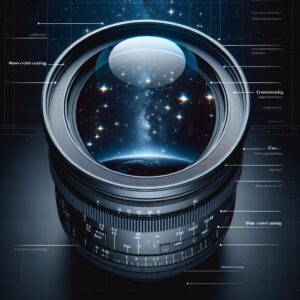
- A wide-angle lens with a large maximum aperture (f/2.8 or wider) to let in as much light as possible.
- A sturdy tripod to eliminate camera shake during long exposures.
- Extra batteries, as cold weather can drain them quickly.
- A remote shutter release or camera’s built-in timer to take photos without touching the camera.
It’s crucial to have a camera that can handle long exposures without generating too much noise. And remember, the colder the environment, the faster your batteries will deplete, so always pack extras.
Your Camera, the Northern Canvas: Understanding Settings
When it comes to camera settings, there’s no one-size-fits-all for aurora photography, but there are starting points. Set your camera to manual mode. This gives you complete control over the ISO, aperture, and shutter speed – the three pillars of exposure that you’ll need to balance to capture the aurora’s glory.
Let’s break it down:
- ISO: This controls your camera’s sensitivity to light. For auroras, start with an ISO between 1600 and 3200. You may need to adjust depending on the aurora’s intensity and the presence of moonlight.
- Aperture: Use the widest aperture (smallest f-number) your lens allows, like f/2.8 or even f/1.4, to capture as much light as you can.
- Shutter Speed: Begin with a shutter speed of 5 to 10 seconds. If the lights are moving quickly, a shorter exposure can prevent them from blurring. If they’re faint, a longer exposure may be necessary.
Experimenting with these settings is key. The aurora’s brightness and activity can change rapidly, so be prepared to adjust on the fly. And don’t forget to shoot in RAW format for the highest quality images and more flexibility in post-processing.
Now, let’s delve into the details of each setting and how they interact to bring the aurora borealis to life in your photography.
Seasons of the Aurora: The Best Times to Shoot
Most importantly, to capture the aurora borealis, timing is everything. The auroras are most active during the equinoxes, that’s around late September and late March. This is due to the position of the Earth in relation to the sun, which maximizes the probability of solar wind interactions. Winter in the Northern Hemisphere is also a prime time due to the long, dark nights. However, don’t let the cold deter you; the dance of the northern lights is well worth braving the chill.
Reading the Night Sky: Using Aurora Forecasts Effectively
Just like checking the weather before a picnic, using aurora forecasts can greatly increase your chances of witnessing and capturing the northern lights. Apps and websites like the NOAA’s Space Weather Prediction Center provide aurora forecasts that can help you plan your shoot. Look for the Kp index, a scale that measures geomagnetic activity. A higher Kp number suggests a higher chance of seeing the aurora borealis. Combine this with a clear sky forecast, and you’re on the right track.
Also, keep an eye on the solar cycle; approximately every 11 years, solar activity peaks, increasing the frequency and intensity of auroral displays. The next peak is expected in the mid-2020s, so start planning your aurora photography expeditions accordingly.
The Spotter’s Guide: Prime Locations for Aurora Photography
Finding the perfect location is as crucial as timing. The aurora borealis is best seen in the Auroral Zone, an area between 65 to 72 degrees north or south latitude. Within this zone, you’ll want to find a spot with minimal light pollution and a clear view of the northern horizon. This is because the aurora typically appears in an oval-shaped ring over the Earth’s magnetic poles. For more detailed guidance, consider reading this astrophotography guide on precise polar alignment techniques.
Therefore, scouting your location during the day can be beneficial. Look for open areas with few obstructions like trees or buildings that might block your view of the sky. And remember, safety first. Always let someone know where you’re going, especially if you’re venturing into remote areas.
Mapping the Auroral Zone: Top Geographical Hotspots
Some of the best places to photograph the aurora borealis include:
- Tromsø, Norway – known as the “Paris of the North,” it offers a high frequency of auroral displays.
- Yellowknife, Canada – situated directly under the auroral oval, providing excellent viewing opportunities.
- Reykjavik, Iceland – although the city lights can be a challenge, a short drive out can yield spectacular results.
- Fairbanks, Alaska – with its clear, dark skies, it’s a favorite among aurora photographers.
These locations are known not only for their auroral activity but also for their stunning landscapes, which can add a dramatic backdrop to your aurora photos.
Navigating Light Pollution: Finding Dark Skies
To capture the true colors and details of the aurora, you need dark skies. Light pollution from cities and towns can wash out the night sky, making the aurora borealis less visible. Use online dark sky maps to find the darkest locations near you or your chosen destination. Even a short drive away from urban areas can make a significant difference in the quality of your aurora photographs.
Creative Composition: Elevating Your Aurora Images
While the aurora itself is a mesmerizing subject, the composition of your photograph can turn a good shot into a great one. Think about the rule of thirds, where you divide your frame into nine equal segments. Place the horizon on the bottom or top line, depending on whether you want to emphasize the sky or the landscape. Then, try to align the most vibrant part of the aurora along one of the vertical lines.
Incorporating Natural Landscapes for Dramatic Effect
Using the natural landscape can add depth and interest to your aurora photographs. Mountains, trees, and water bodies can provide a sense of scale and context to the celestial display. Here’s how:
- Include a mountain range to ground the image and add grandeur.
- Use trees as silhouettes to frame the aurora and draw the viewer’s eye upward.
- Find a lake or river to capture reflections of the aurora, doubling its impact.
And don’t forget to explore different angles and perspectives. Sometimes, the most striking compositions are found by simply moving a few steps to the left or right, or by looking back over your shoulder.
Auroras can change quickly, so be ready to adjust your composition to follow the display. And remember, the foreground should complement, not compete with, the aurora. Choose elements that enhance the overall scene.
Utilizing Foreground Elements for Depth and Interest
Foreground elements can transform your aurora images from flat to dynamic. A well-placed object in the foreground can provide a point of interest and draw the viewer into the scene. Look for items that have an interesting shape or texture, such as rocks, ice formations, or man-made structures like cabins or lighthouses.
Experimenting with Reflections and Silhouettes
Reflections and silhouettes can add a layer of complexity and intrigue to your aurora images. Water bodies are perfect for capturing the aurora’s reflection. Find a calm lake or a slow-moving river for the best effect. For silhouettes, position yourself so that the aurora is behind your subject, creating a stark contrast between the dark foreground and the illuminated sky.
Preserving the Moment: Post-Processing Aurora Images
After capturing the aurora borealis, post-processing can help you refine your images. Start with basic adjustments to color, brightness, and contrast. Be careful not to overdo it; the goal is to enhance the photo’s natural beauty, not create an artificial look. If you shot in RAW, you’d have more latitude to adjust these settings without losing image quality.
Here’s a simple post-processing workflow:
- Adjust the white balance to accurately reflect the aurora’s colors.
- Increase the contrast slightly to make the aurora stand out against the night sky.
- Fine-tune the exposure to ensure the image is neither too dark nor too bright.
- Apply noise reduction to clean up any graininess resulting from high ISO settings.
For more advanced post-processing, you can experiment with stacking multiple images to reduce noise and increase detail. This involves taking several photos of the same scene and combining them in post-processing software. The result is often a cleaner, more detailed image than you could achieve with a single exposure.
Remember, the key to successful aurora borealis photography is patience, practice, and passion. With these tips and camera settings, you’re well on your way to capturing the ethereal beauty of the northern lights. Bundle up, venture out, and let the night sky be your canvas.
Advanced Techniques: Stacking and Noise Reduction
When you’re aiming for the crispest shot of the aurora’s whimsical dance, advanced techniques like stacking and noise reduction become your allies. Stacking is a method where you take multiple shots of the same scene and merge them in post-processing software. This technique not only reduces noise, which is common in low-light photography, but also enhances details, making your aurora images pop with clarity and depth.
Noise reduction is another crucial step, especially if you’ve had to bump up your ISO. Most photo editing software offers noise reduction tools, and by applying them judiciously, you can maintain the delicate balance between reducing grain and preserving detail. Remember, it’s about refinement, not alteration. The goal is to let the true beauty of the aurora shine through.
FAQ
What is the Best Camera for Aurora Borealis Photography?
The best camera for capturing the aurora borealis is one that performs well in low light conditions. This means a camera with a large sensor, the ability to handle high ISO settings without significant noise, and the flexibility to use manual settings. DSLRs and mirrorless cameras from brands like Nikon, Canon, and Sony are popular choices among night sky photographers. The specific model you choose will depend on your budget and the features you find most important.
While a full-frame sensor is ideal due to its superior light-gathering capabilities, crop-sensor cameras can also perform admirably with the right settings and lenses. Ultimately, the best camera is the one you have with you, as long as it allows you the control you need to capture the magic of the aurora.
Can Smartphone Cameras Capture the Aurora Borealis?
While smartphone cameras have come a long way in terms of technology, they typically don’t offer the same level of control or sensitivity to light as DSLRs or mirrorless cameras. However, some newer models do have night modes that allow for longer exposures and can capture a semblance of the aurora borealis. For the best results, use a tripod and a smartphone mount to keep the phone steady, and experiment with any manual settings your phone’s camera app may offer.
How Cold is Too Cold for My Camera Gear?
Most modern camera gear is designed to withstand a range of temperatures, but extreme cold can still pose challenges, particularly for battery life. Batteries can lose charge quickly in cold conditions, so it’s wise to keep spares warm in an inner pocket close to your body and swap them out as needed. Cameras themselves can usually function in temperatures well below freezing, but consult your camera’s manual for its specific operating temperature range. Always allow your gear to warm up slowly after being out in the cold to prevent condensation.
How Do I Stay Safe While Photographing in Remote Areas?
Photographing the aurora often means venturing into remote and potentially hazardous locations at night. To stay safe, always plan ahead. Inform someone of your plans and expected return time, carry a map and GPS device, and pack essential survival gear including extra food, water, and warm clothing. Be aware of local wildlife and terrain-related dangers, and never put yourself at unnecessary risk for a photo. Safety should always be your top priority.
What Are the Environmental Considerations When Photographing the Aurora?
As photographers and admirers of nature’s beauty, it’s our responsibility to minimize our impact on the environment. When photographing the aurora, stay on marked trails to avoid damaging fragile ecosystems, and take all your trash with you. If you’re using light for foreground illumination, be mindful of local wildlife that can be disoriented by artificial light. Embrace the principles of Leave No Trace to ensure that the natural areas we enjoy remain pristine for future generations.