Key Takeaways
- The Nikon D5600 is a versatile camera ideal for astrophotography due to its excellent ISO performance and lightweight design.
- Proper preparation of your camera, including updating firmware and cleaning the sensor, is crucial for clear night sky images.
- Essential accessories for astrophotography include a sturdy tripod, remote shutter release, and a portable power source.
- Wide-angle and prime lenses are the best choices for capturing detailed and vibrant astrophotography images.
- Optimal camera settings such as ISO, exposure time, and aperture play a significant role in achieving stunning night sky photos.
Best Nikon D5600 Camera for Astrophotography Tips & Tricks
Why Nikon D5600 is Great for Astrophotography
The Nikon D5600 stands out as an excellent choice for astrophotography enthusiasts. Its 24.2 MP APS-C CMOS sensor provides high-resolution images, capturing the intricate details of the night sky. The camera’s ISO range of 100-25600 allows for flexibility in various lighting conditions, making it easier to photograph stars and other celestial objects.
Besides that, the Nikon D5600’s lightweight and compact design make it convenient to carry around, especially when traveling to remote locations for the best night sky views. The articulated touchscreen also adds a layer of convenience, enabling you to frame your shots from different angles.
Preparing Your Nikon D5600 for Astrophotography
Before heading out to capture the night sky, it’s essential to prepare your Nikon D5600 properly. Start by ensuring that your camera’s firmware is up-to-date. This can improve performance and fix any bugs that might affect your photography experience.
Cleaning your camera sensor is another crucial step. Dust and debris on the sensor can create unwanted spots in your images. Use a blower or sensor cleaning kit to keep it spotless. Additionally, format your memory card to ensure you have ample space for long exposure shots.
“Proper preparation of your camera, including updating firmware and cleaning the sensor, is crucial for clear night sky images.”
Essential Accessories
- Sturdy Tripod
- Remote Shutter Release
- Portable Power Source
Tripod Choice
A sturdy tripod is a must-have accessory for astrophotography. It ensures that your camera remains stable during long exposure shots, reducing the risk of blurry images caused by camera shake. Look for a tripod that is robust yet lightweight, making it easier to transport to different locations.
Remote Shutter Release
Using a remote shutter release helps to minimize camera shake when taking long exposure photos. It allows you to trigger the shutter without physically touching the camera. There are various options available, including wired and wireless remotes. Choose one that best suits your needs and preferences.
Portable Power Source
Long exposure astrophotography sessions can drain your camera’s battery quickly. Therefore, having a portable power source is essential. You can use an external battery pack or a portable charger to ensure your camera remains powered throughout the night.
“Essential accessories for astrophotography include a sturdy tripod, remote shutter release, and a portable power source.”
Lens Selection
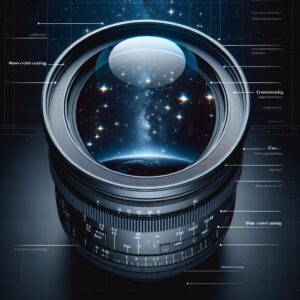
Choosing the right lens is critical for capturing stunning astrophotography images. While the Nikon D5600’s kit lens is a good starting point, investing in specialized lenses can significantly enhance your results. Two main types of lenses are highly recommended: wide-angle lenses and prime lenses.
Wide-Angle Lens
Wide-angle lenses are ideal for astrophotography because they allow you to capture a broader view of the night sky. These lenses have a shorter focal length, usually between 14mm and 24mm, enabling longer exposure times without star trails. They also have a larger aperture, allowing more light to reach the camera sensor.
“Wide-angle lenses are ideal for astrophotography because they allow you to capture a broader view of the night sky.”
Prime Lens
Prime lenses, with their fixed focal length, offer excellent image quality and sharpness. They typically have larger maximum apertures (e.g., f/1.8 or f/2.8), which is beneficial for astrophotography as it lets in more light. This feature is particularly useful when photographing faint celestial objects.
Prime lenses, with their fixed focal length, offer excellent image quality and sharpness. They typically have larger maximum apertures (e.g., f/1.8 or f/2.8), which is beneficial for astrophotography as it lets in more light. This feature is particularly useful when photographing faint celestial objects. For more information on the suitability of the Nikon D5600 for astrophotography, you can check out this discussion on Photography Stack Exchange.
Optimal Camera Settings
Getting the right camera settings can make a world of difference in astrophotography. You’ll need to adjust the ISO, exposure time, and aperture to suit the conditions. Here are some tips to help you get started with deep sky imaging.
ISO Settings
ISO settings determine your camera’s sensitivity to light. For astrophotography, you generally want a higher ISO to capture more light. However, too high an ISO can introduce noise into your images. A good starting point is an ISO of 1600 or 3200. Experiment with these settings to find the best balance between brightness and noise.
Exposure Time
Exposure time is crucial for capturing the stars. Too short an exposure, and you won’t capture enough light; too long, and you’ll get star trails instead of points. A good rule of thumb is the “500 Rule”: divide 500 by the focal length of your lens to get the maximum exposure time in seconds. For example, with a 20mm lens, you can use an exposure time of up to 25 seconds.
Aperture Setup
The aperture controls how much light enters the camera. For astrophotography, you’ll want to use a wide aperture (a low f-number) to let in as much light as possible. Set your lens to its widest aperture, typically around f/2.8 or lower if possible.
- ISO: Start with 1600 or 3200
- Exposure Time: Use the 500 Rule
- Aperture: Set to the lowest f-number
Focusing Techniques
Focusing in the dark can be challenging, but it’s essential for capturing sharp images. Here are some techniques to help you get the best focus. For more detailed guidance, check out this star trails photography guide.
Manual Focus
Switch your lens to manual focus mode. Autofocus can struggle in low light, so manual focus gives you more control. Use the live view mode on your Nikon D5600 to magnify a bright star or distant light and adjust the focus until it’s as sharp as possible.
Focusing on Infinity
Many lenses have an infinity focus mark. This can be a good starting point, but it’s not always accurate. Fine-tune the focus using live view to ensure the stars are pinpoints of light. Remember, even a slight misfocus can result in blurry stars.
“Focusing in the dark can be challenging, but it’s essential for capturing sharp images.”
Using Live View for Precision
Live view is a valuable tool for precise focusing. Use the camera’s magnification feature to zoom in on a bright star or distant object. Adjust the focus until the object is as sharp as possible. This method ensures that your focus is spot on.
Most importantly, take your time with focusing. It’s better to spend a few extra minutes getting it right than to end up with a night full of blurry images.
Tackling Common Astrophotography Issues
Astrophotography comes with its own set of challenges. Here are some common issues and how to tackle them. For more detailed tips, check out this astrophotography guide.
Reducing Noise
Noise can be a significant problem in astrophotography, especially at high ISO settings. To reduce noise, take multiple shots of the same scene and stack them using software like DeepSkyStacker. This technique averages out the noise, resulting in a cleaner image.
Dealing with Light Pollution
Light pollution can wash out the stars and reduce the contrast in your images. To combat this, try to find a location far from city lights. Additionally, using a light pollution filter can help to block out unwanted artificial light, enhancing the visibility of celestial objects.
Preventing Camera Shake
Even the slightest camera shake can ruin a long exposure shot. Besides using a sturdy tripod and remote shutter release, you can enable the mirror lock-up feature on your Nikon D5600. This reduces vibrations caused by the mirror flipping up when the shutter is released.
Post-Processing Tips
Post-processing is an essential part of astrophotography. It helps to bring out the details in your images and correct any issues. Here are some tips to get you started.
“Post-processing is an essential part of astrophotography. It helps to bring out the details in your images and correct any issues.”
Basic Post-Processing Steps
Start by adjusting the levels and curves to enhance the contrast and brightness of your image. This will help to make the stars and other celestial objects stand out. You can also use noise reduction tools to clean up any remaining noise.
Software Choices
There are several software options available for astrophotography post-processing. Adobe Photoshop and Lightroom are popular choices due to their powerful editing tools. For stacking images, software like DeepSkyStacker is highly recommended.
Remember, post-processing is an art. Experiment with different techniques and settings to find what works best for your images. For more tips, check out this deep sky imaging guide.
Adjusting Levels and Curves
Adjusting levels and curves in post-processing is crucial for enhancing the contrast and brightness of your astrophotography images. Start by opening your image in your preferred editing software, such as Adobe Photoshop or Lightroom. Use the levels adjustment tool to set the black and white points, which will help to increase the overall contrast of the image. For more detailed guidance, check out this astrophotography tutorial.
Next, move on to the curves adjustment tool. This allows you to fine-tune the brightness and contrast by adjusting the curve’s shape. A gentle S-curve is often effective for astrophotography, as it boosts the contrast in the midtones while preserving details in the highlights and shadows. Don’t be afraid to experiment with different adjustments to see what works best for your specific image.
Documenting Your Astrophotography Journey
Documenting your astrophotography journey is not only a great way to track your progress but also to share your experiences and learnings with others. Keeping detailed records of your settings, conditions, and outcomes can help you refine your techniques and achieve better results over time.
Recording Settings and Conditions
Whenever you go out for an astrophotography session, make it a habit to record the settings and conditions. Note down the camera settings such as ISO, aperture, exposure time, and focal length. Additionally, record the date, time, location, and any relevant environmental conditions like weather and moon phase.
This information can be incredibly valuable for future reference. It allows you to compare different sessions and understand how various factors affect your images. You can use a dedicated notebook, a digital document, or even a specialized app designed for photographers.
Organizing Your Photos
Keeping your astrophotography photos organized is essential for easy access and review. Create a structured folder system on your computer, categorizing images by date, location, or specific celestial events. Rename your files with descriptive names to make them easier to identify.
Additionally, consider using photo management software like Adobe Lightroom, which allows you to add tags, ratings, and metadata to your images. This makes it simpler to search for specific photos and keep track of your best shots.
Sharing Your Work
Sharing your astrophotography work can be incredibly rewarding. Not only does it allow you to showcase your skills, but it also connects you with a community of like-minded enthusiasts. Consider sharing your photos on social media platforms like Instagram, Facebook, or specialized photography forums.
When sharing your work, provide details about the equipment and settings used, as well as any interesting stories or challenges faced during the shoot. This adds context to your images and can be educational for others. Engaging with the community by giving and receiving feedback can further enhance your skills and inspire new ideas.
Frequently Asked Questions (FAQ)
Can I use a kit lens for astrophotography?
Yes, you can use a kit lens for astrophotography, but it may have limitations. Kit lenses typically have a smaller maximum aperture, which means they let in less light. This can make it more challenging to capture faint celestial objects. However, they are a good starting point for beginners to learn the basics of astrophotography.
What is the best ISO setting for night sky photos?
The best ISO setting for night sky photos depends on your specific camera and conditions. For the Nikon D5600, a good starting point is ISO 1600 or 3200. This provides a balance between sensitivity and noise. Experiment with different ISO settings to find what works best for your particular situation.
How long should my exposure time be?
The exposure time for night sky photos depends on your lens and the desired effect. A common guideline is the “500 Rule,” which suggests dividing 500 by your lens’s focal length to determine the maximum exposure time in seconds. For example, with a 20mm lens, you can use an exposure time of up to 25 seconds. This helps to avoid star trails and capture sharp points of light.
Can I shoot astrophotography without a tripod?
- It is possible but not recommended. A tripod provides the stability needed for long exposure shots.
- If you don’t have a tripod, try to find a stable surface to rest your camera on.
- Use a remote shutter release or the camera’s timer to minimize shake.
- Keep in mind that without a tripod, achieving sharp and clear images will be more challenging.
What’s the best software for processing astrophotography images?
Several software options are excellent for processing astrophotography images. Adobe Photoshop and Lightroom are popular choices due to their powerful editing tools. DeepSkyStacker is highly recommended for stacking multiple images to reduce noise and enhance detail. Other options include PixInsight and StarTools, which offer specialized features for astrophotography.
By following these tips and tricks, you can make the most out of your Nikon D5600 for astrophotography. Remember, practice and patience are key. Keep experimenting with different settings and techniques, and you’ll be capturing stunning images of the night sky in no time.