Key Takeaways
-
Deep sky astrophotography involves capturing distant celestial objects like galaxies and nebulae.
-
The best time for deep sky imaging is during a new moon or when the moon is below the horizon.
-
Essential equipment includes a DSLR or dedicated astrophotography camera, a telescope, a sturdy mount, and various accessories like filters and autoguiders.
-
Long exposure photography and image stacking are crucial techniques for capturing detailed images.
-
Dealing with light pollution and proper focusing are key challenges that need to be managed for successful deep sky photography.
The Basics of Deep Sky Astrophotography
“Deep sky astrophotography allows us to capture the beauty of distant galaxies, nebulae, and star clusters, revealing details that are invisible to the naked eye.”
Deep sky astrophotography is a fascinating hobby that lets you explore and capture the wonders of the universe. Unlike regular photography, it involves taking long-exposure shots of distant celestial objects, which are often located many light-years away. The images you can capture are breathtaking and can reveal the intricate details of galaxies, nebulae, and star clusters.
What is Deep Sky Astrophotography?
Deep sky astrophotography focuses on capturing images of objects far beyond our solar system. These objects, known as deep sky objects (DSOs), include galaxies, nebulae, star clusters, and more. Because these objects are incredibly faint, deep sky astrophotography requires specialized equipment and techniques to capture them effectively.
-
Galaxies: Massive systems of stars, gas, dust, and dark matter, bound together by gravity.
-
Nebulae: Clouds of gas and dust in space, often the birthplace of new stars.
-
Star Clusters: Groups of stars that are gravitationally bound and move together through space.
The Best Time to Shoot Deep Sky Objects
The timing of your astrophotography sessions is crucial for capturing high-quality images. The best time to photograph deep sky objects is during a new moon or when the moon is below the horizon. This is because the moon’s light can wash out the faint details of DSOs.
Additionally, it’s important to consider the position of your target object in the sky. The higher the object is above the horizon, the less atmospheric interference you’ll encounter, leading to clearer images. Therefore, plan your sessions around the object’s highest point in the sky, known as the “meridian.”
Types of Deep Sky Objects to Photograph
There are numerous deep sky objects you can photograph, each offering unique challenges and rewards. Here are some popular targets:
For more detailed guidance, check out this deep-sky astrophotography how-to guide.
-
Andromeda Galaxy (M31): The closest spiral galaxy to the Milky Way and a stunning subject for astrophotography.
-
Orion Nebula (M42): A bright and colorful nebula that’s relatively easy to capture, making it a favorite among beginners.
-
Pleiades (M45): An open star cluster that appears as a group of bright blue stars, surrounded by a faint nebulosity.
Essential Equipment for Deep Sky Imaging
To get started with deep sky astrophotography, you’ll need some specialized equipment. The right gear can make a significant difference in the quality of your images and your overall experience.
Choosing the Right Camera
The camera you choose is one of the most critical components of your setup. While you can use a DSLR camera, dedicated astrophotography cameras offer several advantages, such as higher sensitivity to light and better cooling systems to reduce noise during long exposures.
Here are some options to consider:
-
DSLR Cameras: Versatile and widely available, making them a good starting point for beginners.
-
CCD Cameras: Highly sensitive and capable of capturing faint details, but can be expensive.
-
CMOS Cameras: Offer a good balance between performance and cost, with lower noise levels than DSLRs.
Telescope Types and Their Benefits
The telescope is your primary tool for capturing deep sky objects. There are several types to choose from, each with its own set of advantages and disadvantages. For a comprehensive guide, you can check out this Deep-Sky Astrophotography How-To.
-
Refractors: Use lenses to gather light and produce sharp, high-contrast images. They are relatively low-maintenance but can be expensive.
-
Reflectors: Use mirrors to gather light, offering larger apertures at a lower cost. However, they require regular collimation (alignment of mirrors).
-
Catadioptrics: Combine lenses and mirrors, providing a compact design with good image quality. They are versatile but can be more expensive than reflectors.
Mounts and Tracking: Why They’re Important
A sturdy mount is essential for deep sky astrophotography. It holds your telescope and camera steady, allowing for long exposures without blurring. There are two main types of mounts: equatorial and altazimuth mounts.
-
Alt-Azimuth Mounts: Simple to use but not ideal for long exposures due to field rotation.
-
Equatorial Mounts: Track the motion of the sky, making them perfect for long exposures. They require more setup but are worth the effort.
Besides that, you’ll need a tracking system to compensate for the Earth’s rotation. This ensures that your target object stays centered in the frame during long exposures. Many equatorial mounts come with built-in tracking motors, but you can also add an autoguider for more precise tracking.
Necessary Accessories: Filters, Autoguiders, and More
In addition to your primary equipment, several accessories can enhance your deep sky imaging experience:
-
Filters: Help reduce light pollution and enhance specific wavelengths of light. Common types include light pollution filters, narrowband filters, and color filters.
-
Autoguiders: Small cameras that help keep your telescope precisely aligned with your target, improving tracking accuracy.
-
Field Flatteners: Correct distortions in the image, particularly at the edges, ensuring a flat and even field of view.
These accessories can make a significant difference in the quality of your images, allowing you to capture more detail and reduce noise.
Long Exposure Photography: Step-by-Step
Long exposure photography is a fundamental technique in deep sky imaging. By keeping the camera’s shutter open for an extended period, you allow more light to reach the sensor, capturing faint details of distant celestial objects. Here’s how to do it:
First, set up your telescope and mount. Make sure everything is stable and balanced. Attach your camera to the telescope using the appropriate adapters. Next, polar align your equatorial mount to ensure accurate tracking. This step is crucial for avoiding star trails in your images.
Once everything is aligned, select your target object. Use a low ISO setting to reduce noise and a long exposure time, typically ranging from 30 seconds to several minutes. Start with shorter exposures and gradually increase the duration as you gain experience. For more detailed tips, check out these astrophotography techniques.
Image Stacking and Processing
Image stacking is a technique that involves combining multiple exposures to create a single, high-quality image. This method reduces noise and enhances details, making it an essential part of deep sky astrophotography.
To begin, take several long-exposure shots of your target object. Aim for at least 10-20 exposures, but more is always better. Use a software program like DeepSkyStacker or PixInsight to align and stack the images. These programs will automatically detect and correct for slight misalignments between frames.
After stacking, you’ll need to process the image to bring out the details. Use software like Adobe Photoshop or GIMP to adjust the levels, curves, and saturation. Pay close attention to the histogram to ensure you’re not clipping any data. The goal is to reveal the faint details of the deep sky object while maintaining a natural appearance.
Narrowband Imaging Techniques
Narrowband imaging is a specialized technique that uses filters to isolate specific wavelengths of light emitted by celestial objects. This method is particularly useful for capturing nebulae, which often emit light in narrow spectral lines.
To get started with narrowband imaging, you’ll need a set of narrowband filters, such as Hydrogen-alpha (Ha), Oxygen-III (OIII), and Sulfur-II (SII). These filters block out most of the light pollution and allow only the light from the nebula to reach your camera sensor.
Begin by capturing several long-exposure shots through each filter. Stack and process the images as described earlier, but keep the different channels separate. Once you have the processed images for each filter, combine them to create a color image. This process is known as the Hubble Palette, where Ha is mapped to red, OIII to green, and SII to blue.
Narrowband imaging can produce stunning, high-contrast images of nebulae, revealing intricate details that are otherwise invisible.
“Narrowband imaging allows astrophotographers to capture the hidden beauty of nebulae, revealing details that are lost in broadband images.”
Tips for Successful Deep Sky Photography
Deep sky photography can be challenging, but with the right techniques and a bit of patience, you can capture stunning images of the cosmos. Here are some tips to help you succeed:
Dealing with Light Pollution
Light pollution is one of the biggest challenges in deep sky astrophotography. It can wash out faint details and make it difficult to capture clear images. Here are some strategies to minimize its impact:
-
Use light pollution filters: These filters block out specific wavelengths of artificial light, reducing the overall light pollution in your images.
-
Travel to dark-sky locations: If possible, find a location away from city lights. National parks and remote areas are great options.
-
Shield your telescope: Use a light shield or dew shield to block stray light from entering your telescope.
“Traveling to a dark-sky location can make a significant difference in the quality of your deep sky images.”
Focusing Your Telescope
Achieving precise focus is crucial for capturing sharp images. Here are some tips to help you get the best focus: Check out this Deep-Sky Astrophotography How-To for more detailed guidance.
-
Use a Bahtinov mask: This inexpensive tool creates diffraction spikes around bright stars, making it easy to achieve perfect focus.
-
Zoom in on a bright star: Use your camera’s live view function to zoom in on a bright star and adjust the focus until it’s as sharp as possible.
-
Check focus regularly: Temperature changes can affect your telescope’s focus, so check and adjust it throughout your imaging session.
Tracking and Autoguiding Tips
Accurate tracking is essential for long exposure astrophotography. Here are some tips to improve your tracking:
-
Polar align your mount: Spend time getting a precise polar alignment to ensure accurate tracking.
-
Use an autoguider: An autoguider continuously monitors a guide star and makes small adjustments to keep your target centered.
-
Balance your setup: Ensure your telescope and camera are balanced on the mount to reduce strain on the motors and improve tracking accuracy.
Patience and Practice
Deep sky astrophotography requires patience and practice. Don’t be discouraged if your first few attempts don’t turn out as expected. Keep experimenting with different settings, techniques, and targets. Over time, you’ll develop the skills and experience needed to capture stunning images of the cosmos.
Inspirational Deep Sky Photography Projects
Once you’re comfortable with the basics, try tackling some more challenging and rewarding deep sky photography projects. These projects will push your skills to the next level and provide stunning results.
Photographing Nebulae
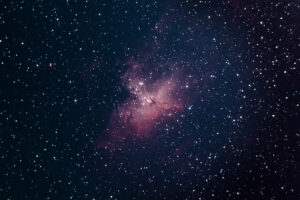
Nebulae are some of the most beautiful and colorful objects in the night sky. They come in various shapes and sizes, providing endless opportunities for stunning images. Start with bright nebulae like the Orion Nebula (M42) or the Lagoon Nebula (M8). As you gain experience, try capturing fainter objects like the Horsehead Nebula or the Veil Nebula.
Capturing Galaxies
Galaxies are vast collections of stars, gas, and dust, offering a glimpse into the structure of the universe. The Andromeda Galaxy (M31) is a great starting point, as it’s one of the closest and brightest galaxies. Other popular targets include the Whirlpool Galaxy (M51) and the Sombrero Galaxy (M104). Use longer exposures and image stacking to reveal the intricate details of these distant objects.
Shooting Star Clusters
Star clusters are groups of stars that are gravitationally bound and move together through space. They come in two main types: open clusters and globular clusters. Open clusters, like the Pleiades (M45) and the Beehive Cluster (M44), are relatively young and loosely bound. Globular clusters, like the Hercules Cluster (M13) and Omega Centauri, are older and more densely packed. Both types of clusters make excellent targets for deep sky astrophotography.
Deep sky astrophotography is a fascinating hobby that lets you explore and capture the wonders of the universe. Unlike regular photography, it involves taking long-exposure shots of distant celestial objects, which are often located many light-years away. The images you can capture are breathtaking and can reveal the intricate details of galaxies, nebulae, and star clusters. For a comprehensive guide on getting started, check out this deep-sky astrophotography how-to.
When shooting star clusters, use a shorter focal length to capture the entire cluster in one frame. Take multiple exposures and stack them to reduce noise and enhance details. Experiment with different exposure times to find the best balance between capturing faint stars and avoiding overexposure of the brighter ones. For more tips, check out our astrophotography tips.
Creating Deep Sky Mosaics
Deep sky mosaics are composite images created by stitching together multiple frames to cover a larger area of the sky. This technique is particularly useful for capturing large objects like the Milky Way or the North America Nebula, which may not fit within a single frame.
To create a deep sky mosaic, start by planning your composition and dividing the target area into overlapping sections. Capture multiple exposures for each section, ensuring enough overlap between adjacent frames. Use software like Microsoft ICE or Adobe Photoshop to stitch the frames together and create a seamless mosaic. This technique allows you to capture stunning, wide-field images of the night sky, similar to those seen in Milky Way panoramas.
Conclusion
Deep sky astrophotography is a rewarding and challenging hobby that allows you to capture the beauty of the universe. By understanding the basics, investing in the right equipment, and mastering essential techniques, you can create stunning images of distant celestial objects. Remember to be patient and practice regularly, as improvement comes with experience.
Recap of Key Points
To summarize, deep sky astrophotography involves capturing long-exposure images of distant celestial objects using specialized equipment and techniques. Key points to remember include:
-
Choose the right camera, telescope, and mount for your needs.
-
Use long exposure photography and image stacking to capture detailed images.
-
Consider narrowband imaging for capturing nebulae.
-
Minimize light pollution and ensure precise focus for the best results.
-
Experiment with different targets and techniques to continually improve your skills.
Encouragement for Future Projects
As you continue your journey in deep sky astrophotography, don’t be afraid to challenge yourself with new projects and techniques. The universe is vast and full of wonders waiting to be discovered. Keep experimenting, learning, and sharing your passion with others. The images you capture can inspire awe and curiosity in people of all ages, fostering a greater appreciation for the beauty of the cosmos.
Frequently Asked Questions (FAQ)
What is the best camera for deep sky astrophotography?
The best camera for deep sky astrophotography depends on your budget and experience level. DSLR cameras are versatile and widely available, making them a good starting point for beginners. Dedicated astrophotography cameras, such as CCD or CMOS cameras, offer higher sensitivity to light and better cooling systems, resulting in higher-quality images.
How long should my exposures be?
Exposure times for deep sky astrophotography can vary depending on the brightness of the target object and the level of light pollution. Start with exposures of 30 seconds to several minutes and adjust based on the results. Longer exposures allow more light to reach the sensor, capturing faint details, but may require more precise tracking to avoid star trails.
What filters do I need for deep sky imaging?
Filters can enhance your deep sky images by reducing light pollution and isolating specific wavelengths of light. Common filters include:
-
Light pollution filters: Reduce the impact of artificial light, improving contrast.
-
Narrowband filters: Isolate specific wavelengths, such as Hydrogen-alpha (Ha), Oxygen-III (OIII), and Sulfur-II (SII), for capturing nebulae.
-
Color filters: Enhance specific colors in your images, useful for planetary and lunar photography.
How can I reduce light pollution in my photos?
To reduce light pollution in your deep sky images, consider the following strategies:
-
Use light pollution filters to block specific wavelengths of artificial light.
-
Travel to dark-sky locations away from city lights.
-
Shield your telescope with a light shield or dew shield to block stray light.
Do I need a telescope to photograph deep sky objects?
While a telescope is essential for capturing detailed images of faint deep sky objects, you can start with a DSLR camera and a telephoto lens to photograph brighter objects like the Milky Way, Andromeda Galaxy, and Pleiades. As you gain experience, investing in a telescope will allow you to capture more detailed and impressive images.
With dedication and practice, deep sky astrophotography can become a deeply fulfilling and awe-inspiring hobby. The night sky is full of wonders waiting to be captured, so grab your equipment and start exploring the cosmos!
Deep-sky astrophotography is a fascinating and rewarding hobby that allows you to capture the beauty of the universe. With the right equipment and techniques, you can photograph distant galaxies, nebulae, and star clusters. For beginners, it’s essential to start with the basics and gradually progress to more advanced methods. Understanding the fundamentals of exposure, focus, and post-processing will help you achieve stunning results. If you’re looking for a step-by-step guide, Deep-Sky Astrophotography How-To is a great resource to get started.