Key Takeaways
-
The Canon EOS 80D is an excellent choice for astrophotography due to its versatile features and high image quality.
-
Key settings for astrophotography include using a high ISO, slow shutter speed, and wide aperture.
-
Wide-angle lenses are ideal for capturing expansive night sky scenes, including the Milky Way.
-
Post-processing your images can significantly enhance the details and overall quality of your astrophotography.
-
Dealing with challenges like light pollution and star trails is crucial for capturing clear and stunning night sky images.
Canon EOS 80D DSLR Camera for Astrophotography
Why Choose the Canon EOS 80D for Astrophotography?
When it comes to astrophotography, the Canon EOS 80D stands out as a versatile and capable camera. Its 24.2-megapixel APS-C CMOS sensor ensures high-resolution images, which is crucial for capturing the intricate details of the night sky. The camera’s DIGIC 6 image processor enhances low-light performance, allowing for stunning night sky shots with minimal noise.
Another reason to choose the Canon EOS 80D is its user-friendly interface. The camera’s intuitive controls and menu system make it accessible even for beginners. This means you can focus more on capturing breathtaking images rather than struggling with complicated settings.
Features Making It Ideal for Night Sky Photography
-
High ISO Range: The Canon EOS 80D offers an ISO range of 100-16000, expandable to 25600. This flexibility allows you to capture faint stars and other celestial objects without excessive noise.
-
Articulating Touchscreen: The 3-inch vari-angle touchscreen makes it easy to frame your shots from various angles, especially when your camera is mounted on a tripod.
-
Dual Pixel Autofocus: While manual focus is often preferred in astrophotography, the camera’s Dual Pixel AF system can be useful for daytime photography or when capturing other types of images.
-
Weather-Sealed Body: The robust, weather-sealed construction ensures that your camera can withstand challenging outdoor conditions, making it perfect for nighttime excursions.
Essential Camera Settings for Astrophotography
ISO, Shutter Speed, and Aperture
Getting the right settings on your Canon EOS 80D is crucial for successful astrophotography. Start by setting your camera to manual mode (M) to have full control over the exposure settings.
ISO: A higher ISO setting, such as 1600 or 3200, is generally recommended for capturing more light from the stars. However, be mindful of noise, which can increase with higher ISO values.
Shutter Speed: For capturing star trails or the Milky Way, a slower shutter speed is essential. Start with a shutter speed of around 20-30 seconds. Remember, the longer the exposure, the more light your camera will capture, but it can also introduce star trails.
Aperture: Use a wide aperture (low f-stop number) to allow more light into the camera. An aperture setting of f/2.8 or lower is ideal for night sky photography.
White Balance and Focus
White Balance: Setting the correct white balance is essential for accurate color representation. For astrophotography, you can use the “Daylight” white balance setting or set a custom white balance to match the natural colors of the night sky.
Focus: Achieving sharp focus is crucial for capturing detailed night sky images. Switch your lens to manual focus and use the Live View mode to zoom in on a bright star. Adjust the focus until the star appears sharp and clear. Additionally, you can use the camera’s focus peaking feature to assist in achieving precise focus.
Choosing the Right Lenses
Wide-Angle Lenses
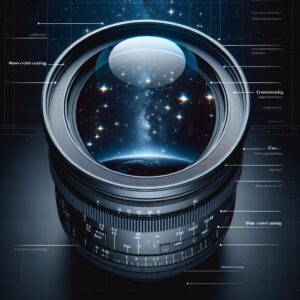
Wide-angle lenses are the go-to choice for astrophotography, as they allow you to capture expansive views of the night sky. A lens with a focal length between 14mm and 24mm is ideal for capturing the Milky Way, star trails, and other celestial phenomena.
Consider investing in a lens with a wide maximum aperture (f/2.8 or lower) to gather more light and achieve better results in low-light conditions. Some popular wide-angle lenses for astrophotography include the Canon EF 16-35mm f/2.8L III USM and the Rokinon 14mm f/2.8 IF ED UMC.
Techniques for Capturing Stunning Night Sky Images
Finding the Perfect Location
Location is key when it comes to astrophotography. To capture clear and detailed images of the night sky, you need to find a location with minimal light pollution. Use online tools and apps to identify dark sky locations near you.
Once you’ve found a suitable location, arrive early to set up your equipment and familiarize yourself with the surroundings. This will help you avoid any potential obstacles and ensure a smooth shooting experience. For additional guidance, check out this astrophotography tips.
When it comes to astrophotography, finding the perfect location is crucial. Light pollution from city lights can wash out the faint details of the night sky, making it essential to seek out dark sky locations. National parks, rural areas, and designated dark sky reserves are excellent choices. Websites like Dark Site Finder can help you identify these spots.
Using a Tripod and Remote Shutter
Stability is key for capturing sharp images of the night sky. A sturdy tripod will prevent any camera shake during long exposures. Make sure to set up your tripod on a stable surface and avoid touching the camera during the shot.
Additionally, using a remote shutter release or the camera’s built-in timer can help eliminate any vibrations caused by pressing the shutter button. This small step can make a big difference in the clarity of your images.
Long Exposure Shots
Long exposure photography allows you to capture more light from the night sky, revealing stars, galaxies, and other celestial objects that are otherwise invisible to the naked eye. To achieve this, set your camera to bulb mode, which lets you control the shutter speed manually.
Start with an exposure time of 20-30 seconds. If you want to capture star trails, you can experiment with even longer exposures, sometimes lasting several minutes. Keep in mind that longer exposures can also introduce more noise, so finding the right balance is key.
Post-Processing Your Astrophotography Images
Post-processing is an essential part of astrophotography. It allows you to enhance the details, reduce noise, and bring out the beauty of the night sky. While the Canon EOS 80D captures stunning images straight out of the camera, a bit of editing can take your photos to the next level.
Software Recommendations
Several software options are available for post-processing astrophotography images. Adobe Lightroom and Photoshop are popular choices among photographers due to their powerful editing tools and user-friendly interfaces. Other options include DeepSkyStacker, which specializes in stacking multiple exposures to reduce noise and increase detail.
Basic Editing Steps
Begin by importing your images into your chosen software. Adjust the exposure, contrast, and white balance to bring out the details of the night sky. Use the noise reduction tools to minimize any graininess in the image.
Next, enhance the clarity and sharpness to make the stars and other celestial objects stand out. Be careful not to overdo it, as excessive sharpening can introduce artifacts and reduce the overall quality of the image.
Enhancing Image Details
To further enhance the details in your astrophotography images, consider using advanced techniques like stacking. This involves combining multiple exposures of the same scene to reduce noise and increase the signal-to-noise ratio.
Software like DeepSkyStacker can automate this process, making it accessible even for beginners. Additionally, you can use layer masks in Photoshop to selectively enhance specific areas of your image, such as the Milky Way or a particular constellation.
Dealing with Common Challenges
Astrophotography comes with its own set of challenges. From light pollution to weather conditions, these factors can impact the quality of your images. However, with the right techniques and equipment, you can overcome these obstacles and capture stunning night sky photos.
Light Pollution
Light pollution is one of the biggest challenges in astrophotography. It can wash out the faint details of the night sky, making it difficult to capture clear images. To combat this, seek out dark sky locations away from city lights. Additionally, using a light pollution filter can help reduce the impact of artificial lights on your photos.
Weather and Atmospheric Conditions
Clear skies are essential for successful astrophotography. Check the weather forecast before heading out to ensure optimal conditions. Apps like Clear Outside can provide detailed weather information, including cloud cover and visibility.
Besides that, consider the atmospheric conditions. High humidity or haze can reduce the clarity of your images. If possible, choose nights with low humidity and good atmospheric transparency for the best results.
-
Tip: Plan your shoot during a new moon or when the moon is below the horizon to avoid its bright light interfering with your shots.
-
Tip: Bring extra batteries and memory cards, as long exposure shots can quickly drain your camera’s power and fill up storage space.
Tracking Stars and Reducing Star Trails
To capture sharp images of stars without trails, consider using a star tracker. This device compensates for the Earth’s rotation, allowing you to take longer exposures without the stars appearing as streaks. Popular star trackers include the iOptron SkyTracker Pro and the Sky-Watcher Star Adventurer.
If you don’t have a star tracker, you can still reduce star trails by using the “500 Rule.” Divide 500 by the focal length of your lens to determine the maximum exposure time in seconds before star trails become noticeable. For example, with a 24mm lens, you can use an exposure time of up to 20 seconds (500 ÷ 24 ≈ 20).
Upgrading and Accessorizing Your Gear
As you gain experience in astrophotography, you may want to upgrade your equipment and invest in additional accessories to enhance your capabilities. From star trackers to specialized filters, these tools can help you capture even more stunning images of the night sky.
Additional Equipment: Star Trackers and Filters
Star trackers are invaluable for long exposure astrophotography. They allow you to take longer exposures without star trails, capturing more detail and reducing noise. Popular models include the iOptron SkyTracker Pro and the Sky-Watcher Star Adventurer.
Filters can also enhance your astrophotography. Light pollution filters, such as the Hoya Red Intensifier or the Optolong L-Pro, help reduce the impact of artificial lights on your images. Additionally, narrowband filters can isolate specific wavelengths of light, making it easier to capture nebulae and other deep-sky objects. For more tips, check out this Nikon D5600 DSLR camera guide.
Recommended Accessories
-
Sturdy Tripod: A high-quality tripod is essential for stable long exposure shots. Look for models with adjustable legs and a ball head for maximum flexibility.
-
Remote Shutter Release: A remote shutter release or intervalometer allows you to take long exposures without touching the camera, reducing the risk of camera shake.
-
Extra Batteries and Memory Cards: Long exposure shots can quickly drain your camera’s battery and fill up storage space. Bring extra batteries and memory cards to ensure you don’t run out of power or space during your shoot.
-
Portable Power Bank: A power bank can provide additional power for your camera and other devices during long shooting sessions.
Final Tips for Budding Astrophotographers
Astrophotography is a rewarding and challenging hobby that requires patience and practice. Here are some final tips to help you get started and improve your skills:
Best Practices
-
Plan Your Shoot: Research the best times and locations for astrophotography. Use apps like Stellarium or PhotoPills to plan your shots and track celestial events.
-
Experiment with Settings: Don’t be afraid to experiment with different camera settings to find what works best for you. Try different ISO levels, shutter speeds, and apertures to see how they affect your images.
-
Practice Patience: Astrophotography requires patience and persistence. Keep practicing and experimenting, and don’t get discouraged if your first attempts aren’t perfect.
-
Learn from Others: Join online communities and forums to learn from other astrophotographers. Share your work, ask for feedback, and learn from the experiences of others.
Continuous Learning and Experimentation
Astrophotography is a constantly evolving field, with new techniques and equipment being developed all the time. Stay up to date with the latest trends and advancements by reading articles, watching tutorials, and participating in workshops.
Most importantly, keep experimenting and pushing your boundaries. Try new techniques, explore different locations, and challenge yourself to capture unique and stunning images of the night sky. The more you practice and experiment, the more you’ll improve and grow as an astrophotographer.
Frequently Asked Questions (FAQ)
Can the Canon EOS 80D be used for Milky Way photography?
Yes, the Canon EOS 80D is an excellent choice for Milky Way photography. Its high ISO range, wide dynamic range, and user-friendly interface make it well-suited for capturing detailed images of the Milky Way.
What is the recommended ISO setting for night sky photography?
The recommended ISO setting for night sky photography is typically between 1600 and 3200. However, this can vary depending on the specific conditions and your camera’s performance. Experiment with different ISO levels to find the best balance between sensitivity and noise.
Do I need a special lens for astrophotography?
While you don’t necessarily need a special lens for astrophotography, a wide-angle lens with a wide maximum aperture (f/2.8 or lower) is ideal for capturing expansive night sky scenes. Popular choices include the Canon EF 16-35mm f/2.8L III USM and the Rokinon 14mm f/2.8 IF ED UMC.
How can I minimize noise in my night sky images?
To minimize noise in your night sky images, use a lower ISO setting and take multiple exposures to stack them in post-processing. Additionally, use noise reduction tools in your editing software to further reduce any graininess.
Is it necessary to modify the Canon EOS 80D for astrophotography?
Modifying the Canon EOS 80D for astrophotography is not necessary, but it can enhance its performance. Some astrophotographers choose to modify their cameras by removing the infrared filter to increase sensitivity to certain wavelengths of light. However, this is a more advanced technique and may not be necessary for beginners. For more tips, check out these astrophotography tips.
When it comes to astrophotography, finding the perfect location is crucial. Light pollution from city lights can wash out the faint details of the night sky, making it essential to seek out dark sky locations. National parks, rural areas, and designated dark sky reserves are excellent choices. Websites like AstroBackyard can help you identify these spots.