Key Takeaways
- Choose a camera with good low light performance and a wide-angle lens for expansive sky scenes.
- Stabilize your camera with a sturdy tripod and use a remote shutter release to avoid vibrations.
- Shoot in manual mode to have full control over ISO, shutter speed, and aperture settings.
- Scout for dark locations away from light pollution to capture clear night skies.
- Use the rule of thirds and include interesting foreground elements to enhance composition.
Capturing the Cosmos: A Guide to Night Landscape Photography
When the sun dips below the horizon and the stars begin to twinkle, a new realm of photographic opportunity presents itself. Night landscape photography, or astrophotography, is the art of capturing the beauty of the night sky, and it’s something that anyone with a camera and a bit of know-how can enjoy. Let’s dive into the world of night photography and uncover the secrets to capturing stunning celestial scenes.
Deciphering Night Photography Gear
To start off, you’ll need the right gear. This doesn’t mean the most expensive camera or lens, but rather, equipment that performs well when the lights go down. Look for a camera that has a high ISO range with low noise and a lens with a wide aperture to let in as much light as possible.
Mastering the Art of Exposure
Getting the exposure right is crucial. In the darkness of night, every bit of light counts. You’ll often find yourself balancing ISO, aperture, and shutter speed to capture the faint glow of the stars without introducing too much noise or motion blur.
As a rule of thumb, start with these settings:
- Aperture: Wide open (e.g., f/2.8)
- ISO: As high as possible without excessive noise (e.g., 1600-3200)
- Shutter Speed: Long enough to capture light but short enough to prevent star trails (e.g., 15-30 seconds)
Remember, these are just starting points. You’ll need to adjust based on the conditions and your specific gear. For more detailed guidance, check out our ultimate guide to the NPF rule for sharp astrophotography.
Scouting for Stellar Locations
Location is everything. You want a spot that’s far from the city lights and offers a clear view of the sky. Apps like Dark Sky Finder or websites like lightpollutionmap.info can help you locate the perfect spot for your night shoot.
Framework of Composition in the Dark
Composition can be challenging when you can barely see what’s in front of you. Use a flashlight to illuminate the foreground for focus, or take a test shot with a high ISO to see the composition before dialing in the settings for the final image. And don’t forget the rule of thirds to create a balanced and interesting shot.
Essential Equipment for Night Sky Wonders
Let’s break down the essential gear you’ll need:
Choosing the Right Camera
A camera with a full-frame sensor is ideal because of its ability to capture more light, but crop sensors can also do the job. The key is to have manual controls and the ability to shoot in RAW for more post-processing flexibility.
Lenses That Capture the Stars
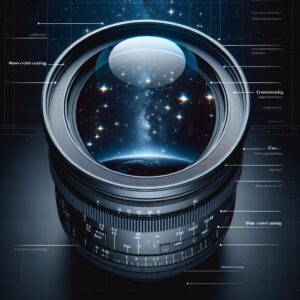
Wide-angle lenses are the stars of the show here. They allow you to capture a vast expanse of the sky and landscape. Look for lenses with a wide maximum aperture (e.g., f/2.8 or wider) to gather as much light as possible.
Stabilizing with Tripods and Mounts
A sturdy tripod is non-negotiable. You’ll be dealing with long exposure times, and even the slightest movement can blur your stars. A tripod ensures your camera stays perfectly still. Also, consider a remote shutter release or your camera’s timer function to avoid shaking the camera when pressing the shutter button.
Now that we’ve covered the gear and basic techniques, we’re ready to delve deeper into camera settings, location scouting, and the art of composition. In the next sections, we’ll explore how to fine-tune your camera to capture the night sky in all its glory, find the darkest skies, and compose shots that truly tell a story.
Navigating the Night: Location Scouting and Planning
Scouting the right location is half the battle in night landscape photography. You’re looking for the darkest skies, which means venturing out away from the glow of city lights. This often means a bit of adventure, heading into the wilderness or remote areas where the light pollution is minimal.
Consider the moon phase as well. A new moon night is ideal for capturing the Milky Way and faint stars. Full moon nights, while brighter, can wash out the details of the galaxy but can provide a unique landscape illumination for different effects.
When you’ve found a promising location, visit during the day. This allows you to get a feel for the terrain, scout out compositions, and ensure safety when you return in the dark. Always tell someone where you’re going and bring essential safety gear.
- Check the weather forecast for clear skies.
- Use a dark sky map to find the least light-polluted areas.
- Consider the lunar calendar for the moon’s phase and position.
- Recon the area during daylight to plan your compositions and ensure safety.
Finding Dark Skies Away from Light Pollution
To capture the best night sky images, you need darkness—real darkness. This means getting as far away from city lights as possible. Light pollution maps are invaluable tools that show you how bright the sky is in different locations. Use them to find the darkest skies within your reach, and you’ll be rewarded with clearer, more detailed night skies in your photographs.
Planning with Celestial Events and Seasons
Timing is crucial. Keep an eye on celestial events like meteor showers, planetary alignments, or the Milky Way’s core visibility. These events can elevate your night photography from great to extraordinary. Also, be mindful of the seasons. The Milky Way, for example, is best viewed during the summer months in the Northern Hemisphere.
The Composition of Cosmos and Earth
Composition in night landscape photography is about balancing the vastness of the cosmos with the intimacy of the terrestrial. It’s about finding harmony between the infinite and the tangible. Start with the sky as your canvas and then look for elements on the ground that can anchor your shot and give it depth.
Use natural features like trees, rocks, or water bodies to lead the viewer’s eye from the land to the stars. Experiment with different angles and perspectives to find the perfect balance between earth and sky. The contrast between the stillness of the landscape and the perceived motion of the heavens can create truly compelling images.
Remember to take several test shots to check your composition. It’s easy to adjust your frame in the daylight, but at night, it’s all about trial and error until you find that sweet spot where everything aligns.
Using Foreground for Depth and Interest
Foreground elements are not just important; they’re essential. They add depth, context, and interest to your night landscapes. A lone tree, a winding river, or a silhouette of mountains can transform a simple shot of the stars into a story.
- Look for interesting shapes or patterns in the landscape.
- Find elements that can reflect or complement the night sky.
Use a headlamp or flashlight to ‘paint’ light onto foreground subjects if they’re too dark. This technique, called light painting, can bring out textures and details that would otherwise be lost in the shadows.
Framing the Milky Way in Your Shots
The Milky Way is a showstopper in night photography. To frame it effectively, you need to know where and when it will be visible in the sky. Apps like PhotoPills or Stellarium can help you plan this. Aim to compose your shot so the Milky Way interacts with the landscape in an engaging way, perhaps rising from a mountain peak or arching over a lake.
Learning from Iconic Astrophotography Images
Study the work of renowned astrophotographers. Look at how they use composition, lighting, and subject matter to create impactful images. This isn’t about imitation but rather inspiration—seeing what’s possible and then applying those concepts to your unique vision and the landscapes you have access to.
Techniques to Enhance Your Nightscapes
Now, let’s refine our technique to make those nightscapes pop. Long exposures are the bread and butter of night photography, but there’s more to it than just leaving the shutter open.
Long Exposure Mastery
Long exposures allow you to capture the faint light of the stars and the Milky Way. But they also mean you need to control for camera shake and the rotation of the Earth—if the exposure is too long, the stars will turn into trails (which can be beautiful, but it’s a different kind of shot).
For a starting point, use the ‘500 Rule’: Divide 500 by your lens’s focal length to find the maximum exposure time before stars begin to trail. For example, with a 20mm lens, you can expose for about 25 seconds. This is a guideline, so experiment to find what works best for your particular setup.
Focus Stacking for Crisp Details
Focus stacking is a technique where you take multiple photos with different focus points—from the foreground to the stars—and then blend them together in post-processing for an image that’s sharp throughout. It’s a bit more advanced, but the results can be stunning.
Creating Star Trails
- Use a wide-angle lens to capture as much of the sky as possible.
- Set your camera to a low ISO and narrow aperture to allow for a longer exposure without overexposing.
- Use a shutter release or your camera’s built-in intervalometer to take continuous shots over several hours.
Star trails require patience and clear skies, but they’re a mesmerizing way to depict the Earth’s rotation. Stack the images in post-processing to create a spiral of stars around the North or South Pole.
Time-lapse Tips for the Night Sky
Time-lapses are a dynamic way to show the movement of the stars across the night sky. You’ll take a series of images at set intervals and then stitch them together to create a video. Make sure your battery is fully charged or use an external power source, as this process can take hours.
Editing Night Photos for Maximum Impact
Shooting is only half the process; editing is where you bring your nightscapes to life. Start with basic adjustments like exposure, contrast, and color balance to enhance the natural beauty of the night sky. For more in-depth tips, check out our guide on common astrophotography mistakes and how to avoid them.
Basic Adjustments for Stellar Images
Begin with the RAW files to have the most data to work with. Adjust the exposure, bring out the shadows, reduce the highlights, and fine-tune the white balance. Noise reduction is important, but be careful not to lose star details. For more guidance, check out this astrophotography guide on making the most of your night sky images.
Advanced Techniques with Software
For those who want to go further, software like Adobe Photoshop or Lightroom offers advanced tools. You can increase clarity, adjust curves for better contrast, and even use selective color adjustments to make the Milky Way stand out. Remember, the goal is to enhance, not overpower, the natural beauty of the night sky.
Common Pitfalls and How to Avoid Them
Even with the best preparation, things can go awry. Common issues include blurry images, excessive noise, and incorrect focus. To avoid these, always check your focus manually using your camera’s live view, set your ISO as low as possible while still exposing correctly, and use a remote shutter release to prevent camera shake. For more in-depth advice, consider reading about common astrophotography mistakes and how to avoid them.
Another pitfall is underestimating the cold. Night photography often means long hours outside in potentially chilly conditions. Dress warmly, and consider battery life, as batteries can drain faster in the cold. Bring spares and keep them close to your body to stay warm.
Dealing with Noise
Noise is the grainy speckles that can plague night sky photos, especially at high ISOs. To minimize noise, shoot at the lowest ISO you can while still achieving a good exposure. You can also use noise reduction software, but be careful—it’s a fine balance between reducing noise and retaining the crispness of the stars.
Managing Movement and Blur
Long exposures can lead to star trails, which are beautiful but may not be what you’re aiming for. Use the ‘500 Rule’ to prevent this: divide 500 by your lens’s focal length to get the maximum shutter speed before stars blur. For example, with a 20mm lens, don’t exceed 25 seconds. If your images are still blurry, ensure your tripod is stable and that you’re using a remote shutter or timer.
Remember, movement in the trees or grass in your foreground can also blur during long exposures. If it’s a windy night, find a sheltered spot or embrace the movement for a dynamic element in your shot.
Post-Photography: Showcasing Your Stellar Shots
After all your hard work, it’s time to share your masterpieces. Creating an online portfolio is a great way to display your images. Platforms like 500px, Flickr, or even Instagram are perfect for photographers to showcase their work. Make sure your images are edited consistently and presented in high quality to truly reflect the beauty of your work.
Building an Online Portfolio
Your online portfolio is your digital gallery. Choose a simple, clean design that lets your photos shine. Write a little about each shot—what inspired you, how you took it, and any challenges you faced. This personal touch can connect with viewers and make your work more memorable.
Photo Sharing in Communities for Feedback
Join photography communities online to share your work and get feedback. Websites like Reddit’s r/astrophotography or photography forums are great places to start. Be open to constructive criticism—it’s a valuable tool that can help you grow as a photographer.
Don’t forget to engage with other photographers’ work too. Commenting and asking questions can lead to discussions that broaden your knowledge and inspire new ideas.
Frequently Asked Questions (FAQ)
Here are some quick answers to common questions about night landscape photography:
What is the Best Time of Year for Astrophotography?
The best time of year for astrophotography is generally during the summer months in the Northern Hemisphere when the Milky Way’s core is most visible. However, winter skies can also offer stunning clear nights for capturing different constellations.
Keep an eye on astronomical events such as meteor showers and planetary alignments, which can offer unique photographic opportunities regardless of the season.
Research your specific location for the best times and conditions. Some areas may have specific seasons where the skies are clearer or where certain celestial events are more visible.
Can You Do Astrophotography in the City?
While it’s challenging, it’s not impossible. Look for parks or areas on the outskirts of the city where light pollution is less intense. Use a longer focal length lens to focus on specific celestial objects like the moon or planets.
Consider using a light pollution filter to help cut down on the glow from city lights. These filters can help increase contrast and make celestial objects stand out more in your photos.
What Camera Settings Should I Start With?
For night landscape photography, start with these settings:
- Aperture: Set to the widest your lens allows, such as f/2.8 or f/4.
- Shutter Speed: Begin with 20-30 seconds and adjust as needed.
- ISO: Start at 1600 and adjust for brightness, being mindful of noise.
Always shoot in RAW for more control during post-processing. Remember, these settings are a starting point—experiment to see what works best for your environment and equipment.
How Do I Focus My Camera at Night?
Focusing at night can be tricky since autofocus often struggles in low light. Switch to manual focus and use your camera’s live view mode to zoom in on a bright star or distant light. Adjust the focus until the star or light is sharp and clear.
If your lens has an infinity mark (∞), use it as a starting point, but still fine-tune manually to ensure sharp focus. Some photographers also use a bahtinov mask, which creates a diffraction pattern that helps achieve precise focus on stars.
Do I Need a Specialized Astrophotography Camera?
No, you don’t necessarily need a specialized camera for astrophotography. Many modern DSLRs and mirrorless cameras have excellent low light capabilities. However, if you’re serious about astrophotography and want to capture deep-sky objects, a specialized camera with a cooled sensor can be beneficial in reducing noise during long exposures.
Ultimately, the best camera is the one you have with you. Start with what you’ve got, learn the techniques, and invest in specialized gear as your passion and skills grow.