Key Takeaways
-
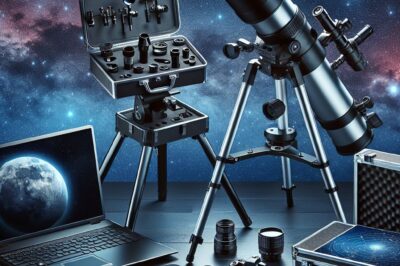
A basic astrophotography setup for beginners includes a telescope, camera, and mount.
-
DSLR cameras are a great starting point for capturing the night sky.
-
Equatorial mounts are preferred for astrophotography because they align with the Earth’s rotation.
-
Accessories like remote shutters and star trackers can significantly enhance your astrophotography experience.
-
Patience and practice are key to mastering the art of astrophotography.
Here’s a detailed list of Astrophotography Equipment categorized by its function:
Camera:
-
DSLR or mirrorless camera: A good option for beginners, especially those who already own one. They are versatile and can be used for other types of photography as well.
Mirrorless camera
-
Dedicated astronomy camera: Offers higher sensitivity and features like image cooling, which are essential for capturing faint deep-sky objects.
Mount:
-
Tripod: A sturdy tripod is crucial for keeping your camera stable during long exposures. Look for one that is rated for the weight of your camera and lens.
-
Equatorial mount: This type of mount compensates for the Earth’s rotation, allowing you to take long exposures without star trails.
Lenses:
-
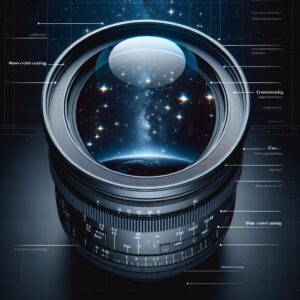
Wide-angle lens: Ideal for capturing the Milky Way, constellations, and landscapes. A focal length of around 14mm to 24mm is suitable for most full-frame cameras.
-
Telephoto lens: Great for capturing close-up images of planets, galaxies, nebulae, and other deep-sky objects. Focal lengths can range from 200mm to 1000mm or even more.
Accessories:
-
Intervalometer: Allows you to take a series of images automatically at preset intervals, which can be stacked later to create a high-quality image with improved signal-to-noise ratio.
-
Filters: Different filters can be used to block out unwanted light pollution and enhance the appearance of specific celestial objects:
-
Light pollution filter: Reduces the effects of light pollution, allowing for better color reproduction and contrast.
-
Nebula filter: Enhances the contrast of nebulae by blocking out unwanted light wavelengths.
-
-
Remote shutter release: Triggers the camera shutter remotely, minimizing vibrations caused by pressing the shutter button directly on the camera.
-
Lens hood: Blocks stray light from entering the lens, which can cause flare and reduce image quality.
-
Dew heater: Prevents dew from forming on your lens or telescope, which can ruin your images.
-
Headlamp with red LED: Provides dim red light that helps you see at night without ruining your night vision, which is essential for preserving your ability to see faint celestial objects.
-
Power source: A portable power supply is necessary to power your camera and other equipment in the field, especially if you are shooting at a remote location without access to an outlet.
This list is not exhaustive, but it covers the essential equipment you will need to get started with astrophotography. Remember, the specific gear you choose will depend on your budget, interests, and astrophotography goals.
Staring up at the night sky, you can’t help but wonder about the distant stars and galaxies. The allure of capturing the cosmos is irresistible, and with the right equipment, you can start this thrilling journey from your own backyard. Whether you’re aiming to snap shots of the Milky Way, or distant nebulae and galaxies, the right gear will make all the difference.
But before you venture into the vast universe of astrophotography, let’s ensure you have a solid foundation. We’ll go through the essentials, one step at a time, so you can make informed decisions on your equipment and techniques.
Starting Your Stargazing Journey: The Essentials
Choosing the Right Telescope
When you’re just starting out, the plethora of telescope options can seem daunting. But let’s keep it simple. For beginners, a refractor or a small reflector telescope is often the best choice. They’re user-friendly, portable, and require less maintenance. You want a telescope with enough aperture to gather light (usually starting around 70mm) but not so powerful that it becomes difficult to handle.
Camera Choices: DSLR vs. CCD
Now, let’s talk about cameras. A DSLR camera is a fantastic starting point for astrophotography. They’re versatile and you might already own one. If you’re choosing a new DSLR for astrophotography, consider one that has a ‘Bulb’ mode for long exposures and can handle high ISO settings without too much noise.
CCD cameras are another option, designed specifically for astrophotography. They’re more sensitive and better at handling noise in long exposures. But they can be expensive and have a steeper learning curve, so they might be something to aspire to as you gain more experience.
Mount Mastery: Equatorial vs. Alt-Azimuth
-
Equatorial mounts are designed to follow the rotation of the Earth, making them ideal for long-exposure astrophotography.
-
Alt-Azimuth mounts are simpler and can be perfect for quick sessions or when portability is key.
Most importantly, for astrophotography, you’ll want to invest in an equatorial mount. Why? Because as the Earth turns, the stars seem to move across the sky. An equatorial mount will track this movement, allowing you to take long-exposure images without star trails.
Besides that, a good mount should be sturdy and able to handle the weight of your telescope and camera without wobbling. This stability is crucial for getting those crisp, clear shots of the heavens.
Accessories That Make a Difference
There are a few accessories that can take your astrophotography from good to great:
-
A sturdy tripod is a must to prevent vibrations.
-
A remote shutter release allows you to take pictures without touching the camera, avoiding any shake.
-
A star tracker compensates for Earth’s rotation, allowing for longer exposures without star trails.
Remember, astrophotography is as much about patience and practice as it is about the equipment. Start with the basics and as you grow more comfortable, you can add more tools to your arsenal. For those interested in exploring astrophotography without a tracker, there are techniques to capture the night sky even without this equipment.
Understanding Exposure Times and ISO Settings
Exposure time, also known as shutter speed, is critical in astrophotography. It’s the length of time your camera’s sensor is exposed to light. Longer exposures allow more light from distant stars and galaxies to reach the sensor, which is essential in the dark night sky. However, the longer the exposure, the more precise your tracking needs to be to avoid star trails.
ISO setting is another key factor. It determines your camera’s sensitivity to light. Higher ISO can brighten your images, but it can also introduce noise, which looks like graininess in your photos. Finding the right balance between exposure time and ISO is vital for clear, detailed images. Start with an ISO around 800 and adjust as needed based on your camera’s performance and the brightness of the sky.
The Magic of Long Exposure: Star Trackers Explained
Star trackers are game-changers for long-exposure astrophotography. These devices move your camera at the same speed as the stars across the sky. By doing so, they prevent those beautiful points of light from turning into streaks over long exposures. A star tracker is especially useful for capturing the Milky Way or deep-sky objects like nebulae and galaxies.
For beginners, a portable star tracker is a great investment. It’s less complex than a full equatorial mount and can give you stunning results. You’ll be amazed at how much more of the universe you can capture with this one addition to your setup.
Guiding for Perfection: Auto-guiders and their Role
Auto-guiders are advanced tools that work with your mount to make tracking even more precise. They use a secondary camera and telescope, called a guide scope, to lock onto a single star. If that star moves, the auto-guider adjusts the mount to keep it in the same spot. This means even sharper images and the ability to take much longer exposures without worrying about star drift.
Mastering Moonshots and Planetary Imaging
Capturing our celestial neighbors requires a slightly different approach. The moon and planets are much brighter and closer than deep-sky objects, so they need less exposure time. But they’re also smaller targets, which means you’ll want a telescope with higher magnification to see those details.
Picking Lenses for Lunar Details
When photographing the moon, a long focal length lens will help you capture its craters and seas in stunning detail. A lens with a focal length of at least 300mm is a good start for impressive moon shots. You can also use a Barlow lens to effectively double the magnification of your telescope, getting you even closer to the lunar surface.
Example: Using a 300mm lens on a clear night, you can capture the rugged landscapes of the moon’s surface, highlighting the contrast between the bright lunar highlands and the dark, flat maria.
For planetary imaging, the technique is a bit different. You’ll want a telescope with high magnification and a camera capable of video. Why video? Because you can capture frames quickly, then use software to stack the clearest ones, reducing atmospheric distortion and bringing out more detail.
Filters: Seeing Planets in a New Light
Filters are a small investment that can have a big impact on your planetary imaging. They can increase contrast, reduce glare, and bring out details in the planets’ atmospheres. For example, a red filter can enhance the polar ice caps on Mars, while a blue filter can bring out the cloud bands on Jupiter.
Software Assistance for Stacking and Processing
Software plays a crucial role in astrophotography. Programs like DeepSkyStacker or RegiStax can take multiple images or video frames and combine them into a single, high-quality photo. This process, known as stacking, reduces noise and brings out details that would be impossible to see in a single shot.
Post-processing is also important. Adjusting contrast, brightness, and color balance can help reveal the true beauty of your celestial subjects. Remember, the goal is to enhance, not to alter what the universe has naturally provided.
Advanced Techniques for Awe-Inspiring Images
Once you’ve mastered the basics, you can explore more advanced techniques to elevate your astrophotography. These methods will help you capture the night sky in ways that truly showcase its wonder.
Introduction to Digital Stacking and Noise Reduction
Digital stacking isn’t just for planets. It’s also essential for deep-sky astrophotography. By taking multiple long-exposure images and stacking them, you can reduce the random noise that comes from the camera sensor and the atmosphere. This technique requires patience and plenty of clear nights, but the results are worth it.
Noise reduction software can also help clean up your images. These tools analyze your photos and selectively reduce the graininess, leaving you with smoother, clearer images of the night sky.
Color Accuracy: Balancing and Calibration Tips
Color accuracy is important for producing natural-looking images of the cosmos. To achieve this, you’ll need to understand white balance and color calibration. White balance ensures that the colors in your image reflect what’s actually out there. For astrophotography, setting your white balance to ‘Daylight’ is a good starting point, as it approximates the natural color of starlight.
Color calibration is a more advanced step that involves adjusting your images to match a known set of color standards. This can be done through post-processing software and ensures that the colors in your images accurately represent the astronomical objects you’ve photographed.
Automating Your Astrophotography Session
As you dive deeper into astrophotography, you might want to automate your sessions. This means using software to control your camera and mount, automating the capture process. Automation can help you take consistent exposures over several hours, which is essential for capturing faint deep-sky objects.
Remember, the key to great astrophotography is not just the equipment you use, but the knowledge and passion you bring to each session. With practice and patience, you can capture the wonders of the night sky in ways that inspire awe and curiosity.
Expanding Your Universe
Now that you’ve got the basics down, it’s time to look beyond your backyard and expand your astrophotography horizons. The universe is vast, and with the right approach, you can capture a slice of it no matter where you are.
The Role of Light Pollution and How to Overcome It
One of the biggest challenges in astrophotography is light pollution. It’s the glow from streetlights and cities that dims the stars above. But don’t worry, you can still capture the night sky’s beauty even if you live in a bright area. Here’s how:
-
Seek out darker skies: Use a light pollution map to find the best spots near you.
-
Use a light pollution filter: These filters can reduce the glow from artificial lights.
-
Choose your targets wisely: Some celestial objects like planets are less affected by light pollution.
Therefore, even if you’re city-bound, there’s still plenty of celestial wonder to be captured.
Portable Set-Ups for Remote Astrophotography Adventures
If you’re ready to escape the city lights, a portable astrophotography setup is your ticket to clearer skies. Choose lightweight and compact equipment that’s easy to transport. A portable star tracker and a good lens are often enough to capture stunning wide-field images of the Milky Way or constellations.
When you’re out in the field, battery power becomes crucial. Make sure to pack enough batteries or a portable power supply to keep your camera and mount running through the night.
Remember, the further you get from light pollution, the more of the universe reveals itself to your camera’s lens.
Example: On a camping trip to a national park, away from city lights, you set up your portable tracker and camera. As the night deepens, you capture a breathtaking image of the Milky Way, its dust lanes and star clusters crisply defined against the darkness.
Community and Learning: Joining Clubs and Online Groups
Joining an astrophotography club or online community can be incredibly rewarding. Not only will you learn from experienced astrophotographers, but you’ll also share your own experiences and grow. These communities often organize dark sky trips, offer workshops, and provide a platform for feedback on your images.
So, don’t go at it alone. Connect with others who share your passion for the stars. You’ll find that the astrophotography community is as vast and welcoming as the night sky itself.
Frequently Asked Questions
Can I use my regular camera for astrophotography?
Absolutely! Many regular DSLR and mirrorless cameras are capable of taking stunning astrophotographs. Just make sure you can manually control the exposure settings and that the camera can handle long exposures without significant noise.
Do I need to live in a dark area to do astrophotography?
While dark skies are ideal, they are not a necessity. You can start astrophotography for beginners even in light-polluted areas by capturing brighter objects like the moon and planets or using light pollution filters to photograph fainter objects.
What is the minimum equipment needed to start?
To begin with astrophotography, you need:
-
A camera capable of manual settings and long exposures
-
A sturdy tripod
-
A wide or long focal length lens for wide-field or close-up shots, respectively
With just these items, you can start capturing the night sky!
How much should I budget for a beginner setup?
You can start with a budget of around $500 to $1000 for a basic setup that includes a decent telescope or a star tracker, a camera, and a tripod. As you delve deeper into the hobby, you may choose to invest more in specialized equipment.
For instance, a beginner astrophotography setup might include a second-hand DSLR for around $200, a new star tracker for $300, and a sturdy tripod for $100.
Can I photograph deep-sky objects from my backyard?
Yes, with the right equipment and techniques, you can photograph deep-sky objects from your backyard. A tracking mount and a telescope or lens with a long focal length will help you capture images of galaxies, nebulae, and star clusters. Using stacking software to combine multiple exposures can also greatly improve your results.
Embarking on the astrophotography journey is an adventure like no other. It connects you with the cosmos in a unique and profound way. With patience, practice, and the right gear, you’ll soon be capturing the wonders of the night sky. Clear skies and happy shooting!