Key Takeaways
- Stacking astrophotography images enhances clarity and reduces noise.
- Choosing the right equipment and planning are crucial for successful image stacking.
- Combining multiple exposures can significantly improve the detail and quality of night sky images.
- Software tools are available to simplify the stacking process for astrophotographers of all levels.
- Post-processing stacked images can further refine and improve the final photograph.
Capturing the Universe: Why Stack Your Starry Night Images?
Imagine a night sky sprinkled with twinkling stars, each one a fiery furnace in the cold vastness of space. Now, picture capturing that cosmic spectacle with a clarity that makes every star stand out like a diamond on black velvet. That’s the power of astrophotography stacking techniques. It’s not just about taking one picture; it’s about combining many to create a single, stunning image that’s clearer, deeper, and more detailed than any single exposure could ever be.
The Basics of Image Stacking
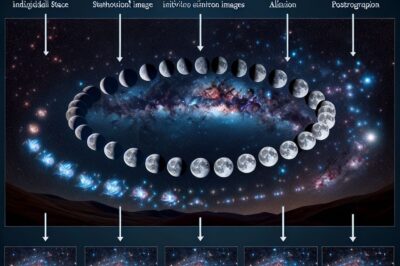
When you gaze up at the night sky, your eyes are taking in light from stars millions of miles away. In astrophotography, we aim to capture that light, but a single exposure often falls short. Why? Because digital sensors in cameras can only do so much in low light conditions. They introduce ‘noise’—those pesky speckles that muddle the image. That’s where stacking comes in. By taking multiple shots and blending them together, we can sift out the noise and let the true beauty of the cosmos shine through.
Increase Your Sky Scene’s Clarity
Stacking isn’t just about noise reduction. It’s also about increasing the ‘signal’, which in our case is the actual light from the stars and galaxies. With each additional image we stack, the real signal gets stronger, making our celestial subjects stand out more clearly against the background of space. It’s like listening to a faint radio station; as you tune in more precisely, the music becomes clearer and the static fades away.
Setting the Stage: Preparing for a Stacked Masterpiece
Before we dive into the stacking process, let’s set the stage. Good preparation is key to a successful astrophotography session. Clear skies, minimal light pollution, and the right equipment are your starting points. Plan your session during a new moon when the skies are darkest, and if you can, head out to a remote location where the stars aren’t competing with city lights. For more tips on optimal camera settings for such conditions, consider reading this guide on astrophotography exposure and camera settings.
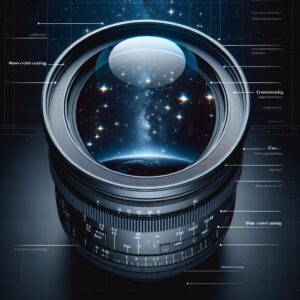
Now, let’s talk about gear. A sturdy tripod is a must to keep your camera stable during long exposures. A camera with manual mode capabilities will give you control over exposure settings, and a wide-aperture lens will let in as much light as possible. If you’re serious about astrophotography, consider investing in an equatorial mount or star tracker to compensate for the Earth’s rotation during longer exposures.
- Use a sturdy tripod to eliminate camera shake.
- Choose a camera that allows manual control over settings.
- Select a lens with a wide aperture to capture more light.
- Consider an equatorial mount for long-exposure photography.
Once you’ve got your gear sorted, plan your photo session. Check the weather, moon phase, and astronomical events. Choose your location wisely—somewhere with dark skies and an unobstructed view of your celestial targets. And most importantly, be patient. Good astrophotography takes time and practice.
Choosing the Right Gear
Getting into astrophotography doesn’t require the most expensive gear, but it does demand the right tools for the job. Your camera should allow for long exposures—most DSLRs and mirrorless cameras do. As for lenses, a wide-angle lens with a large maximum aperture, such as f/2.8 or larger, is ideal for capturing expansive star fields and the Milky Way.
- Camera capable of long exposures (DSLR or mirrorless).
- Wide-angle lens with a large aperture (f/2.8 or larger).
- Sturdy tripod to keep the camera steady.
- Optional: Equatorial mount or star tracker for longer exposures without star trails.
Remember, it’s not about having the best gear, but about knowing how to use what you have. Even with a basic setup, you can achieve stunning results with stacking.
Planning Your Photo Session
Successful astrophotography is as much about planning as it is about execution. You’ll want to scout out your location during the day to ensure it has a clear view of the night sky. Check the weather forecast—clouds are the enemy of astrophotographers. Choose a night when the moon is new or a thin crescent to avoid its bright light washing out the stars.
Next, consider what celestial wonders you want to capture. Are you aiming for a wide-angle shot of the Milky Way, or do you want to zoom in on a particular constellation or deep-sky object? Knowing your target helps you plan the best time to shoot and what equipment you’ll need.
And don’t forget the little things: dress warmly, bring extra batteries, and pack a red flashlight to preserve your night vision. Preparation is the first step to a rewarding night under the stars.
Averaging vs. Median Stacks: Which One Wins?
When it comes to stacking techniques, there are two main contenders: averaging and median stacking. Averaging involves adding up the pixel values of each image and dividing by the number of images to reduce noise. Median stacking, on the other hand, sorts the pixel values and picks the middle one, which is great for removing anomalies like passing satellites or airplanes. So, which one wins? It depends on the situation. Averaging is generally better for deep-sky objects where you want the smoothest possible result. Median stacking is your friend when dealing with random, transient light sources that could spoil your shot.
Software Selection for Seamless Stacking
Now that you’ve captured a set of images, it’s time to stack them. There’s a variety of software available, ranging from free to professional grade. DeepSkyStacker is a popular free choice for Windows users. It’s user-friendly and specifically designed for astrophotography. For Mac users, Starry Landscape Stacker is a go-to. If you’re looking for more advanced features, software like PixInsight or Sequator offer greater control over the stacking process.
When choosing your software, consider your skill level and the complexity of your projects. Some programs are more intuitive than others, and you don’t want to be bogged down by a steep learning curve when you’re eager to see your stacked results.
Refining Your Cosmic Canvas: Post-Stacking Enhancements
Once your images are stacked, the journey isn’t over. Post-processing is where your cosmic canvas comes to life. Most stacking software will leave you with a flat, unprocessed image that looks nothing like the vibrant night sky you’re after. That’s where image editing software comes in. Programs like Adobe Photoshop or Lightroom allow you to adjust contrast, brightness, and color balance to reveal the true beauty of your stacked image.
Tweaking and Adjusting Your Stacked Image
After stacking, your image may look a bit lackluster. Don’t worry, that’s normal. Now it’s time to tweak and adjust. Start by stretching the histogram to bring out the details in the shadows and highlights. Play with the curves to enhance contrast and make the stars pop. Adjust the white balance to correct any color casts. Remember, small, incremental changes are key—don’t be tempted to overdo it.
Addressing Common Stacking Challenges
Even with the best planning and execution, stacking can present challenges. Misaligned stars are a common issue, often caused by slight movements of the camera or tripod. Make sure your images are perfectly aligned before stacking. Light pollution can also taint your images with an orange glow. Combat this by using light pollution filters when shooting and by applying careful color correction during post-processing.
Another challenge is dealing with different exposures. If you’re blending images with varying exposure times, you’ll need to balance them out to avoid a patchy final image. This can be done manually or with the help of software that automates the process.
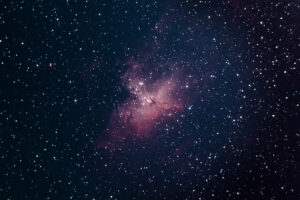
For example, let’s say you’ve captured the Orion Nebula with a series of 30-second exposures. Some frames might be slightly brighter due to passing cars with their headlights on. By using median stacking, you can eliminate those bright frames and keep the consistent exposure of the nebula throughout your stacked image.
Stacking Success Stories: The Clear Difference
There’s no better way to understand the benefits of stacking than to see it in action. Photographers who’ve embraced this technique have seen their images transform from noisy, speckled snapshots to breathtaking portraits of the night sky. The difference is night and day—literally.
Before and After: Real-World Examples
Consider the case of an amateur astrophotographer capturing the Andromeda Galaxy. Their first attempt, a single long exposure, was marred by noise and lacked detail. After learning about stacking, they took multiple shorter exposures and combined them. The result? A clearer image with well-defined spiral arms and less noise, showcasing the galaxy’s true splendor.
- Increased star sharpness and reduced noise.
- Greater detail in deep-sky objects like nebulae and galaxies.
- Improved color accuracy and contrast.
Another example comes from a photographer who stacked 20 images of the Milky Way. The stacked image showed more stars, clearer dust lanes, and improved color differentiation between the cooler and warmer stars. These enhancements bring the viewer closer to the feeling of looking up at the Milky Way with their own eyes.
Astronomer’s Corner: Expert Insights on Stacking
Seasoned astrophotographers agree: stacking is a game-changer. It allows them to push the limits of their equipment and capture images that rival those taken with far more expensive gear. They’ll tell you that patience, practice, and persistence are the keys to mastering this technique. But the payoff is well worth it—the ability to share views of the universe that few have ever seen with their own eyes.
Remember, stacking isn’t just about technical prowess; it’s about sharing the wonder of the night sky. It’s a way to connect with the cosmos and inspire others to look up and explore the stars. So grab your camera, plan your next astrophotography adventure, and get ready to stack your way to stellar images that truly capture the awe-inspiring beauty of our universe.
Astronomer’s Corner: Expert Insights on Stacking
Those who have been in the field of astrophotography for a while know the transformative power of stacking. It’s akin to turning whispers of starlight into a chorus that sings the beauty of the universe. But it’s not just about the technical triumphs; it’s about the stories that each stacked image tells—of cosmic events billions of years in the making, captured in a moment of human curiosity and ingenuity.
Take it from the pros: stacking requires patience. You might spend a whole night capturing images that, when stacked, just don’t turn out right. But when everything aligns—the gear, the conditions, your technique—the results can be magical. Stacking isn’t a shortcut to great astrophotography; it’s a path to mastering the art of capturing the night sky.
Imagine capturing a comet as it streaks through the heavens. A single image might show it as a smudge of light, but stack several exposures, and you’ll see its tail, clear and distinct, against a backdrop of stars. That’s stacking at its best: revealing the wonders of the cosmos that are often hidden in plain sight.
When you share a stacked image, you’re not just showing off a technical skill. You’re inviting others to marvel at the universe. You’re inspiring future astronomers, artists, and dreamers. And in doing so, you’re continuing the age-old human tradition of storytelling, with the sky as your canvas and the stars as your narrative.
FAQ: Sky-High Questions, Grounded Answers
Q: Can stacking help reduce the effects of light pollution in my astrophotography images?
A: Absolutely. By stacking multiple images, you can significantly reduce the grainy appearance that light pollution causes. It won’t eliminate the problem entirely, but it can help to clarify the true celestial objects amidst the urban glow.
It’s time to address those burning questions that can light up the mind of any aspiring astrophotographer. Whether you’re just starting out or looking to refine your technique, understanding the ins and outs of stacking is key to elevating your night sky captures.
Stacking is a technique that can seem daunting at first, but once you grasp the basics, it becomes a powerful tool in your astrophotography arsenal. Let’s demystify some common queries and set you on the path to clearer, more captivating cosmic images.
From the essentials of stacking to tackling the challenges of light pollution, this section is designed to provide clear, actionable answers. With the right knowledge, you can turn your night sky photography into a pursuit of celestial excellence.
Now, let’s dive into some frequently asked questions that might be twinkling in your mind like stars waiting to be resolved by the lens of your camera and the power of stacking.
Is Stacking Essential for Every Type of Astrophotography?
While stacking is incredibly beneficial for many types of astrophotography, it’s not a one-size-fits-all solution. If you’re shooting brighter objects like the Moon or planets, single exposures might suffice. However, for deep-sky objects and capturing the faint details of the Milky Way, stacking is indispensable. It helps bring out details that are otherwise lost in the noise of a single shot.
How Many Images Do I Need to Stack for Good Results?
The number of images you’ll need to stack for good results can vary widely. As a rule of thumb, the more, the better. Start with at least 10 to 20 images to notice a significant improvement in noise reduction and detail. However, for truly impressive results, especially with deep-sky objects, aim for 50 or more exposures. It’s all about balancing your available time with the quality you’re striving for.
What’s the Best Stacking Software for Beginners?
For those just starting with stacking, DeepSkyStacker is a fantastic free option that’s user-friendly and designed specifically for astrophotography. Another excellent choice for beginners is Sequator, which is straightforward and effective. These programs will help you learn the ropes without overwhelming you with too many advanced features.
Can Stacking Improve Smartphone Astrophotography?
Yes, stacking can also improve smartphone astrophotography. While smartphones have smaller sensors and are generally less sensitive to light than dedicated cameras, stacking multiple exposures can help overcome these limitations. Apps like StarStaX can assist you in stacking images directly on your smartphone to enhance your night sky photos.
How Can I Handle Light Pollution When Stacking Images?
Light pollution is a common challenge for astrophotographers, especially those in urban areas. Stacking can help mitigate its effects. Here are a few tips:
- Use a light pollution filter when capturing your images.
- Stack more images to improve the signal-to-noise ratio, making celestial objects stand out against the polluted sky.
- Employ post-processing techniques like background subtraction to reduce the orange glow from artificial lights.
Remember, even in light-polluted areas, stacking can unveil the hidden beauty of the night sky. It’s about persistence and leveraging the right techniques to reveal the stars beyond the glare of city lights.
Astrophotography stacking is a powerful technique used by photographers to reduce noise and enhance the quality of their night sky images. By taking multiple exposures of the same scene and then combining them in post-processing, the signal-to-noise ratio is improved, resulting in clearer and more detailed photographs. This method is especially beneficial for capturing faint celestial objects and can be a game-changer for both beginners and experienced astrophotographers alike. For those just starting out, a comprehensive astrophotography guide for beginners can provide valuable insights into the basics of this technique.