Key Takeaways
Essential equipment for star trails photography includes a capable camera, a wide-angle lens, a sturdy tripod, and a remote shutter release.
To capture star trails, scout for dark locations, plan for clear skies, and choose times when the Earth’s rotation will be most visible in the stars’ movement.
Manual mode is your best friend in astrophotography, allowing you to control ISO, aperture, and exposure time for the perfect shot.
Focus manually to ensure the stars are sharp, and use long exposure techniques to capture their trails.
Post-processing is a crucial step to enhance your star trails images, and apps can assist in planning your shoot and locating stars.

Selecting Your Equipment
Choosing the Right Camera
When you’re ready to capture the swirling dance of the stars, your camera is your most crucial tool. Look for a DSLR or mirrorless camera that allows full manual control – this will give you the freedom to tweak settings for the perfect exposure. A camera with a “Bulb” mode is ideal because it lets you keep the shutter open for extended periods, which is essential for recording the movement of the stars.
Understanding Lens Specifications
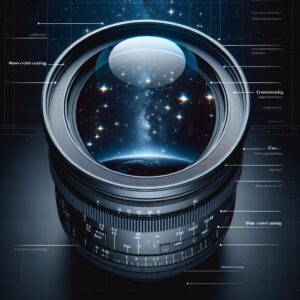
Next, let’s talk lenses. A wide-angle lens with a wide aperture, say f/2.8 or wider, will let in more light, allowing you to capture more stars. The wider the lens, the more of the sky you can fit into your frame, which means more star trails and a more dramatic effect. Remember, the lens’s focal length will affect the appearance of the star trails – shorter focal lengths will give you longer trails across the frame.
Advantages of Using a Tripod
Stability is key in astrophotography. A sturdy tripod is non-negotiable because even the slightest movement can blur your star trails. Choose a tripod that can withstand the weight of your camera and lens without wobbling. The heavier the tripod, the more stable it will be against the wind.
Remote Shutter Releases for Long Exposures
A remote shutter release is a small accessory that can make a big difference. It allows you to start and stop your exposures without touching the camera, preventing any movement that could blur your star trails. Some models even come with a timer, which can be very handy for those extra-long exposures.
Planning Your Star Trails Shoot
Scouting Ideal Locations
Before you even think about setting up your camera, you need to find the right spot. Look for places far from city lights where the sky is darkest. High altitudes can also be beneficial, as there’s less atmosphere to obscure the stars. Remember, the location affects the composition of your shot, so find a foreground that complements the celestial display above.
Use these guidelines to find the perfect location for astrophotography.
Check light pollution maps online to find dark skies.
Visit the location during the day to plan your composition and ensure it’s safe.
Consider the direction – facing north near the equator will show circular star trails around the pole star.
Best Times for Star Trails Photography
The best star trails are captured on nights when the sky is clear and the moon is new or in a crescent phase. The moon’s light can wash out the stars, so planning around the lunar cycle is crucial. Also, winter months often have clearer skies, making them ideal for star trails photography.
Remember:
Check the weather forecast for clear skies.
Plan your shoot around the new moon for the darkest skies.
Winter skies are often clearer and better for capturing star trails.
Camera Settings for Perfect Star Trails
Now that you’ve got your location and equipment ready, it’s time to dial in your camera settings. Remember, star trails photography is all about capturing the movement of the stars as Earth rotates, so your settings need to allow for long exposures without overexposing the shot.
Mastering Manual Mode
Manual mode is where you take control. Start by setting your camera to manual mode. This will let you adjust the ISO, aperture, and exposure time independently to get the best results. The idea is to let enough light in to capture the stars without making the photo too bright. It’s a balance, but with a bit of practice, you’ll get the hang of it.
Ideal ISO Settings
ISO determines your camera’s sensitivity to light. For star trails, you want an ISO that’s high enough to capture the stars but not so high that your photo is full of noise. Start around 800 and adjust as needed. The darker your location, the higher you can push your ISO without introducing too much noise.
The Importance of Aperture
Aperture is the size of the opening in your lens. A wider aperture (a lower f-number) lets in more light, which is great for night photography. However, be aware that the widest aperture might not be the sharpest setting for your lens. Try f/2.8 or f/4 to start with and adjust based on the sharpness and amount of light needed.
Calculating Exposure Time
Exposure time is how long your camera’s shutter stays open. For star trails, you’ll want a long exposure to capture the stars’ movement. Start with an exposure of at least 30 seconds and go up to several minutes or even hours for longer trails. If your camera has a “Bulb” mode, you can use a remote shutter release to hold the shutter open for as long as you need.
Techniques for Sharper Star Trails
To get the sharpest star trails, your focus needs to be spot on. This can be tricky at night when your camera’s autofocus might struggle. The key is to switch to manual focus and set it to infinity. But don’t rely on the infinity mark on your lens; it’s not always accurate. Instead, during twilight, focus on a distant object or use your camera’s live view feature to zoom in on a bright star and manually focus.
Focus Techniques for Clear Night Skies
For the clearest skies and sharpest stars, follow these tips:
Switch to manual focus and turn the focus ring to just before the infinity symbol.
Use the live view mode to zoom in on a star and adjust the focus until it’s a small, sharp point.
If possible, focus during twilight and lock the focus for the night.
Example: I once spent a night in the desert, focusing my lens during twilight on a distant peak. That focus stayed tack-sharp all night, giving me some of the best star trails I’ve ever captured.
Long Exposure Techniques
For long exposures, it’s all about keeping your camera still. Use a remote shutter release to avoid camera shake when you press the button. If you don’t have one, use your camera’s self-timer. And watch out for wind, which can shake your camera during a long exposure. If it’s windy, shield your camera or weigh down your tripod with a bag.
Overcoming Common Star Trails Challenges
One of the biggest challenges in star trails photography is light pollution. Even if you’re in a relatively dark location, stray light from nearby towns can affect your photos. To combat this, you can use a light pollution filter, or adjust your white balance to reduce the orange glow that city lights can cause.
Advanced Star Trails Imaging
Once you’re comfortable with the basics, you can start experimenting with advanced techniques. One such technique is image stacking. This involves taking multiple shorter exposures and combining them in post-processing to create a single image with longer star trails. This method reduces noise and can produce cleaner images than a single long exposure.
Stacking Images for Enhanced Effects
Here’s how to stack images for star trails:
Take a series of photos with the same composition, keeping the settings consistent.
Use software like StarStaX to blend your images together, creating the look of a longer exposure.
Adjust the blending mode to achieve different effects with the star trails.
Stacking can also help mitigate some of the issues with long exposures, like battery drain and sensor overheating.
Post-Processing Tips for Star Trails Photography
After you’ve captured your star trails, post-processing can help enhance the final image. Adjust contrast to make the trails pop, and tweak the white balance if the colors don’t look quite right. Noise reduction can be helpful, but use it sparingly to avoid smearing the stars. And finally, sharpening can bring out the details in your trails and foreground.
Overcoming Common Star Trails Challenges
Challenges in star trails photography often revolve around environmental factors and technical settings. Light pollution is a significant hurdle, but with the right location and some post-processing tricks, you can minimize its impact. Another common challenge is ensuring your camera remains absolutely still during the long exposure. A solid tripod, a remote shutter release, and avoiding windy conditions are your best defenses against unwanted camera movement.
Preservation of Night Sky Quality
The preservation of the night sky is not only important for astronomers and astrophotographers but also for the well-being of our environment. Light pollution disrupts ecosystems, wastes energy, and obscures our view of the universe. By practicing and promoting responsible lighting and advocating for dark sky initiatives, we can help preserve the natural beauty of the night sky.
Combating Light Pollution
Combatting light pollution starts with awareness and action. Here are steps you can take:
Choose outdoor lighting fixtures that are fully shielded to direct light downward.
Use lighting only when necessary, and opt for lower-intensity bulbs.
Support legislation that promotes dark sky initiatives and responsible lighting practices.
By making these changes, you can contribute to the preservation of our night skies and ensure that star trails photography remains a possibility for future generations.
Dark Sky Preserves are areas recognized for their exceptional quality of starry nights and nocturnal environment. These preserves are protected against light pollution and are ideal locations for astrophotography. By visiting and supporting these areas, you not only get the opportunity to capture breathtaking star trails but also contribute to the conservation of these precious dark skies.
FAQ
What is the best camera setting for star trails photography?
The best camera settings for star trails photography will vary depending on your location and conditions, but a good starting point is to use a wide-angle lens, set your aperture to f/2.8 or f/4, your ISO between 800 and 3200, and your exposure time to at least 30 seconds. Always shoot in manual mode to have complete control over these settings.
How do I focus my camera at night?
Focusing at night can be challenging, but there are a few techniques to ensure sharp images. One method is to use the live view mode to zoom in on a bright star and manually adjust the focus. Alternatively, focus on a distant light source at infinity during twilight and then switch your lens to manual focus to lock it in for the night.
Can I capture star trails in a light-polluted area?
While it’s more challenging, you can capture star trails in light-polluted areas by using a light pollution filter, increasing your exposure time, and post-processing your images to reduce the effects of the ambient light. However, for the best results, seek out darker skies away from urban areas.
What is image stacking and how does it benefit star trails photography?
Image stacking is the process of taking multiple shorter exposures and combining them in post-processing to create the effect of a longer exposure. This technique helps reduce noise, increases image quality, and can produce more detailed and dramatic star trails.
Are there any apps to help plan star trails photography?
Yes, there are several apps designed to assist astrophotographers in planning their shoots. Apps like PhotoPills, Stellarium, and Star Walk can help you track the movement of the stars, plan your composition, and determine the best times for shooting star trails based on your location.