Key Takeaways
- Refractor telescopes are typically the best starting point for astrophotography beginners due to their low maintenance and high contrast images.
- The mount is more critical than the telescope for successful astrophotography—invest in stability and tracking accuracy first.
- Match your telescope specifications to your intended targets: shorter focal lengths (400-800mm) work best for deep sky objects, while longer focal lengths excel at planetary imaging.
- Optical quality, particularly with ED or APO glass, dramatically improves color correction and image sharpness in astrophotographs.
- A complete astrophotography setup requires additional accessories like field flatteners, autoguiding equipment, and appropriate camera adapters to achieve professional results.
Find Your Perfect Telescope: Matching Equipment to Your Astrophotography Goals
Capturing the cosmos through your camera reveals details and colors invisible to the naked eye, but choosing the right telescope can feel as vast and overwhelming as the night sky itself. The perfect astrophotography telescope isn’t universal—it depends entirely on your specific goals, experience level, and budget. Whether you’re hoping to photograph expansive nebulae, distant galaxies, or detailed planetary features, the equipment requirements differ significantly. TenSix Photography provides excellent resources for astro enthusiasts looking to get started without breaking the bank.
Before diving into telescope specifications, take a moment to consider what excites you most about astrophotography. Are you drawn to the colorful wisps of emission nebulae? The intricate structure of spiral galaxies? Or perhaps the detailed surface features of planets? Your answers will guide your equipment choices more effectively than any general recommendation. Remember that successful astrophotography combines proper equipment with technique, patience, and practice—even modest equipment in skilled hands can produce remarkable images.
Your journey into astrophotography doesn’t need to start with the most expensive setup. Many accomplished astrophotographers began with entry-level equipment, gradually upgrading as their skills and understanding developed. The learning curve can be steep, but with the right approach, you’ll capture increasingly impressive images as you refine both your equipment and techniques.
Telescope Types for Astrophotography: Which Is Right for You?
The telescope market offers four main optical designs for astrophotography, each with distinct advantages for specific imaging scenarios. Understanding these differences is crucial for matching your equipment to your photographic goals and avoiding costly mistakes that might limit your imaging capabilities.
Refractors: The Astrophotography Workhorse
Refractor telescopes use lenses to gather and focus light, offering several significant advantages for astrophotography beginners. Their closed tube design eliminates internal air currents and keeps optical elements perfectly aligned, resulting in stable, high-contrast images. Premium refractors with ED (Extra-low Dispersion) or APO (Apochromatic) glass significantly reduce chromatic aberration—the colored fringing around bright objects that can ruin otherwise perfect images.
Most astrophotographers start with a small 70-80mm refractor in the 400-700mm focal length range. Models like the Explore Scientific ED80 ($699) or William Optics RedCat 51 ($749) provide excellent optical quality in a portable package. Their shorter focal lengths are forgiving of minor tracking errors while still capable of capturing impressive wide-field images of larger nebulae and star clusters.
The main limitation of refractors is their relatively small aperture for the price, which restricts light-gathering ability compared to reflectors of similar cost. However, their consistent performance and minimal maintenance requirements make them ideal for beginners focusing on deep sky astrophotography.
Reflectors: Maximum Aperture for Your Dollar
Reflector telescopes use mirrors rather than lenses, allowing significantly larger apertures at lower price points. A 6-8 inch Newtonian reflector gathers substantially more light than typical beginner refractors, making them excellent for capturing faint deep sky objects. Their increased light-gathering capability allows for faster exposure times and better detail in dim objects like distant galaxies. For those interested in capturing these celestial wonders, a Sony A7R IVa camera is a great companion to these telescopes.
However, reflectors present unique challenges for astrophotography. Their open tube design requires more frequent collimation (optical alignment), especially when transported. Many also suffer from coma—a distortion that stretches stars at the edge of the field—requiring additional corrective optics for wide-field photography. Despite these challenges, models like the Orion 8″ Astrograph f/3.9 represent excellent value for dedicated astrophotographers who don’t mind the additional maintenance.
Compound Telescopes: The Versatile Option
Compound telescopes (like Schmidt-Cassegrains and Maksutov-Cassegrains) use both mirrors and lenses in a compact folded optical path. These designs pack impressive focal lengths into remarkably portable packages, making them ideal for photographers who want versatility between deep sky and planetary imaging. Their closed optical tubes require minimal maintenance while providing good protection from dew and dust.
The Celestron 8″ EdgeHD and similar Schmidt-Cassegrain designs have become popular among astrophotographers who want one telescope for all targets. Their longer focal lengths (typically 2000mm+) excel at capturing detailed images of planets and lunar features, while optional focal reducers allow them to photograph larger deep sky objects when needed. The main drawbacks include somewhat slower focal ratios and potential issues with mirror flop during long exposures unless properly managed.
Astrographs: Purpose-Built for Deep Sky Photography
Astrographs are specialized telescopes designed specifically for astrophotography rather than visual observation. These instruments feature optimized optical designs that produce flat, well-corrected image fields across large camera sensors. Many incorporate built-in field flatteners, faster focal ratios for shorter exposure times, and enhanced focusing systems that minimize image shift during long exposures.
Dedicated astrographs like the Rowe-Ackermann Schmidt Astrograph (RASA) or Takahashi FSQ series represent the pinnacle of astrophotography instruments, though at premium prices. These telescopes deliver exceptional performance for one specific purpose: capturing wide-field deep sky images efficiently. For advanced astrophotographers who know exactly what they want to photograph, these specialized instruments eliminate compromises found in more general-purpose telescopes.
Critical Telescope Specifications That Make or Break Your Astro Images
Understanding key telescope specifications is essential for matching your equipment to your imaging goals. The relationship between aperture, focal length, and optical quality determines what objects you can effectively capture and how they’ll appear in your final images. For more guidance, consider exploring the best astrophotography telescopes to enhance your imaging experience.
Aperture: Light Gathering Power Explained
Aperture—the diameter of your telescope’s main optical element—directly determines its light-gathering ability. Larger apertures collect more photons, allowing you to capture fainter objects or achieve better signal-to-noise ratios in your images. For deep sky objects like distant galaxies and nebulae, aperture significantly impacts both exposure times and the level of detail you can record.
While larger apertures are generally beneficial, they come with trade-offs including increased weight, cost, and potential for atmospheric turbulence effects. For many beginning astrophotographers, a moderate aperture (70-130mm for refractors, 150-200mm for reflectors) provides an excellent balance of performance and practicality. Remember that a perfectly tracked 80mm refractor will outperform a poorly mounted 11-inch telescope every time—mount stability often matters more than raw aperture.
Focal Length and Focal Ratio: Field of View Considerations
Focal length determines your telescope’s magnification and field of view when paired with a particular camera. Shorter focal lengths (400-800mm) capture wider views of the night sky, making them ideal for large nebulae, star clusters, and extended galaxies. Longer focal lengths (1000mm+) provide higher magnification for detailed views of planets, lunar features, and smaller deep sky objects.
Focal ratio (f/ratio) represents the relationship between focal length and aperture, calculated by dividing focal length by aperture. Lower f/ratios (f/4 to f/6) are considered “faster” because they concentrate light more efficiently, requiring shorter exposure times—a significant advantage for deep sky imaging. Higher f/ratios (f/8 to f/15) provide better contrasting views of planets and lunar details but require longer exposures for deep sky work. For those interested in capturing stunning night sky photos, the Nikon D5300 DSLR camera offers excellent features for astrophotography enthusiasts.
When selecting your first astrophotography telescope, consider starting with a focal length between 400-800mm. This versatile range provides a forgiving field of view while still delivering enough magnification for detailed images of larger deep sky objects. As your skills develop, you can add telescopes with complementary focal lengths to expand your imaging capabilities. For more insights on choosing the right equipment, check out this guide on how to choose a lens mount for astrophotography cameras.
Optical Quality: Why Coatings and Glass Matter
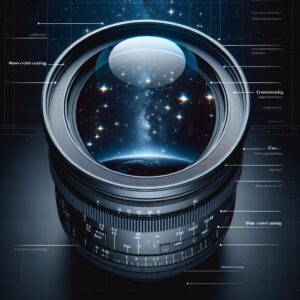
The quality of optical elements and their coatings dramatically impacts image sharpness, contrast, and color accuracy. Premium telescopes utilize specialized glass types like ED (Extra-low Dispersion) or fluorite elements to reduce chromatic aberration—the colored fringing that appears around bright objects. This improved color correction is particularly important for astrophotography, where subtle nebula details and star colors can be easily compromised by lesser optics.
Anti-reflection coatings significantly improve light transmission and reduce internal reflections that degrade contrast. Premium telescopes feature sophisticated multi-layer coatings (often marketed as “fully multi-coated” or similar terminology) that maximize the light reaching your camera sensor. The difference between basic coatings and premium multi-coatings can represent 5-15% more light transmission—a substantial improvement when photographing faint objects.
When comparing telescopes, research their measured optical performance rather than relying solely on specifications. Experienced astrophotographers often share detailed reviews including star tests and actual astro images that reveal a telescope’s true performance. Premium optical quality represents one area where investment genuinely improves your imaging results, especially for challenging targets.
Mount First, Telescope Second: The Real Secret to Sharp Stars
The unspoken truth among experienced astrophotographers is that the mount matters more than the telescope. The finest optics available will produce disappointing results when paired with an inadequate mount. Successful deep sky imaging requires tracking accuracy measured in arc-seconds over extended periods—a demanding mechanical challenge that budget mounts simply cannot achieve.
Why Tracking Accuracy Trumps Premium Optics
During long exposures, even microscopic tracking errors become magnified into elongated stars and blurred details. A mount that drifts by just one arc-second during a 3-minute exposure will transform perfect pinpoint stars into ovals or streaks, regardless of optical quality. This precision requirement explains why experienced astrophotographers often recommend spending 50-70% of your total budget on the mount alone.
Entry-level computerized mounts like the Celestron AVX ($899) represent the minimum viable platform for serious deep sky imaging. For more demanding setups or longer focal lengths, intermediate mounts like the Sky-Watcher EQ6-R Pro ($1,649) or Losmandy G11 ($3,195) provide the stability and precision tracking necessary for consistently sharp images. These investments pay dividends across all your future telescopes, making them the foundation of your astrophotography journey.
Remember that mount capacity ratings should be interpreted conservatively for imaging purposes. The general rule suggests loading your mount to no more than 50-60% of its rated capacity when doing astrophotography, providing necessary headroom for wind, balance shifts, and imperfect polar alignment. This conservative approach dramatically improves tracking performance and image quality.
Equatorial vs. Alt-Azimuth Mounts for Imaging
Equatorial mounts are specifically designed to counter Earth’s rotation with a single axis of motion, making them ideal for astrophotography. When properly polar-aligned, these mounts track celestial objects without field rotation—the gradual turning of the image field that occurs with alt-azimuth tracking. This alignment between the mount’s movement and the sky’s apparent motion allows for virtually unlimited exposure times without specialized de-rotation equipment.
While modern computerized alt-azimuth mounts can technically compensate for field rotation, this approach introduces complex motion patterns that often result in tracking artifacts during long exposures. For serious deep sky imaging, a properly aligned equatorial mount remains the gold standard despite requiring more setup time and a steeper learning curve. The quality of your mount’s tracking directly correlates with the maximum useful exposure time you can achieve, which in turn determines the faintest objects you can successfully photograph.
Payload Capacity: How to Calculate What You Need
Proper mount capacity calculation is essential for stable imaging. Unlike visual astronomy, astrophotography places additional demands on your mount through cable drag, wind resistance, and the precise tracking required for sharp stars. The total payload includes everything that moves with the mount: telescope, camera, guide scope, counterweights, and accessories.
As a reliable rule of thumb, your imaging setup should weigh no more than 50-60% of your mount’s stated capacity. For example, with a mount rated for 30 pounds, aim to keep your complete imaging payload under 15-18 pounds. This conservative approach provides the stability margin needed for high-quality long-exposure photography, especially in less-than-ideal conditions like slight breezes or imperfect polar alignment.
Remember that focal length also affects your payload requirements. Longer focal lengths amplify even tiny vibrations and tracking errors, requiring proportionally more substantial mounting. A 400mm refractor might perform beautifully on a mid-range mount, while a 1200mm telescope might struggle on the same platform despite similar weight. When upgrading your telescope, always verify your mount can handle both the physical weight and the precision demands of your new focal length.
Budget-Friendly Options That Don’t Sacrifice Image Quality
Astrophotography doesn’t have to drain your bank account to produce impressive results. Strategic equipment choices focused on optical quality and mount stability can yield excellent images even on modest budgets. The key is understanding where to invest and where to economize without compromising critical performance factors. For instance, selecting the right camera is crucial, and you might consider the Nikon D5300 DSLR camera for its affordability and quality.
Best Telescopes Under $500
In the sub-$500 range, small but well-corrected refractors offer the best value for beginners. The Orion ST80 ($149) and similar 80mm achromatic refractors provide surprisingly capable platforms for wide-field Milky Way photography when paired with a camera tracker like the Sky-Watcher Star Adventurer ($399). These compact telescopes offer good optical performance for their price, though they do exhibit some chromatic aberration on brighter objects.
For slightly more aperture, the Orion ShortTube 4.5″ Newtonian ($219) offers impressive light-gathering ability in a compact package. While requiring occasional collimation and suffering from some coma at the edges, this reflector captures more photons than similarly priced refractors. When paired with a suitable mount, it can capture impressive images of larger nebulae and star clusters.
The most important consideration in this budget range is avoiding false economy. A compromise telescope on a sturdy mount will consistently outperform a premium telescope on an inadequate mount. Consider starting with just a DSLR on a star tracker for wide-field astrophotography while saving for a complete telescope and equatorial mount package that won’t require immediate upgrading.
Mid-Range Sweet Spot: $500-$1000 Options
The $500-1000 range represents the sweet spot for many beginning astrophotographers, offering significantly improved optical quality without reaching premium pricing. Apochromatic (APO) or ED refractors like the William Optics ZenithStar 61 ($598) provide excellent color correction and sharp images in a highly portable package. These telescopes offer nearly perfect stars across large camera sensors, making them ideal for nebulae and open star clusters.
For more aperture, the Sky-Watcher Esprit 80ED ($749) combines a larger objective with premium ED glass to deliver excellent images of both extended and compact deep sky objects. Its 80mm aperture gathers 56% more light than a 60mm telescope while maintaining high-quality color correction for accurate nebula colors and pin-point stars.
Remember that a telescope in this price range should be paired with at least a mid-level equatorial mount like the Sky-Watcher HEQ5 ($999) or Orion Sirius EQ-G ($1,299) to realize its full potential. This combination provides a platform capable of growing with your skills through the addition of autoguiding and other advanced techniques.
Premium Choices: When to Invest More
Premium telescopes in the $1500+ range deliver noticeable performance benefits for serious astrophotographers. High-end APO refractors like the Takahashi FSQ-85ED ($3,395) feature exotic glass elements and precision mechanical components that produce virtually perfect star images across large camera sensors. Their exceptional color correction captures subtle nebula details and accurate star colors that less expensive telescopes might miss.
Advanced astrographs like the Celestron RASA 8″ ($1,699) offer specialized optical designs optimized exclusively for astrophotography. With extremely fast focal ratios (f/2.0) and perfectly flat fields, these instruments capture deep sky objects in a fraction of the time required by conventional telescopes. The performance difference becomes particularly evident when imaging faint objects like distant galaxy clusters or faint emission nebulae.
The decision to invest in premium equipment should align with your long-term astrophotography goals. If you’re committed to producing exhibition-quality images or tackling challenging targets, the investment often proves worthwhile. However, technique and processing skills remain equally important—the world’s finest telescope cannot compensate for fundamental errors in acquisition or post-processing. For those looking to make an informed decision, check out this guide on the best telescopes for astrophotography.
Used Market Gems: What to Look For
The used market offers exceptional value for the budget-conscious astrophotographer. Premium telescopes retain their optical performance indefinitely when properly cared for, making carefully selected used equipment nearly indistinguishable from new. When evaluating used telescopes, prioritize optical condition over cosmetic appearance—minor tube scratches don’t affect performance, while damaged optics require expensive replacement. For those interested in cameras, consider exploring options like the Nikon D5300 for night sky photos.
Particularly good values include slightly older premium refractors from brands like Takahashi, Tele Vue, and Astro-Physics. These instruments maintain their legendary optical performance while often selling for 30-40% less than current models. Similarly, quality equatorial mounts like older Losmandy or Astro-Physics models frequently surface at substantial discounts despite offering mechanical precision that rivals new equipment.
When purchasing used, request sample astrophotos taken with the exact telescope being sold. Star tests at high magnification can reveal optical issues like pinched optics or misalignment that might not be immediately apparent during casual inspection. Always test the focuser for smooth operation and verify that all accessories and mounting hardware are included before completing your purchase.
Match Your Telescope to Your Target: Deep Sky vs. Planetary Imaging
Different celestial targets demand different telescope characteristics for optimal imaging. Understanding these requirements helps you select the ideal instrument for your preferred subjects or recognize when you might need multiple specialized telescopes for diverse targets. For instance, choosing the right lens mount for astrophotography cameras can significantly enhance your imaging results.
Best Setups for Galaxy and Nebula Photography
Deep sky astrophotography of galaxies and nebulae benefits from instruments that balance aperture, field of view, and optical speed. Refractors with focal lengths between 400-800mm excel at capturing larger nebulae and galaxy clusters with their wide fields and pinpoint stars. The Explore Scientific ED80 represents an excellent entry point with its 80mm aperture and 480mm focal length, providing enough resolution for detail while maintaining a forgiving field of view.
For more challenging targets like smaller galaxies or planetary nebulae, larger apertures and longer focal lengths become advantageous. An 8-inch Schmidt-Cassegrain with a focal reducer brings the focal length to around 1400mm—ideal for galaxies like M51 or M101 where additional magnification reveals spiral arm structure and star-forming regions. The key is matching your focal length to your target’s angular size while maintaining sufficient aperture for good signal-to-noise ratio.
Regardless of your telescope choice, deep sky imaging virtually always requires an equatorial mount capable of precise tracking for 2-10 minute exposures (or longer). The mount should include periodic error correction (PEC) and compatibility with autoguiding systems that further improve tracking accuracy. Without these capabilities, even the finest optics will produce disappointing results on all but the brightest deep sky objects.
Planetary and Lunar Imaging Requirements
Planetary and lunar imaging presents entirely different requirements from deep sky photography. These bright targets benefit from longer focal lengths (1500-3000mm) that provide the necessary magnification to reveal fine surface details. Schmidt-Cassegrains and Maksutov-Cassegrains excel in this application, offering substantial apertures and long focal lengths in relatively compact packages.
Unlike deep sky imaging, planetary photography utilizes high-speed video capture rather than long exposures, recording thousands of frames in quick succession. This technique, called “lucky imaging,” allows software to select and stack only the sharpest frames captured during moments of good atmospheric seeing. The critical specifications become aperture (for resolution) and focal length (for magnification) rather than tracking accuracy.
Optimal planetary setups include instruments like the Celestron 8″ EdgeHD or Sky-Watcher 8″ Collapsible Dobsonian with a tracking platform. Both provide the aperture necessary to resolve fine planetary details while offering sufficient focal length for effective magnification. Planetary imaging can often be accomplished with more affordable alt-azimuth mounts since the short exposure times eliminate concerns about field rotation.
Solar Photography Considerations
WARNING: Solar observation and photography require specialized safety equipment to prevent permanent eye damage or blindness. Never look at or photograph the sun without proper, purpose-built solar filters securely attached to the front of your telescope. Eyepiece solar filters are unsafe and should never be used.
Solar photography represents a specialized branch of astrophotography with unique equipment requirements. For white light (photosphere) imaging showing sunspots and granulation, virtually any telescope can be equipped with a certified solar filter like those from Thousand Oaks Optical or Baader Planetarium. Refractors often provide the best contrast for surface detail, while their sealed tubes prevent dust from compromising the critical solar filter.
Dedicated hydrogen-alpha telescopes like the Coronado PST ($799) or Lunt LS50THa ($1,199) reveal the sun’s dramatic chromosphere, including prominences, filaments, and surface detail invisible in white light. These specialized instruments incorporate complex internal filtering systems that isolate the hydrogen-alpha wavelength (656.28nm) where solar activity becomes clearly visible.
For either approach, mount stability requirements are less stringent than for deep sky work, as solar imaging uses relatively short exposures. A solid alt-azimuth mount with smooth manual controls often proves more practical than a computerized system, allowing quick adjustments to track the sun’s rapid apparent motion.
Essential Accessories That Complete Your Astrophotography Kit
A telescope alone represents only part of a complete astrophotography system. Critical accessories often make the difference between amateur-looking images and professional-quality results. Understanding these components helps you build a comprehensive kit without unexpected compatibility issues.
Field Flatteners and Focal Reducers
- Field flatteners correct natural curvature in refractor telescopes, producing perfectly round stars across the entire image field
- Focal reducers decrease focal length and increase speed (lower f/ratio), allowing shorter exposures and wider fields of view
- Combination flattener/reducers like the William Optics Flat6A perform both functions simultaneously
- Properly matched flatteners require specific spacing from your camera’s sensor—precision matters to within 1mm
- Some telescopes require brand-specific models designed for their exact optical characteristics
Field flatteners represent an essential investment for almost any refractor used in astrophotography. Without proper field flattening, stars near the edge of your frame appear elongated or comet-shaped regardless of perfect focus, significantly detracting from image quality. Quality flatteners like the Orion Field Flattener for Short Refractors ($79) or the premium TeleVue TRF-2008 ($245) transform the performance of your existing telescope. If you’re interested in capturing stunning images, consider pairing your telescope with a Sony A7R IV mirrorless camera for optimal results.
Focal reducers provide both a wider field of view and faster imaging speed by decreasing your telescope’s effective focal length. A typical 0.8x reducer transforms a f/7 refractor into a faster f/5.6 system, cutting exposure times by 23% while expanding your field of view proportionally. This improvement proves particularly valuable for larger objects like the North America Nebula or Andromeda Galaxy that might otherwise exceed your camera’s field of view.
The most efficient approach often combines both functions in a single corrector like the Sky-Watcher Reducer/Flattener for Esprit APOs ($219), which provides perfectly flat fields while decreasing focal length. These specialized accessories are frequently designed for specific telescope models, so verify compatibility before purchasing—a flattener designed for f/7 refractors may perform poorly on f/5 instruments despite similar appearances.
Guide Scopes and Autoguiding
Autoguiding represents the single most significant improvement you can make to your deep sky imaging setup. This technique uses a secondary camera and small guide scope to monitor a star’s position, sending real-time corrections to your mount that compensate for periodic errors and alignment imperfections. Even modest autoguiding setups can improve tracking accuracy by 5-10x, allowing much longer exposures without star trailing. For those interested in camera options, the top mirrorless astrophotography cameras can be a great addition to your setup.
Entry-level guide packages like the Orion Magnificent Mini Autoguider Package ($420) include everything needed to implement basic autoguiding: a small guide scope, sensitive guide camera, and necessary cables. More advanced systems might utilize off-axis guiders that eliminate the need for a separate guide scope, reducing flexure between imaging and guiding systems. For those interested in exploring different camera options, the top mirrorless astrophotography cameras can be a great resource.
For most beginners, a 50mm guide scope paired with a dedicated guide camera like the ZWO ASI120MM Mini ($149) provides excellent performance without excessive weight or complexity. This combination works effectively with guide stars as faint as magnitude 8-9, ensuring suitable guide stars exist in virtually any imaging field. Software options like PHD2 Guiding (free) make the implementation relatively straightforward even for those new to the technique.
Filter Systems for Light Pollution and Narrowband
- Broadband “light pollution” filters selectively block common artificial light wavelengths while transmitting astronomical objects
- Narrowband filters isolate specific emission lines from nebulae, allowing imaging from light-polluted locations
- UV/IR cut filters improve star sharpness with one-shot color cameras by eliminating wavelengths beyond visible light
- Filter wheels automate multi-filter imaging sessions for maximum efficiency
- Filter size must match your optical train—typically 1.25″, 2″ or 48mm thread depending on your setup
Light pollution filters represent essential tools for urban and suburban astrophotographers. Models like the Optolong L-Pro ($109) selectively block mercury and sodium vapor lighting while transmitting the natural emissions from nebulae and galaxies. Though no substitute for truly dark skies, quality filters can transform seemingly hopeless locations into productive imaging sites.
Narrowband filters take this concept further by isolating specific emission wavelengths from nebulae. The popular Hydrogen-alpha (Hα), Oxygen-III (OIII), and Sulfur-II (SII) filters transmit only the specific wavelengths emitted by excited gases within nebulae, effectively eliminating light pollution by excluding all other wavelengths. These filters allow incredible nebula photography even from city centers, though they require monochrome cameras for maximum effectiveness.
Filter selection depends heavily on your imaging environment and targets. For general deep sky photography with color cameras, a quality multi-bandpass filter like the Optolong L-eNhance ($199) provides excellent results on emission nebulae while preserving some star color. More specialized applications might require complete filter sets costing $500-1000, especially when pursuing advanced techniques like Hubble palette imaging that combine multiple narrowband wavelengths into false-color composites.
Camera Adapters and Connection Options
The mechanical connection between your telescope and camera requires specific adapters designed for your equipment combination. DSLR cameras typically connect via a T-ring specific to your camera brand ($20-30) plus a T-adapter designed for your telescope’s focuser ($25-50). This combination provides a solid connection while positioning your camera’s sensor at the correct distance from the telescope’s focal plane.
Dedicated astronomy cameras require different adapters based on their sensor size and backfocus requirements. Many use standardized 2-inch or M42×0.75mm threads that connect directly to filter wheels, off-axis guiders, or focal reducers in your imaging train. When planning your system, carefully calculate the total backfocus distance—the space between your focuser’s mounting surface and the camera sensor—to ensure proper operation with all accessories.
Electronic connections are equally important for full system integration. Cameras, filter wheels, focusers, and mounts should ideally connect to a single computer or controller running observatory automation software like Sequence Generator Pro or N.I.N.A. USB 3.0 hubs, adequate cable lengths, and weather-resistant connections ensure reliable operation during long imaging sessions, particularly in remote or automated observatories.
Smart Telescopes: The New Frontier in Automated Astrophotography
Recent years have seen the emergence of “smart telescopes”—fully integrated systems that combine optics, mount, camera, and processing software in self-contained packages designed for extreme simplicity. These systems aim to democratize astrophotography by eliminating the steep learning curve traditionally associated with deep sky imaging.
All-in-One Systems with Built-in Cameras
Smart telescopes like the Stellina ($3,999), Vaonis Vespera ($1,499), and Unistellar eVscope ($2,999) incorporate dedicated CMOS cameras, computerized tracking, and automated image stacking directly in the telescope itself. These compact systems require virtually no technical knowledge—users simply set up the telescope, connect via smartphone or tablet, and select targets from a catalog. The system automatically locates the object, begins capturing and stacking images, and displays progressively improved results as the session continues.
Smartphone Control and Remote Imaging
Smart Telescope Comparison
Model Aperture Focal Length Resolution Price Vaonis Vespera 50mm 200mm (f/4) 2.1MP $1,499 Unistellar eVscope 114mm 450mm (f/3.9) 4.8MP $2,999 Stellina 80mm 400mm (f/5) 6.4MP $3,999 Vaonis Hestia 152mm 680mm (f/4.5) 10.8MP $24,900
Smart telescopes are controlled entirely through smartphone or tablet applications that provide intuitive interfaces for target selection, exposure control, and image review. These apps transform complex astronomical concepts into accessible experiences, showing real-time image development as more light is collected. Many also incorporate extensive object libraries with detailed information about each target, providing educational context alongside visual observation.
Most smart telescopes feature cloud connectivity that enables remote operation and image sharing through online communities. Systems like Stellina can be controlled from anywhere with internet access, allowing users to start imaging sessions from home or office when clear skies appear. The resulting images are automatically saved to cloud storage and can be shared directly to social media or astronomy platforms.
This connectivity also enables fascinating citizen science possibilities. The Unistellar network, for instance, coordinates observations of transiting exoplanets, asteroids, and comets across thousands of connected telescopes worldwide. Individual users contribute data that, when combined, produces scientifically valuable results beyond what professional observatories alone could accomplish.
Weather monitoring and protection features represent another advantage of these integrated systems. Most smart telescopes include automated shutdown procedures when detecting rain or excessive humidity, protecting sensitive electronics without user intervention. Some even incorporate internal dew heaters and sealed optical tubes that eliminate common maintenance requirements of traditional telescopes.
Limitations of Smart Telescopes
While smart telescopes offer unprecedented convenience, they come with significant limitations compared to traditional astrophotography setups. Their relatively small apertures (typically 50-114mm) gather less light than moderate amateur telescopes, limiting their effectiveness on fainter deep sky objects. Despite clever image processing, the laws of physics still apply—smaller apertures capture fewer photons regardless of software enhancement.
Image resolution represents another compromise in current smart telescope designs. Most use relatively low-resolution sensors (2-6 megapixels) compared to dedicated astronomy cameras or modern DSLRs. This limitation becomes particularly noticeable when printing larger images or cropping to focus on specific details within larger objects. The fixed optical designs also prevent changing focal length or aperture to match specific targets.
Perhaps most significantly, smart telescopes offer limited customization and upgradeability compared to component-based systems. Users cannot swap cameras, add specialized filters, or modify optical configurations as their interests evolve. While this simplicity represents an advantage for beginners, experienced astrophotographers often find these systems restrictive as their skills and interests develop beyond basic imaging.
Your First Night Out: Getting Started With Your New Telescope
Your first imaging session should focus on building fundamental skills rather than capturing perfect images. Begin with basic setup procedures: proper polar alignment, camera connection, and focus achievement. These foundational skills apply to all future sessions regardless of your equipment evolution. Start with bright, easy targets like the Orion Nebula (M42) or Andromeda Galaxy (M31) that provide immediate visual feedback while you learn your equipment’s operation. Even if your first images aren’t gallery-worthy, the knowledge gained becomes the foundation for all future success. Remember that every accomplished astrophotographer started with humble first images—persistence and systematic improvement lead to extraordinary results.
Frequently Asked Questions
After years of helping beginners select their first astrophotography telescopes, I’ve encountered certain questions that arise consistently. These common concerns reflect natural uncertainty when making significant investments in specialized equipment. Understanding these fundamental considerations helps you make informed decisions that align with your specific goals and circumstances.
While no single telescope perfectly suits every astrophotographer, understanding the principles behind these recommendations helps you evaluate options based on your unique situation. Remember that equipment limitations can often be overcome through technique and persistence, while poor equipment choices can create frustrating obstacles to progress.
The following answers address the most common questions I receive from aspiring astrophotographers, focusing on practical considerations rather than technical specifications alone.
Pro Tip: Keep a detailed imaging log recording equipment settings, environmental conditions, and results for each session. This systematic approach accelerates your learning curve by connecting specific techniques with their outcomes, allowing methodical improvement over time.
Can I use my DSLR camera with any telescope for astrophotography?
Most modern DSLR and mirrorless cameras can connect to virtually any telescope using appropriate adapters. The primary requirement is reaching focus—some Newtonian reflectors lack sufficient inward focuser travel to achieve focus with DSLRs without modifications. Refractors, Schmidt-Cassegrains, and purpose-built imaging Newtonians typically work well with standard DSLR cameras using simple T-ring adapters specific to your camera brand.
Beyond basic compatibility, consider your camera’s sensor size relative to the telescope’s image circle. Full-frame DSLRs require telescopes with larger image circles to avoid vignetting (darkened corners), while crop-sensor cameras work well with a wider range of telescopes. Regardless of your camera type, a sturdy connection that eliminates any possibility of flexure or movement during long exposures remains essential for sharp images.
Do I need a computerized GoTo mount for astrophotography?
While not absolutely required, computerized GoTo capability significantly improves the astrophotography experience, especially for beginners. GoTo mounts locate targets automatically, saving valuable dark-sky time and enabling photography of objects not visible to the naked eye. More importantly, most GoTo mounts include the precise tracking motors and periodic error correction necessary for long-exposure photography. Manual mounts can work for bright targets with short exposures, but deep sky imaging of faint objects virtually requires the precision and convenience of computerized systems with autoguiding capability.
What’s more important for deep sky imaging – focal length or aperture?
For most deep sky imaging, focal length determines your field of view and subject framing, while aperture affects exposure time and signal-to-noise ratio. Beginning astrophotographers typically benefit more from shorter focal lengths (400-800mm) that provide wider fields of view, more forgiving tracking requirements, and brighter images at the sensor. Aperture becomes increasingly important when pursuing fainter objects or when imaging from light-polluted locations where contrast improvement becomes critical. The ideal balance depends on your specific targets—larger subjects like the North America Nebula favor shorter focal lengths regardless of aperture, while small planetary nebulae and distant galaxies benefit from both increased focal length and aperture.
How much should I budget for a complete beginner astrophotography setup?
A complete beginner astrophotography system capable of producing satisfying deep sky images typically requires $2,000-3,000. This budget allocates approximately $1,000-1,500 for a suitable equatorial mount like the Sky-Watcher HEQ5, $500-800 for a quality starter telescope like the Explore Scientific ED80, and the remainder for essential accessories including a field flattener, camera adapters, and basic autoguiding equipment. While less expensive entry points exist—particularly using a camera tracker like the Sky-Watcher Star Adventurer ($399) with camera lenses—this budget range represents the threshold for a system without immediate, frustrating limitations. Remember that investing in a quality mount first provides the foundation for future telescope upgrades without requiring complete system replacement.
Can I do astrophotography from light-polluted areas?
Urban Imaging Success Factors:
- Narrowband filters that isolate specific wavelengths
- Precise polar alignment and guiding for longer subexposures
- Extensive image calibration (dark frames, flat frames)
- Target selection favoring emission nebulae over galaxies
- Strategic timing during moonless nights
Yes, remarkable astrophotography remains possible even from heavily light-polluted urban environments with the right approach and equipment. Specialized light pollution filters like the Optolong L-Pro or L-eNhance selectively block artificial lighting while transmitting the wavelengths emitted by astronomical objects. Narrowband filters take this concept further by isolating specific emission lines from nebulae, effectively eliminating light pollution entirely for certain targets.
Urban astrophotographers typically achieve better results with emission nebulae than galaxies, as nebulae emit light at specific wavelengths that filters can isolate from background pollution. The Hydrogen-alpha rich regions of objects like the Eastern Veil Nebula or Rosette Nebula remain accessible even from city centers with appropriate filtering. Modern processing techniques like gradient removal further mitigate the effects of uneven sky illumination common in urban settings. For those interested in equipment, exploring the best astrophotography telescopes can enhance your urban astrophotography experience.
While dark sky locations always provide advantages—particularly for broadband targets like galaxies and star clusters—light pollution no longer presents an insurmountable barrier to quality astrophotography. Many renowned astrophotographers produce gallery-quality images from suburban backyards by combining quality equipment with specialized techniques designed for challenging conditions.
Remember that astronomical imaging represents both an art and a science. Each equipment choice reflects a balance between technical capabilities, practical considerations, and personal preferences. The perfect telescope doesn’t exist—only the right telescope for your specific goals, budget, and circumstances. Start with equipment that matches your current knowledge level while allowing room for skill development, then let your evolving interests guide future acquisitions.
With patience and persistence, even modest equipment can produce images that capture the breathtaking beauty of our universe. The most important factor isn’t the telescope you choose, but your commitment to learning the techniques and skills that transform equipment into tools for cosmic discovery.
The night sky has inspired wonder throughout human history. Today’s astrophotographers continue this tradition, using modern technology to reveal celestial beauty invisible to previous generations. Your journey begins with a single image—perhaps imperfect, but the first step toward mastery of this rewarding pursuit.
Looking for expert equipment advice and astrophotography tutorials tailored to your experience level? TenSix Photography offers comprehensive resources for every stage of your cosmic imaging journey, from first light to advanced techniques.